CNC Milling:
Introducing Ra 3.2/Rz 12.5μm Surface Roughness Option
Surface roughness is important not only for managing the finishing condition and appearance quality of the processing but also for controlling product lifespan and machine efficiency.
Starting December 9, 2024, meviy will begin offering the Ra3.2μm/Rz12.5μm roughness option, in addition to the current Ra6.3μm/Rz25μm, for CNC-milled parts with full surface finishes. With just a simple setting on meviy, you can now easily quote custom parts with smoother surfaces, without any additional lead time.
Scope of Supported New Surface Roughness Option
Roughness Value
・Ra3.2μm/Rz12.5μm
Shipping Options
・Standard Shipping: as soon as 8 days
・Economy Shipping: as soon as 22 days
NOTE: There will be no additional lead time for processing with Ra3.2/Rz12.5μm surface roughness.
Materials
| ▼ Metals | ▼ Resins/Plastics |
| Material | Surface Finish | |
| Carbon Steel | 1018 | No Treatment Black Oxide Electroless Nickel Plating |
| 1049 equivalent | ||
| 1018 (annealed) | ||
| 1049 equivalent (tempered) |
||
| Pre-Hardened Steel | NAK55 or equivalent | No Treatment |
| Aluminum Alloy | 2017 | No Treatment
Clear Anodize |
| 5052 | ||
| 6061 | ||
| 7075 | ||
| Stainless Steel | 303 | No Treatment |
| 304 | ||
| 316 | ||
| 430 | ||
| Material | Surface Finish | |
| Acetal | Standard, White | No Treatment |
| Standard, Black | ||
| MC Nylon | Standard, Blue | |
| Standard, Ivory | ||
| Weather Resistance, Black Ash | ||
| PTFE | Standard, White | |
| UHMWPE | Standard, White | |
| Conductivity, Black | ||
| ABS | Standard, Natural Color | |
| PEEK | Standard, Gray-brown | |
Specifiable Locations

- Unsupported Areas
There are cases where Ra3.2/Rz12.5 μm cannot be achieved due to differences in processing methods, materials, or other conditions. The following cases are excluded.
・Hole bottom, hole side, R surface, slanted part of countersunk hole
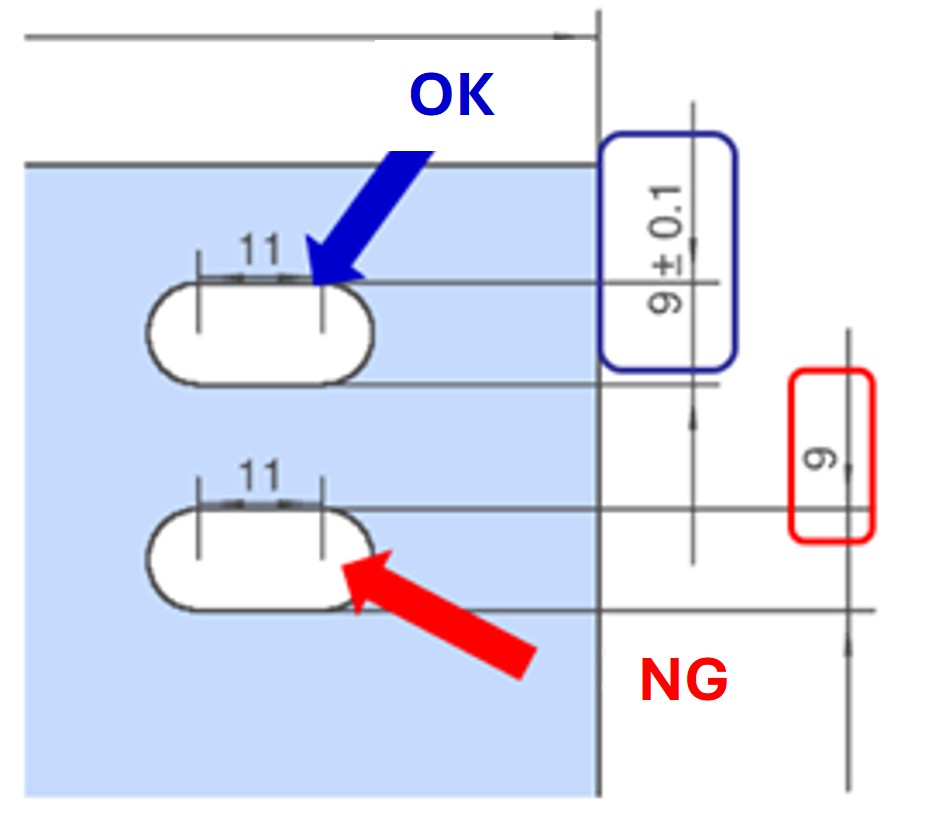
・Slotted hole side (No width tolerance specified) 
How to Quote a Part with Surface Roughness
- Follow these two steps:
1. After uploading your 3D model to meviy’s 3D view screen, select ‘Surface Roughness Ra6.3’ from the left-side panel.
2. Choose ‘Ra3.2/Rz12.5’ from the dropdown menu in the module. Ra/Rz can be switched through user settings. 
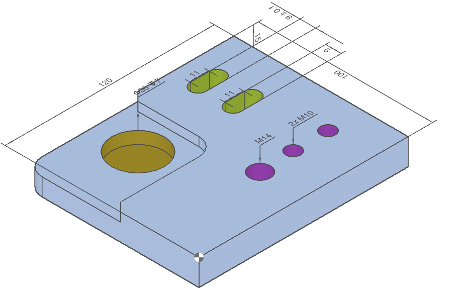
An Example with Surface Roughness

-
Material
1018 Carbon Steel Size
(mm)X: 120, Y: 100, Z: 15 Surface Roughness
(μm)Ra3.2/Rz12.5 Days to Ship
(as soon as)8 days
Learn More about Surface Roughness
What is Surface Roughness?
Surface roughness is a crucial factor in determining the quality of a product. It refers to the degree of fine irregularities on the surface of a part. As outlined below, there are several types of surface roughness parameters, which quantify the microscopic variations on the surface. These parameters help assess the functionality, aesthetics, and durability of the product, contributing to quality control and improvement.
Types of Surface Roughness
Surface roughness in industrial products is characterized by parameters such as Arithmetic Average Roughness (Ra), Maximum Height (Ry), Ten-Point Average Roughness (Rz), Average Spacing of Irregularities (Sm), Average Spacing of Local Peaks (S), and Load Length Ratio (tp). Surface roughness is defined as the arithmetic average of values derived from randomly selected sections of the object’s surface.
In the U.S., surface roughness standards are defined by ASME B46.1, which is based on international standards such as ISO 4287 and 4288, as well as Japan’s JIS standards.
Arithmetic Average Roughness (Ra)
Ra is an indicator of the average roughness of a surface.
To calculate Ra, a section of the roughness curve is extracted based on a reference length in the direction of the mean line. The X-axis is aligned with the mean line direction, and the Y-axis is aligned with the vertical magnification direction. The roughness curve is represented as y = f(χ), and the value calculated using the following formula is expressed in micrometers (μm).
Maximum Height (Ry)
Ry represents the difference between the highest peak and the deepest valley on the surface.
A section of the roughness curve is extracted from the reference length in the direction of the mean line. The distance between the peak line and valley line is measured in the vertical magnification direction, and this value is expressed in micrometers (μm).
When calculating Ry, it is important to exclude sections with abnormally high peaks or deep valleys that may be considered defects, ensuring the reference length is taken from a smooth portion of the surface.
Ten-Point Average Roughness (Rz)
Rz provides a more detailed evaluation of the surface’s characteristic irregularities.
A section of the roughness curve is extracted from the reference length in the direction of the mean line. The absolute averages of the five highest peaks (Yp) and the five deepest valleys (Yv) in the vertical magnification direction are calculated. The sum of these two values is expressed in micrometers (μm).
What’s meviy?
On-demand, fast sourcing of quality custom mechanical parts is made possible by meviy.
meviy is one of the most reliable on-demand manufacturing platforms in the US that allows you to get instant quotes for your mechanical parts simply by uploading 3D CAD data. No longer need to create 2D drawings just to quote parts. This platform supports sheet metal fabrication and CNC machining such as milling or turning and has saved time for over 160,000 mechanical designers and purchasers worldwide.


