- HELP
- How to use
- Quotation conditions settings
- [Sheet metal] Quotation Settings
- Quotation Procedure
Quotation Procedure
After logging in to meviy, follow the steps below to get quotes and place orders based on 3D data of sheet metal parts.
STEP1: Automatic Hole Type Recognition Settings
If you are uploading a neutral format, configure the settings for the CAD software used for modeling.
On the meviy platform, the hole type is identified by referencing the hole diameter in the 3D CAD data against the hole information database. Configuring the settings for the CAD software used for the modeling improves the accuracy of the hole type identification.
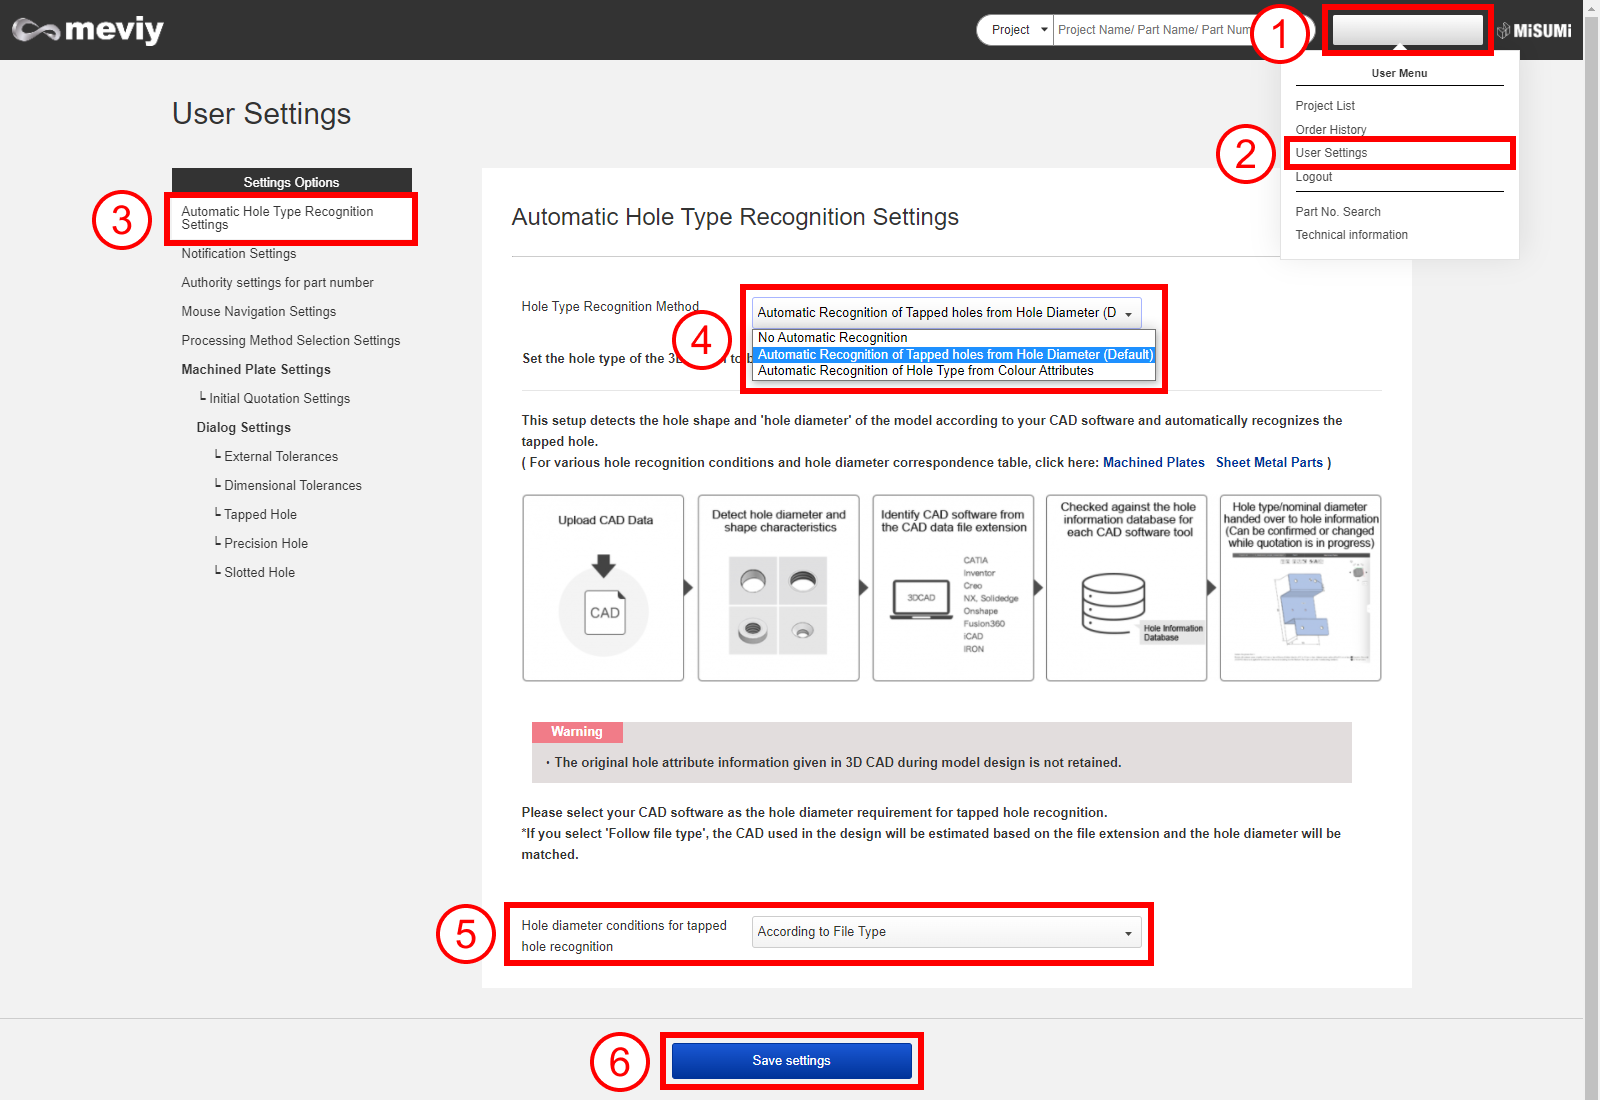
- (1)Point the mouse to the user name in the upper right corner of the screen. The “User Menu” will appear.
- (2)Choose “User Settings”.
- (3)Choose “Automatic Hole Type Recognition Settings”.
- (4)Select the hole type recognition method. → Details of each setting method
- (5)Set the CAD software used for modeling in the hole diameter condition of tap hole recognition.
- (6)Choose “Update”.
STEP2: Set the preferred processing method
You can set up to automatically select a processing method when 3D data is uploaded.
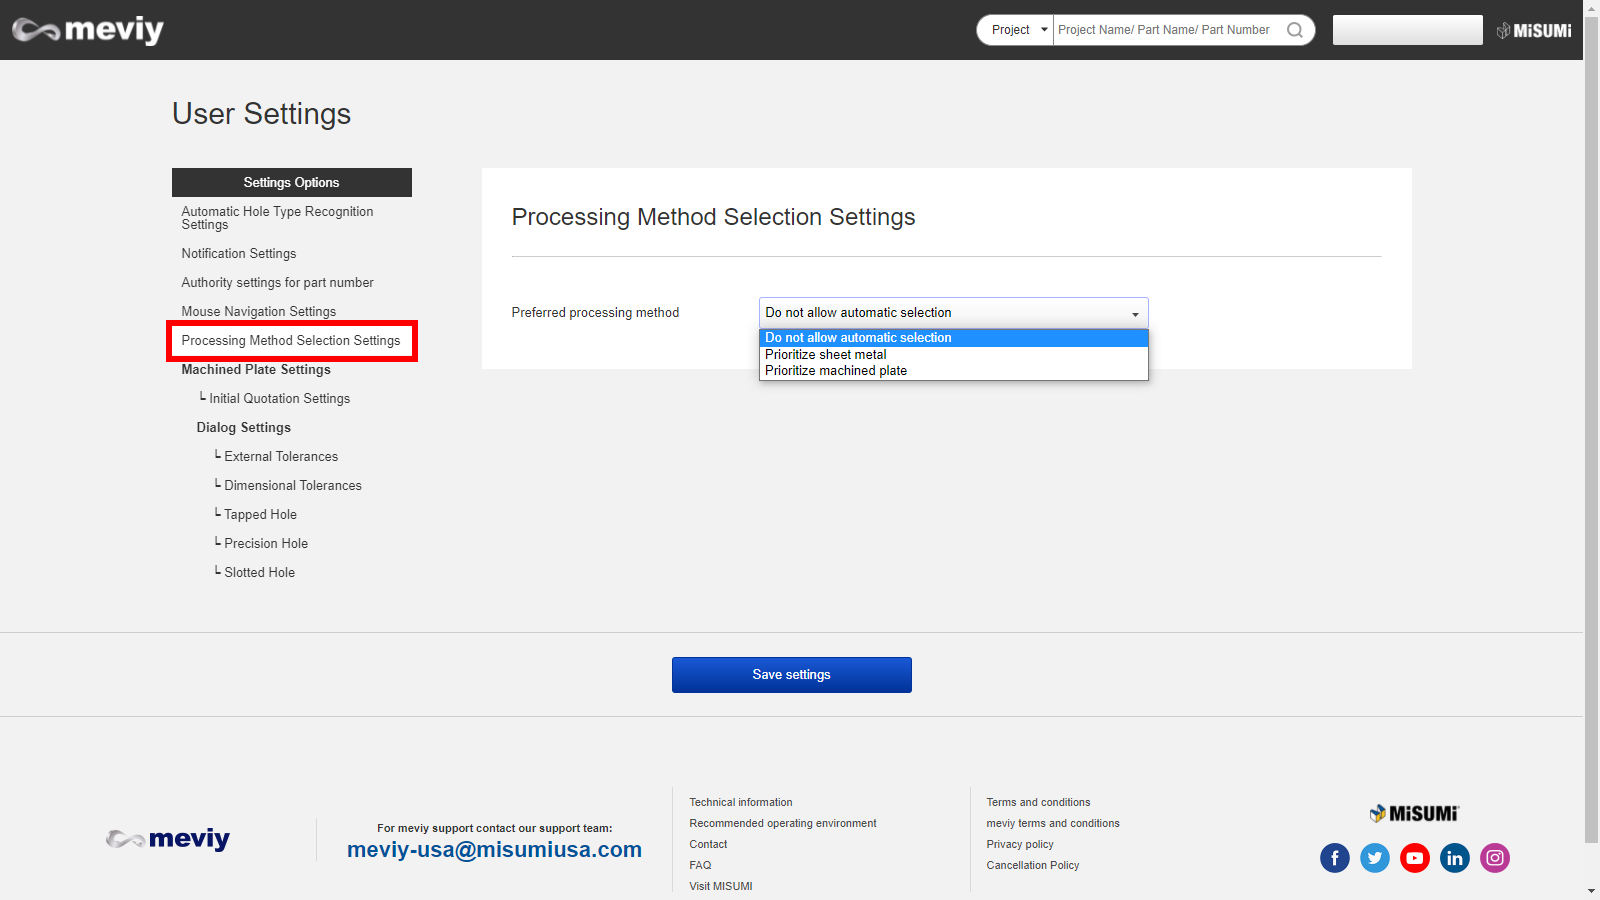
- Open user settings, click “Processing Method Selection Settings”.
- Select the preferred processing method from the pull-down menu.
Tip
The automatically selected processing method can be changed later on the project list screen or the 3D Viewer screen.
STEP3: Upload the 3D CAD Data
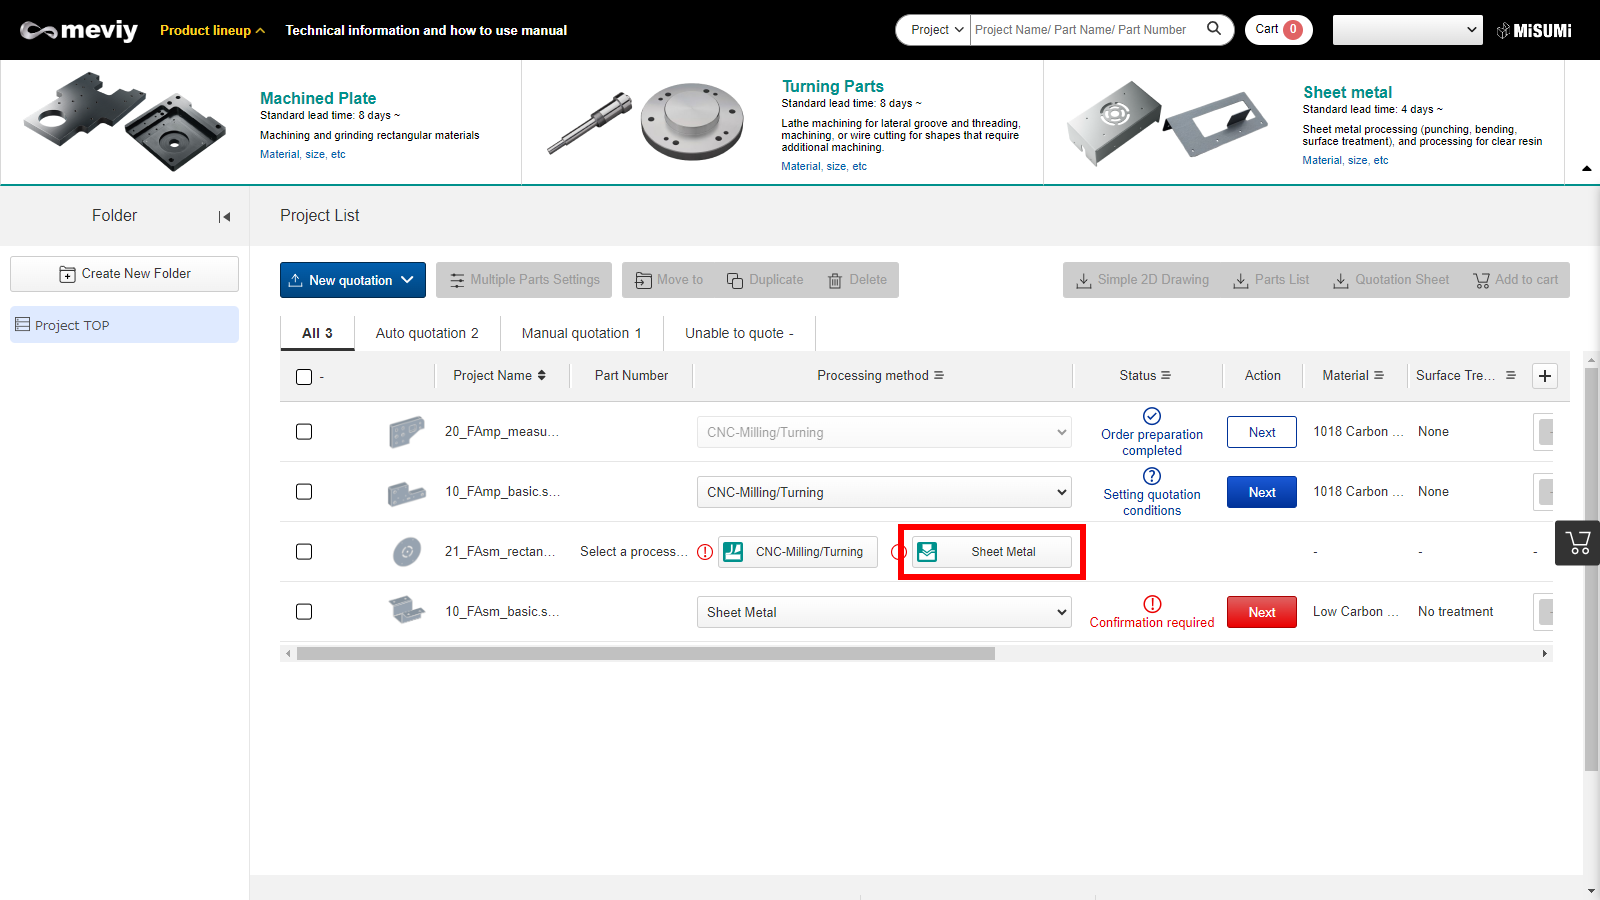
- Upload the 3D CAD data. → Uploading 3D Data
- Press the [Sheet Metal] button. When “Prioritize Sheet Metal” or “Prioritize the way that can be automatically quoted” is selected in the user settings, [Sheet Metal] may already be selected.
- Select [Next]. The 3D Viewer screen will be displayed from where you can then view the quote amount as calculated using the default specifications.
- If there are no issues with the quote conditions or amount, proceed to Step 4: Finalize Quotes and Obtain Part Numbers.
- If you want to change the quote specifications, proceed to Step 3: Configure/Change Quote Specifications.
STEP4: Configure/Change Quote Specifications
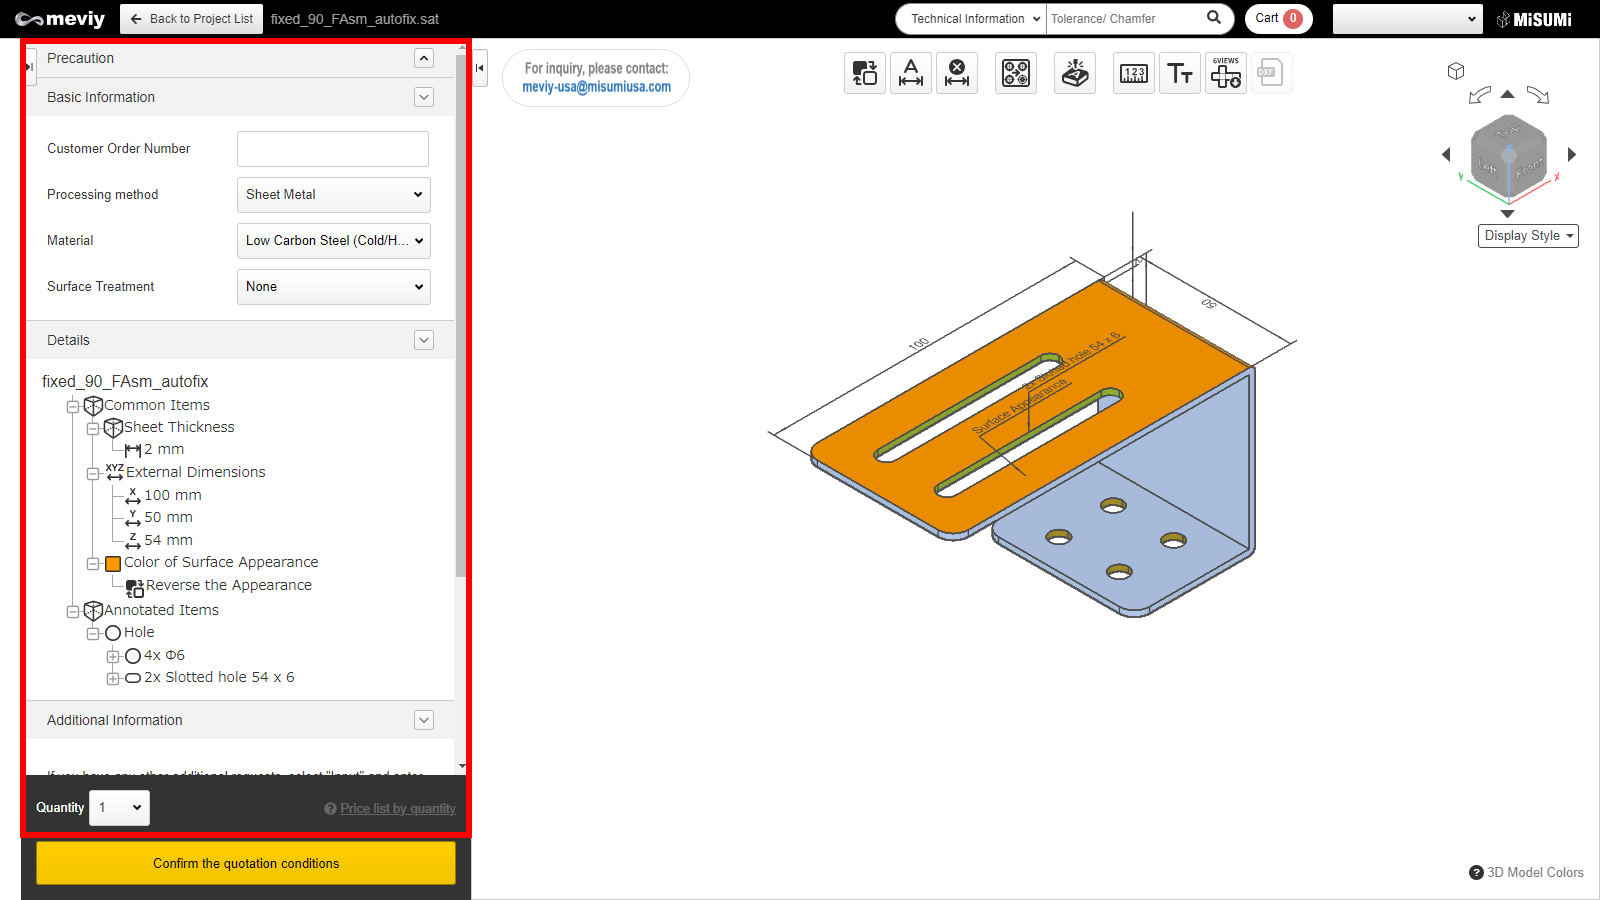
Configure and change the quote specifications as required. Prices and delivery times will be recalculated according to the changed specifications.
- Configure basic information for the quotation specifications such as changing the quantities in the quote, changing the materials or surface treatments, setting custom customer PO numbers and entering additional machining instructions. → Setting Basic Information
- Confirm the information for the loaded 3D data and modify it if necessary.
-
- Changing hole types → Changing Hole Information
- Adding/removing dimensions → Adding/Removing Dimensions
- Splitting holes grouped during shape recognition → Splitting Grouped Holes
- You will not be able to use the automatic quotation function if the plate thickness is not uniform. In such a case, please rectify the situation using the auto-fix function. → Auto-Fixing of Plate Thicknesses of Bends
Tip
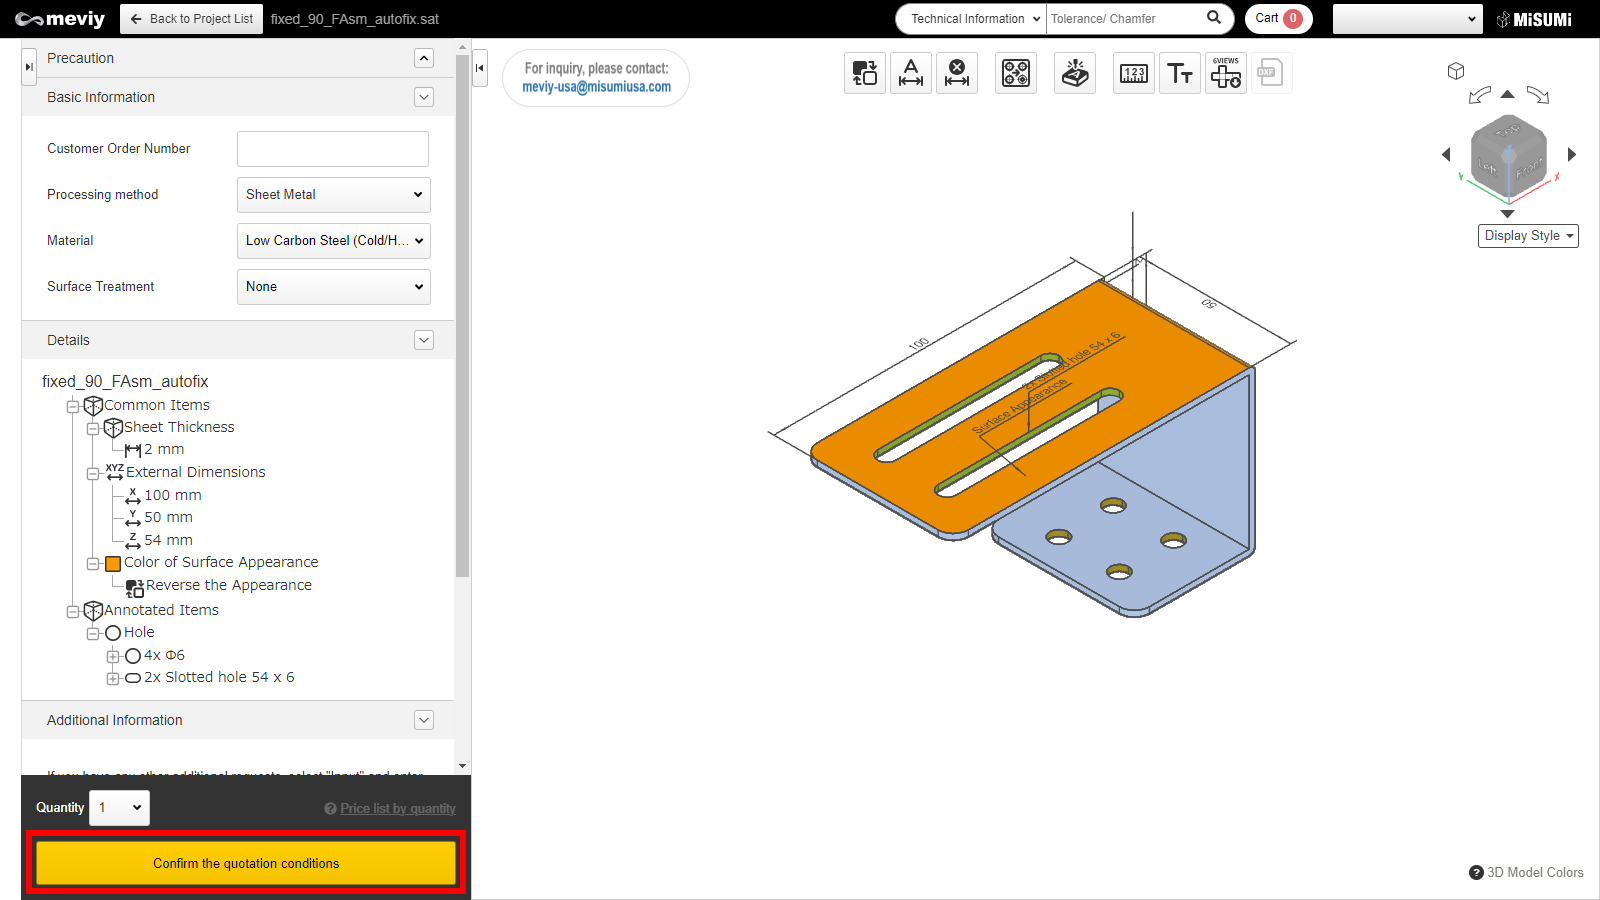
Useful keyboard shortcuts → Keyboard OperationsSTEP5: Confirm the Quotation and Obtain a Part Number
STEP6: Add to Cart
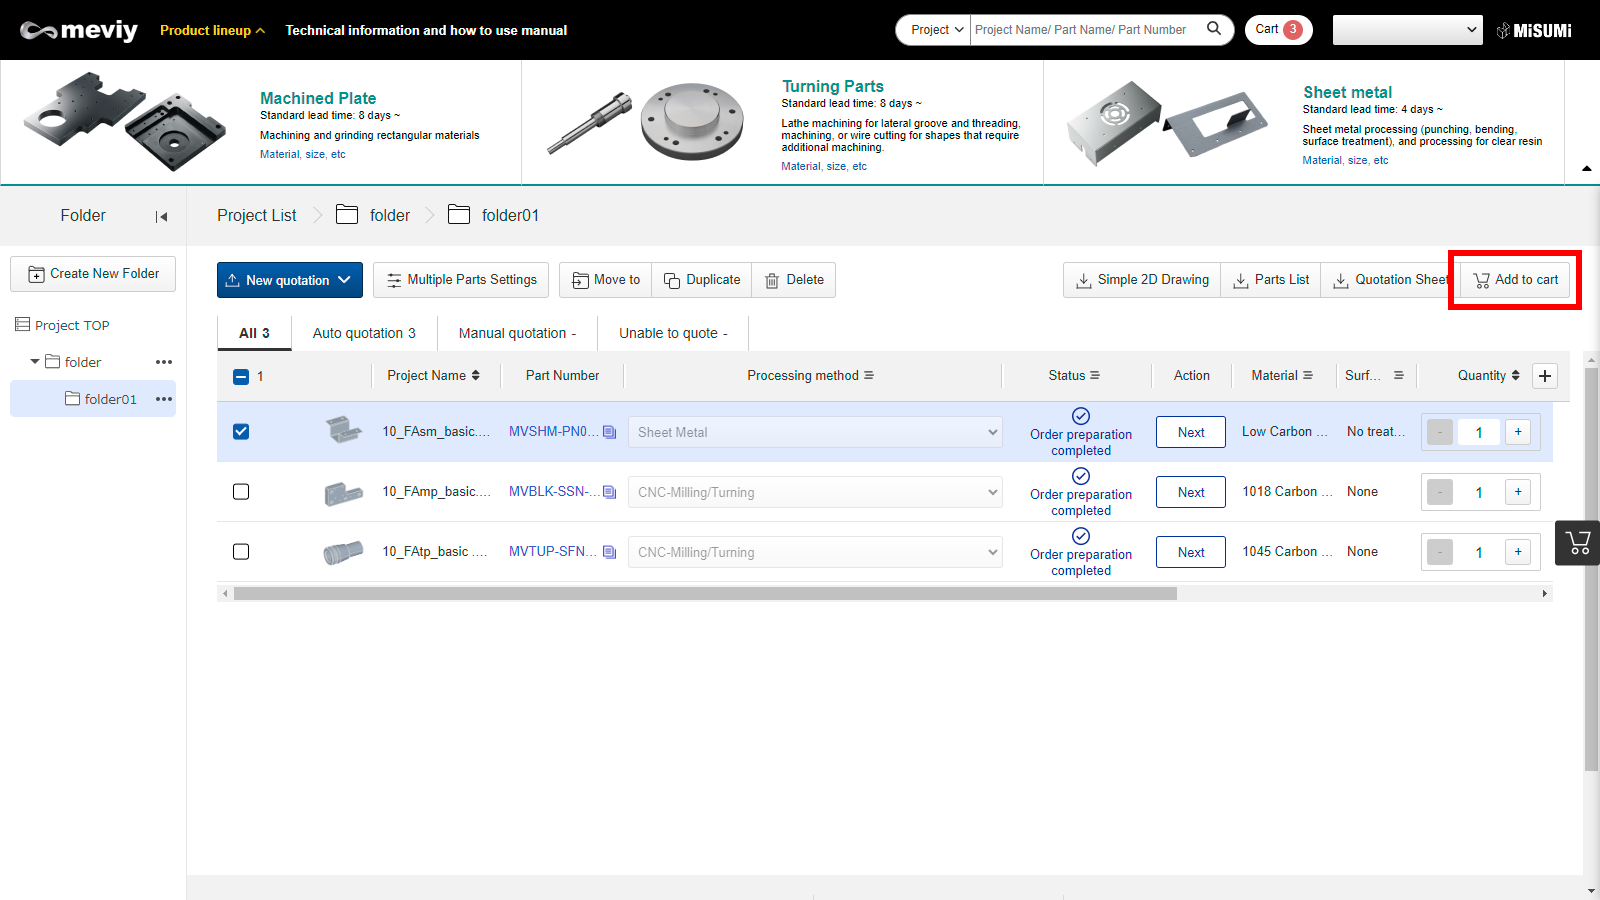
- After obtaining the part number, return to the project list screen.
- Check the parts you wish to order and click the “Add to Cart” button.
STEP7: Check the cart, then order
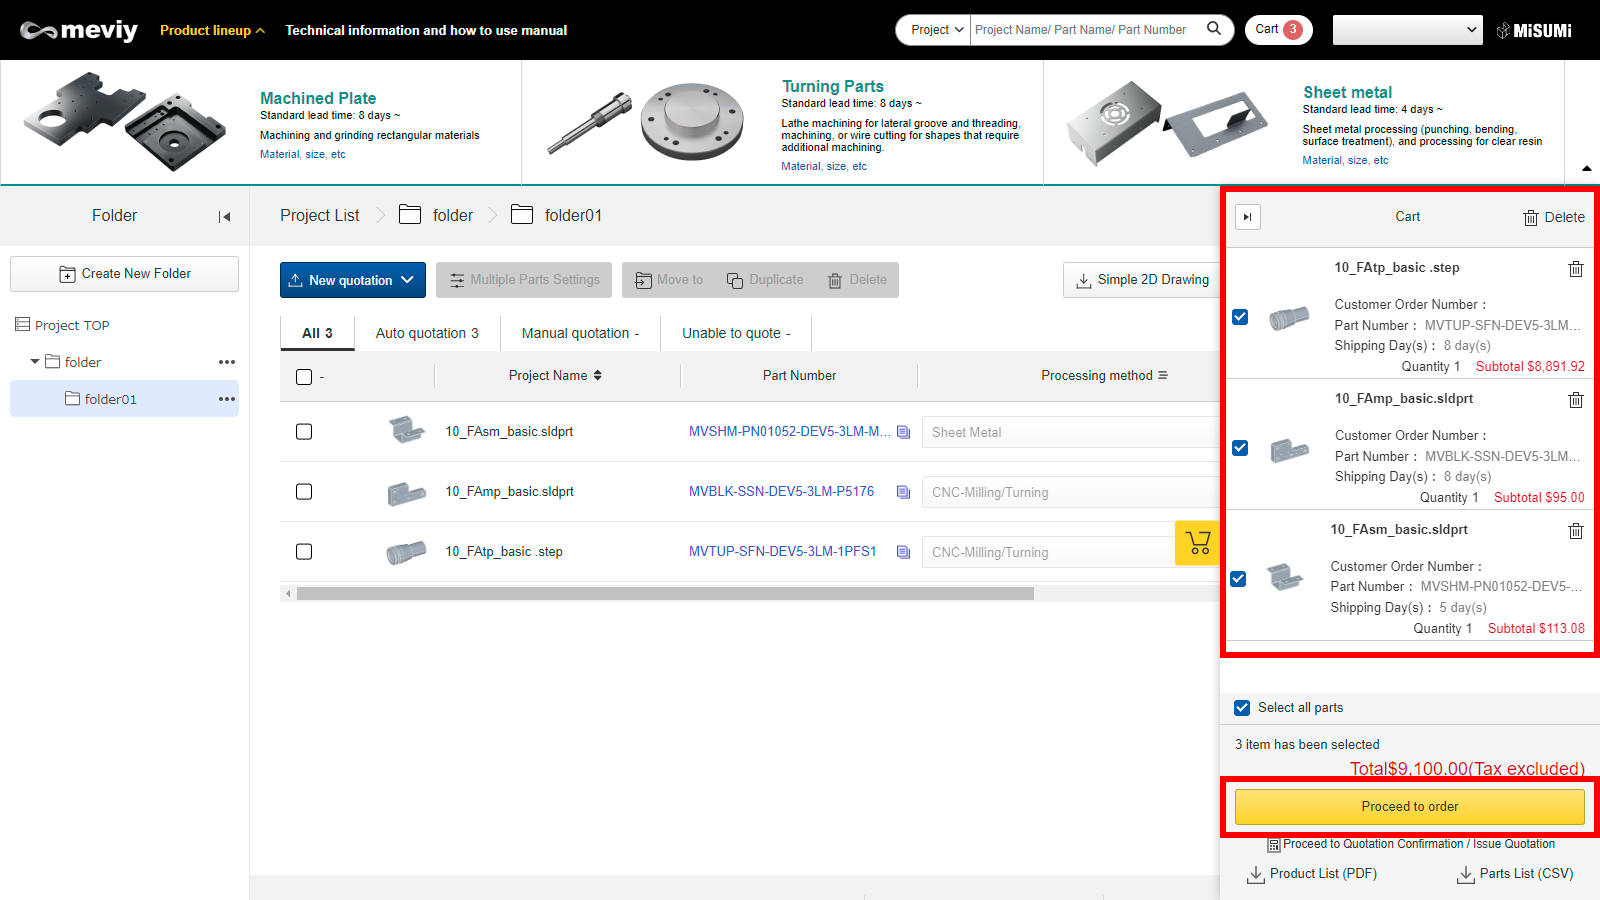
- Open cart screen.
- Check the parts you wish to order, click “Proceed to order”, and place your order through “Entry Order” screen.