- HELP
- Technical Information
- Sheet metal
- Accuracy and Machining Specifications
- Allowable Dimensional Tolerances
Allowable Dimensional Tolerances
| No. | Standard Part | Classification of Standard Dimensions | Product lineup | Example | |||||
|---|---|---|---|---|---|---|---|---|---|
| Standard Values* | |||||||||
| Standard | International Economy | ||||||||
| Normal bending |
|
Normal bending |
|
||||||
|
|
|
|
|
|
||||
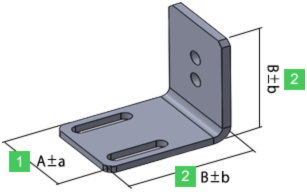
| 1 | Section with no bending | 6 or less | ±0.1 | ±0.3 | ±0.3 | ±0.4 | – | ±0.3 |  |
| More than 6, equal to or less than 30 | ±0.2 | ±0.5 | ±0.5 | ±0.6 | – | ±0.55 | |||
| More than 30, equal to or less than 120 | ±0.3 | ±0.8 | ±0.8 | ±0.8 | – | ±0.75 | |||
| More than 120, equal to or less than 400 | ±0.5 | ±1.2 | ±1.2 | ±1.05 | – | ±1.00 | |||
| More than 400, equal to or less than 1,000 | ±0.8 | ±2.0 | ±2.0 | ±1.45 | – | ±1.40 | |||
| More than 1,000, equal to or less than 2,000 | ±1.2 | ±3.0 | ±3.0 | ±2.0 | – | ±1.8 | |||
| 2 | Section with bending | 6 or less | ±0.3 | ±0.5 | ±0.5 | ±0.9 | – | ±1.00 | |
| More than 6, equal to or less than 30 | ±0.5 | ±1.0 | ±1.0 | ±1.3 | – | ±1.3 | |||
| More than 30, equal to or less than 120 | ±0.8 | ±1.5 | ±1.5 | ±1.6 | – | ±1.6 | |||
| More than 120, equal to or less than 400 | ±1.2 | ±2.5 | ±2.5 | ±2.0 | – | ±2.0 | |||
| More than 400, equal to or less than 1,000 | ±2.0 | ±4.0 | ±4.0 | ±2.8 | – | ±2.8 | |||
| More than 1,000, equal to or less than 2,000 | ±3.0 | ±6.0 | ±6.0 | ±3.2 | – | ±3.5 | |||
- *Standard products with metal press work are manufactured to JIS B 0408 tolerance grade B (sheet thickness 6.0mm or less) and C (sheet thickness over 6.0mm).R-bending is grade C regardless of sheet thickness.
- *International Economy products conform to the standards of the country of manufacture.
- *If a painting/coating is specified, the standard value for material conditions is used.
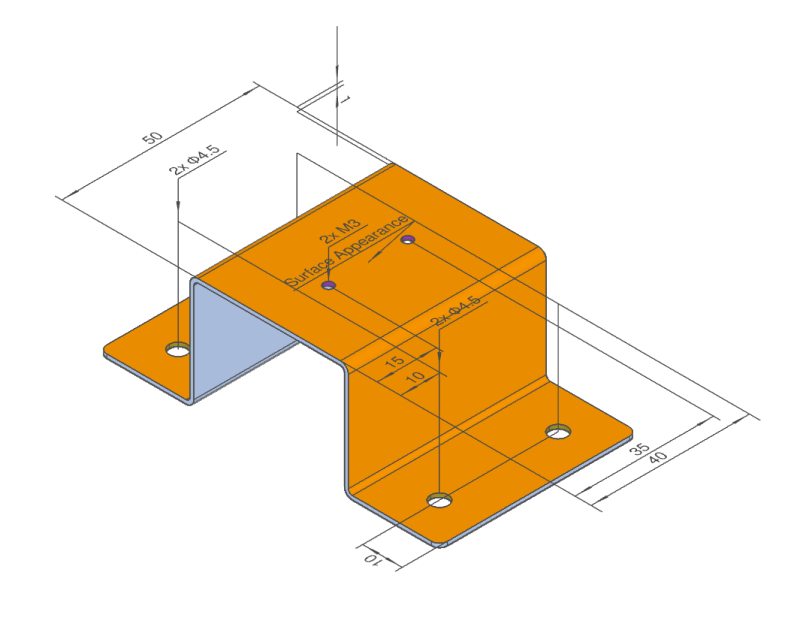
The allowable dimensional tolerances are applicable only for dimensions for between holes on the same face and end-faces/perpendicular-faces that are adjacent as a result of the bending.
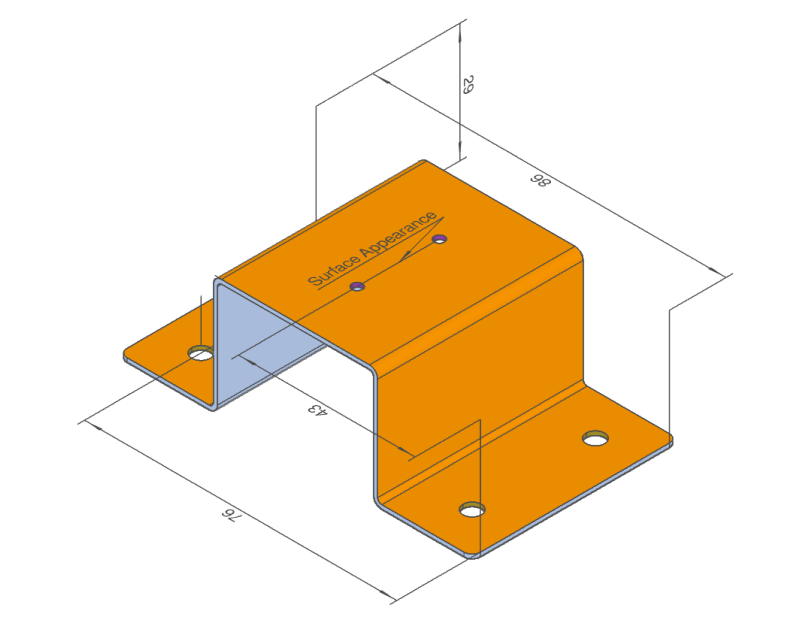
The tolerances are not applicable for hole-to-hole or hole-to-end face dimensions on non-adjacent faces (across multiple bent sections).
e.g. 1) Dimensions acceptable for tolerance setting

e.g. 2) Dimensions not appceptable for tolerance setting
