User Settings
Quotation Settings for CNC Turned parts
Configure materials, surface treatments and surface roughness (roughness, symbol) for initial quotations.
User Settings Screen
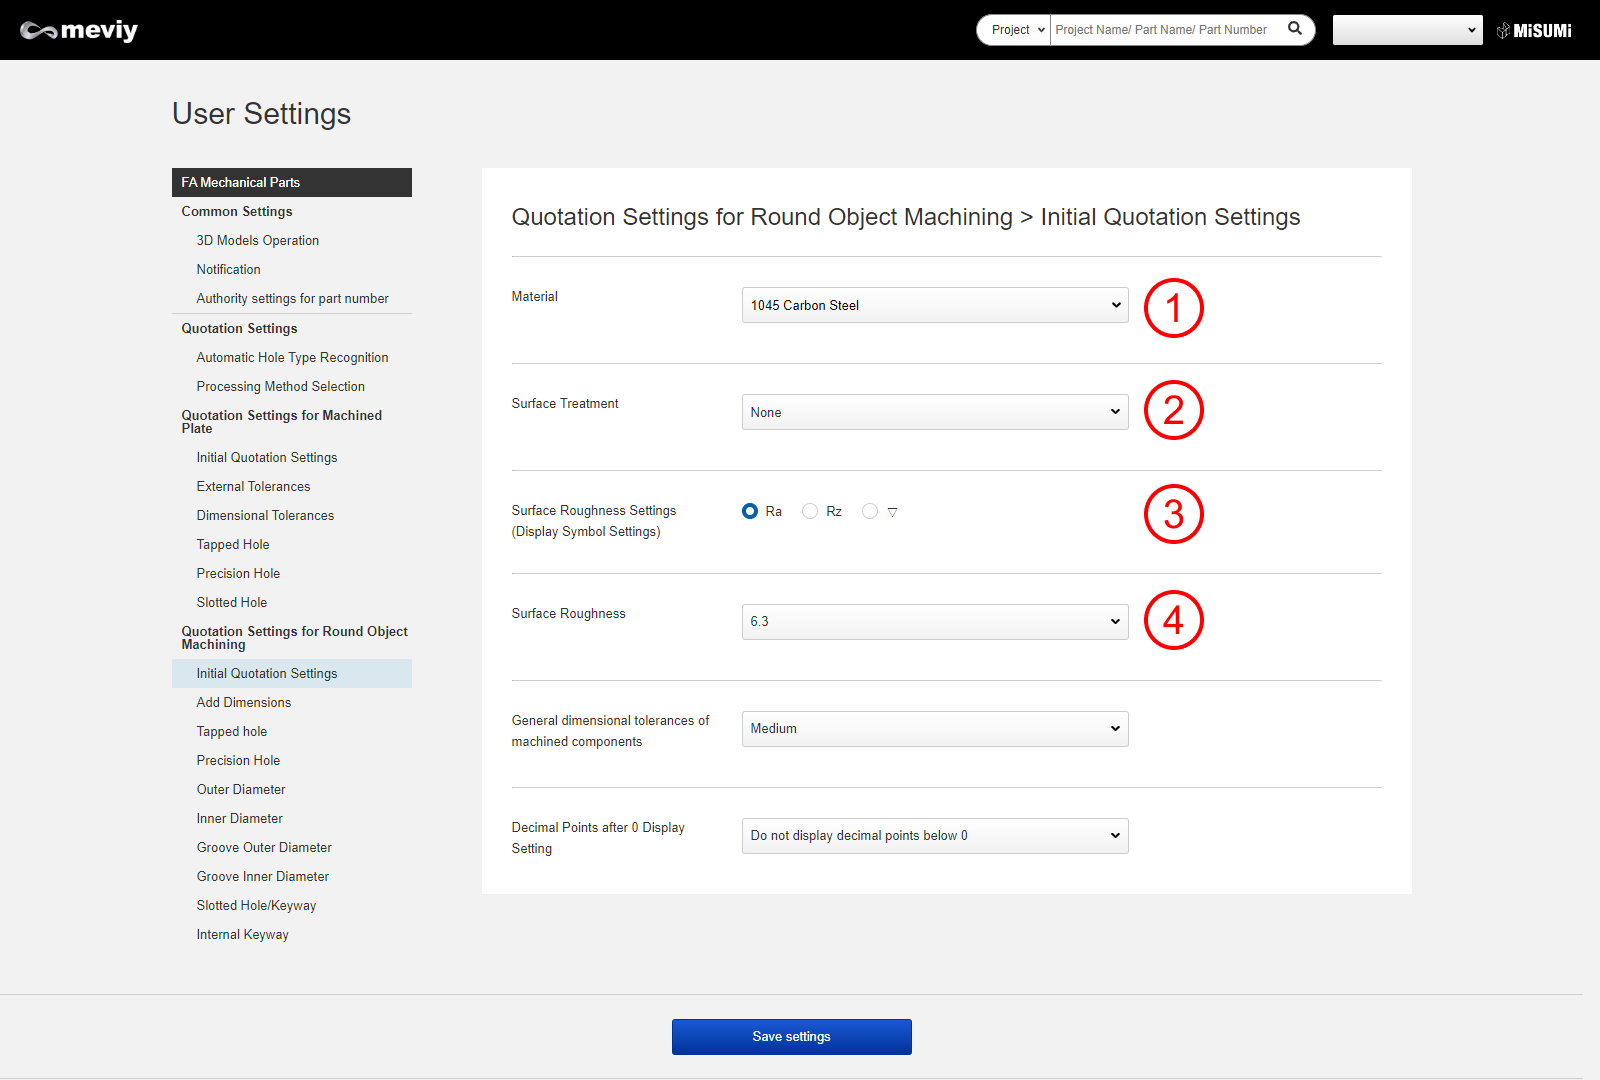
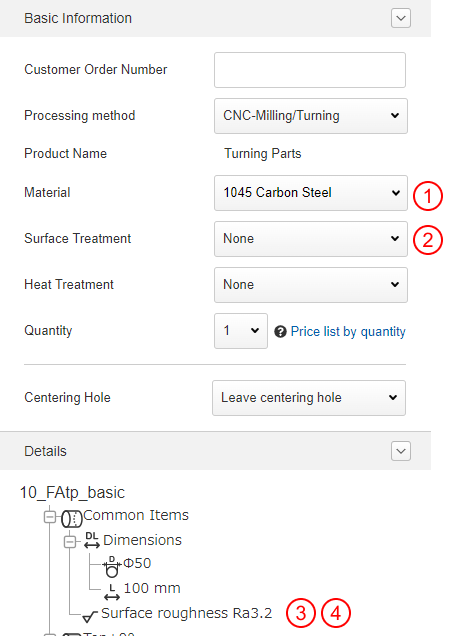
Basic Information and Details
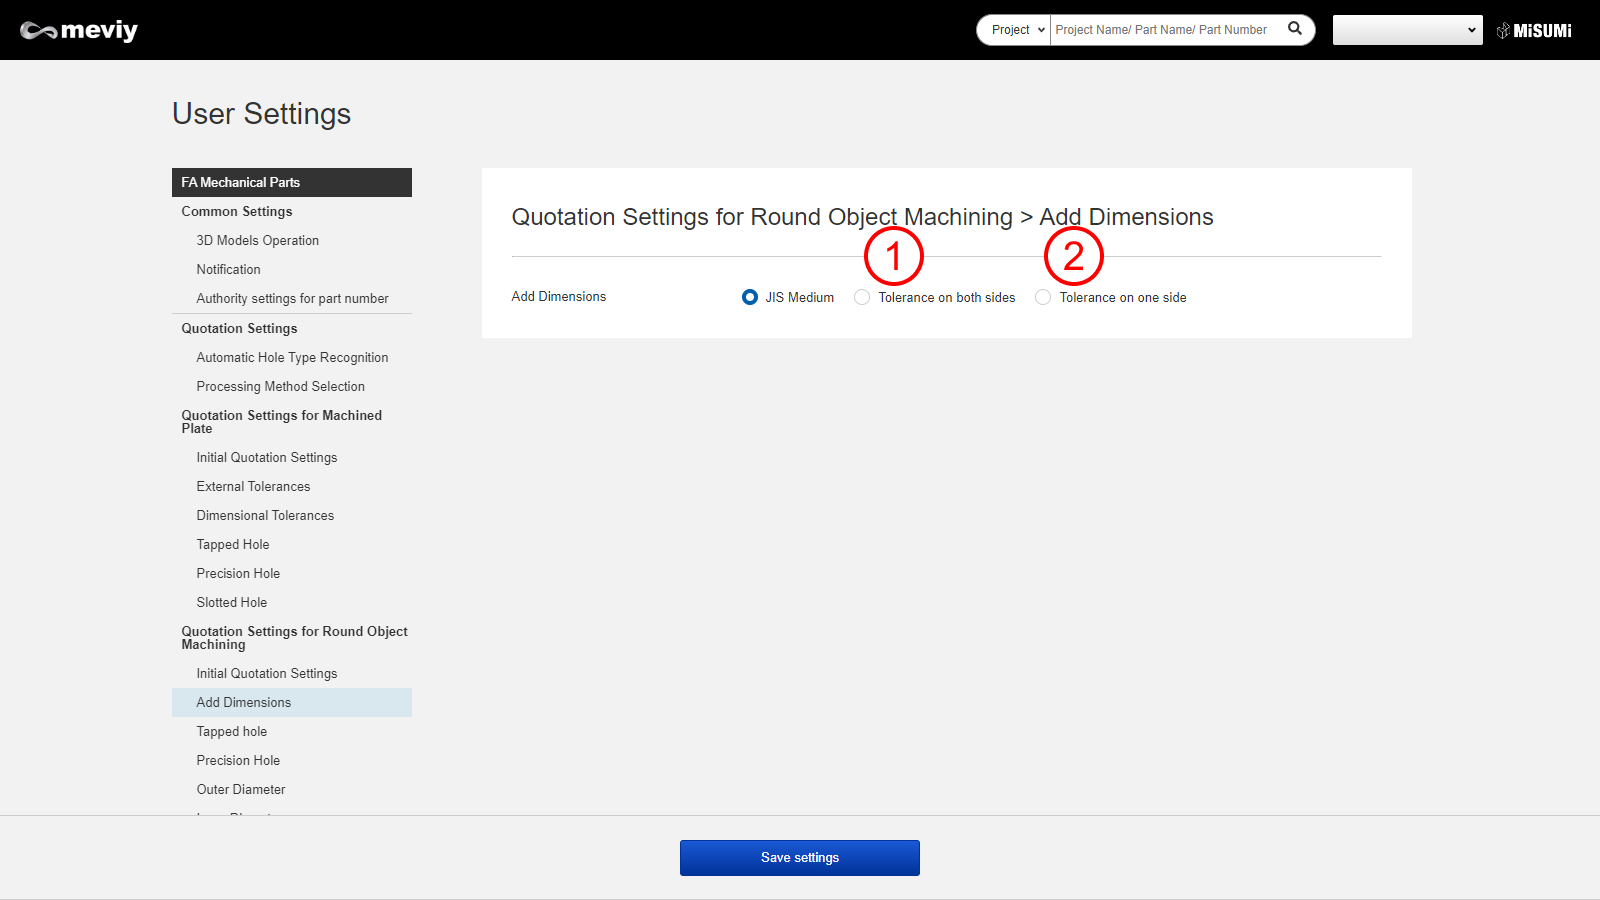
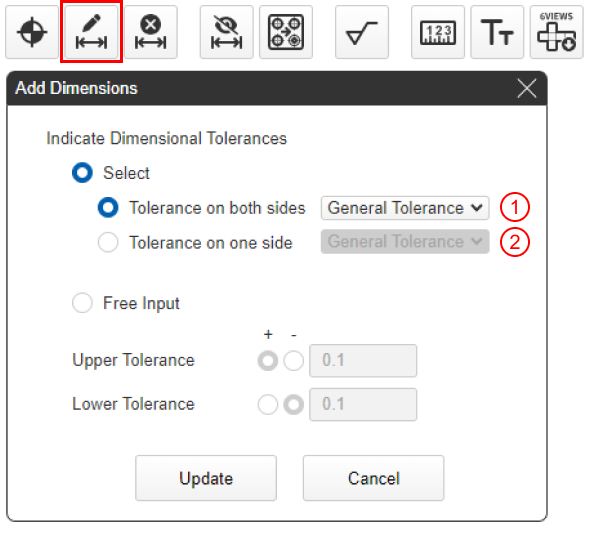
Add Dimensions
Set dimensional tolerances for added dimension locations Tolerances can be set within the dialog (pull-down list).
User Settings Screen
3D Viewer
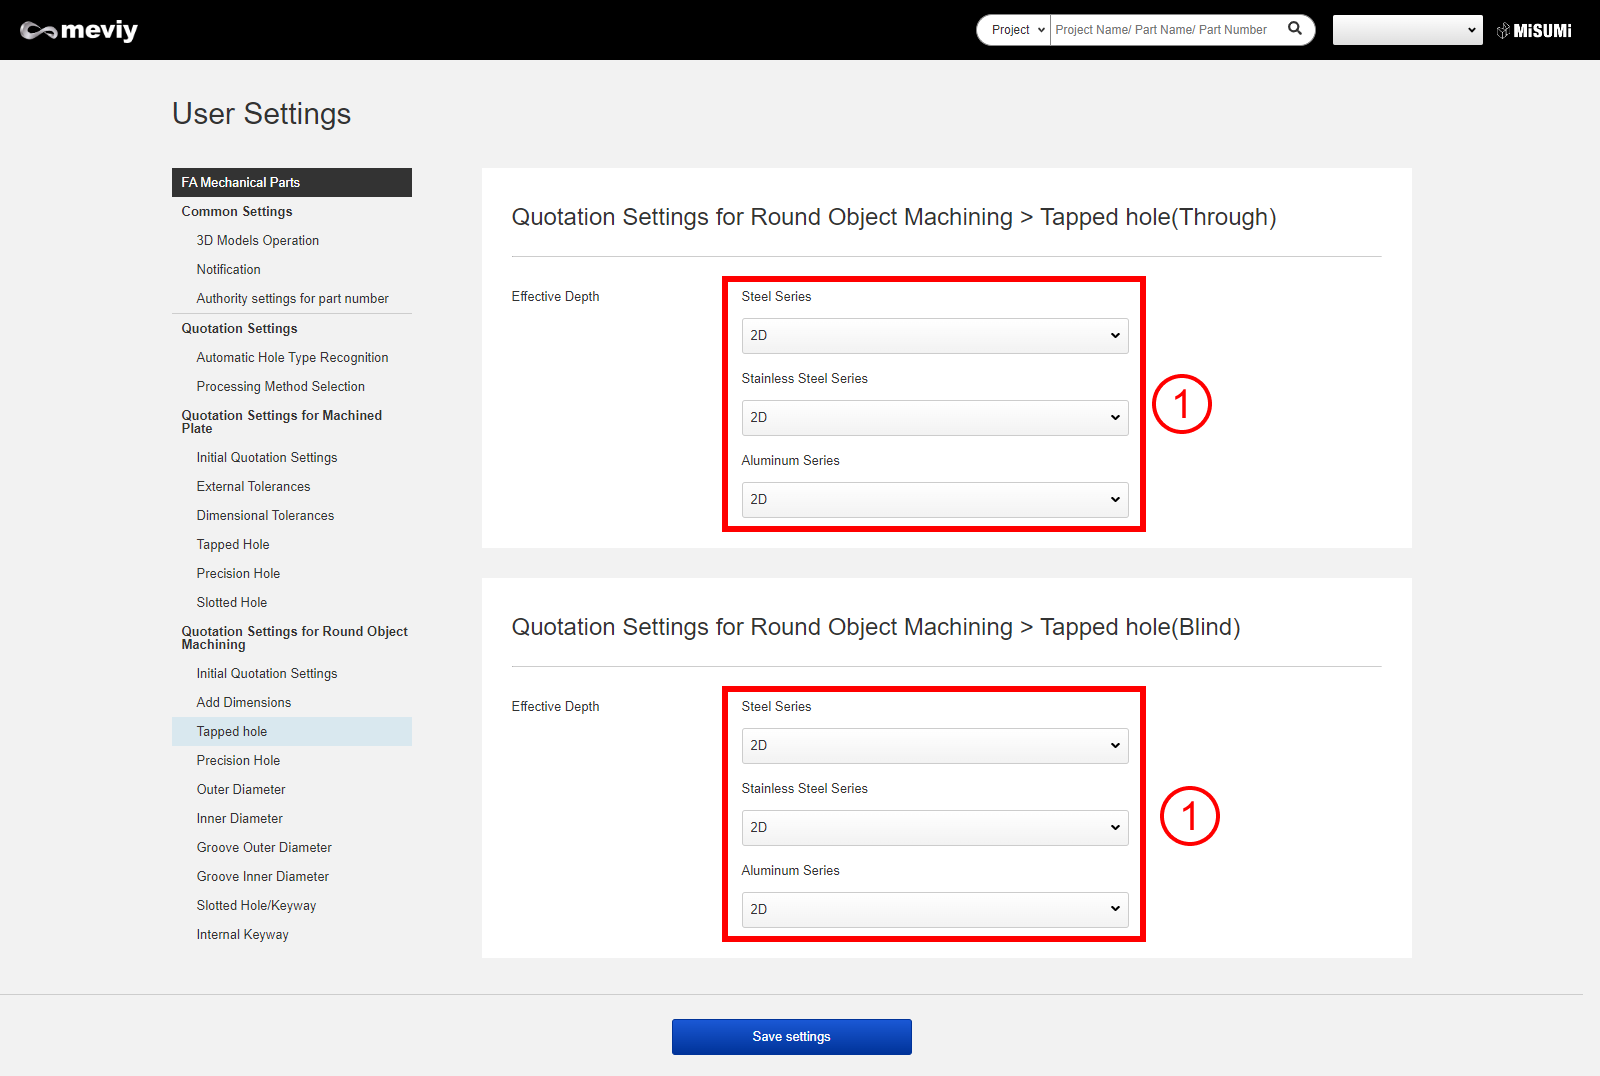
Tapped hole
You can change the initial display of the effective depth (h) of the tapped hole in the “Hole Information Instructions Dialog”.
User Settings Screen
3D viewer dialog
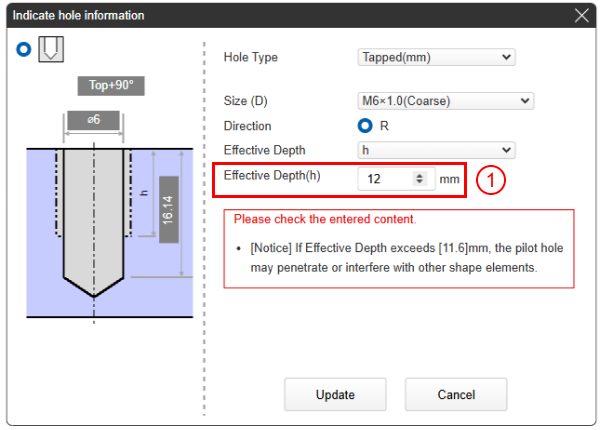
Tip
“Effective Depth (h)” Calculation Method and Display Method| 1D | If size (D) is M6, initial value is 1 × 6, 6 mm |
| 1.5D | If size (D) is M6, initial value is 1.5 × 6, 9 mm |
| 2D | If size (D) is M6, initial value is 2 × 6, 12 mm |
| 2.5D | If size (D) is M6, initial value is 2.5 × 6, 15 mm |
| Full length | Model depth = 16.14 mm |
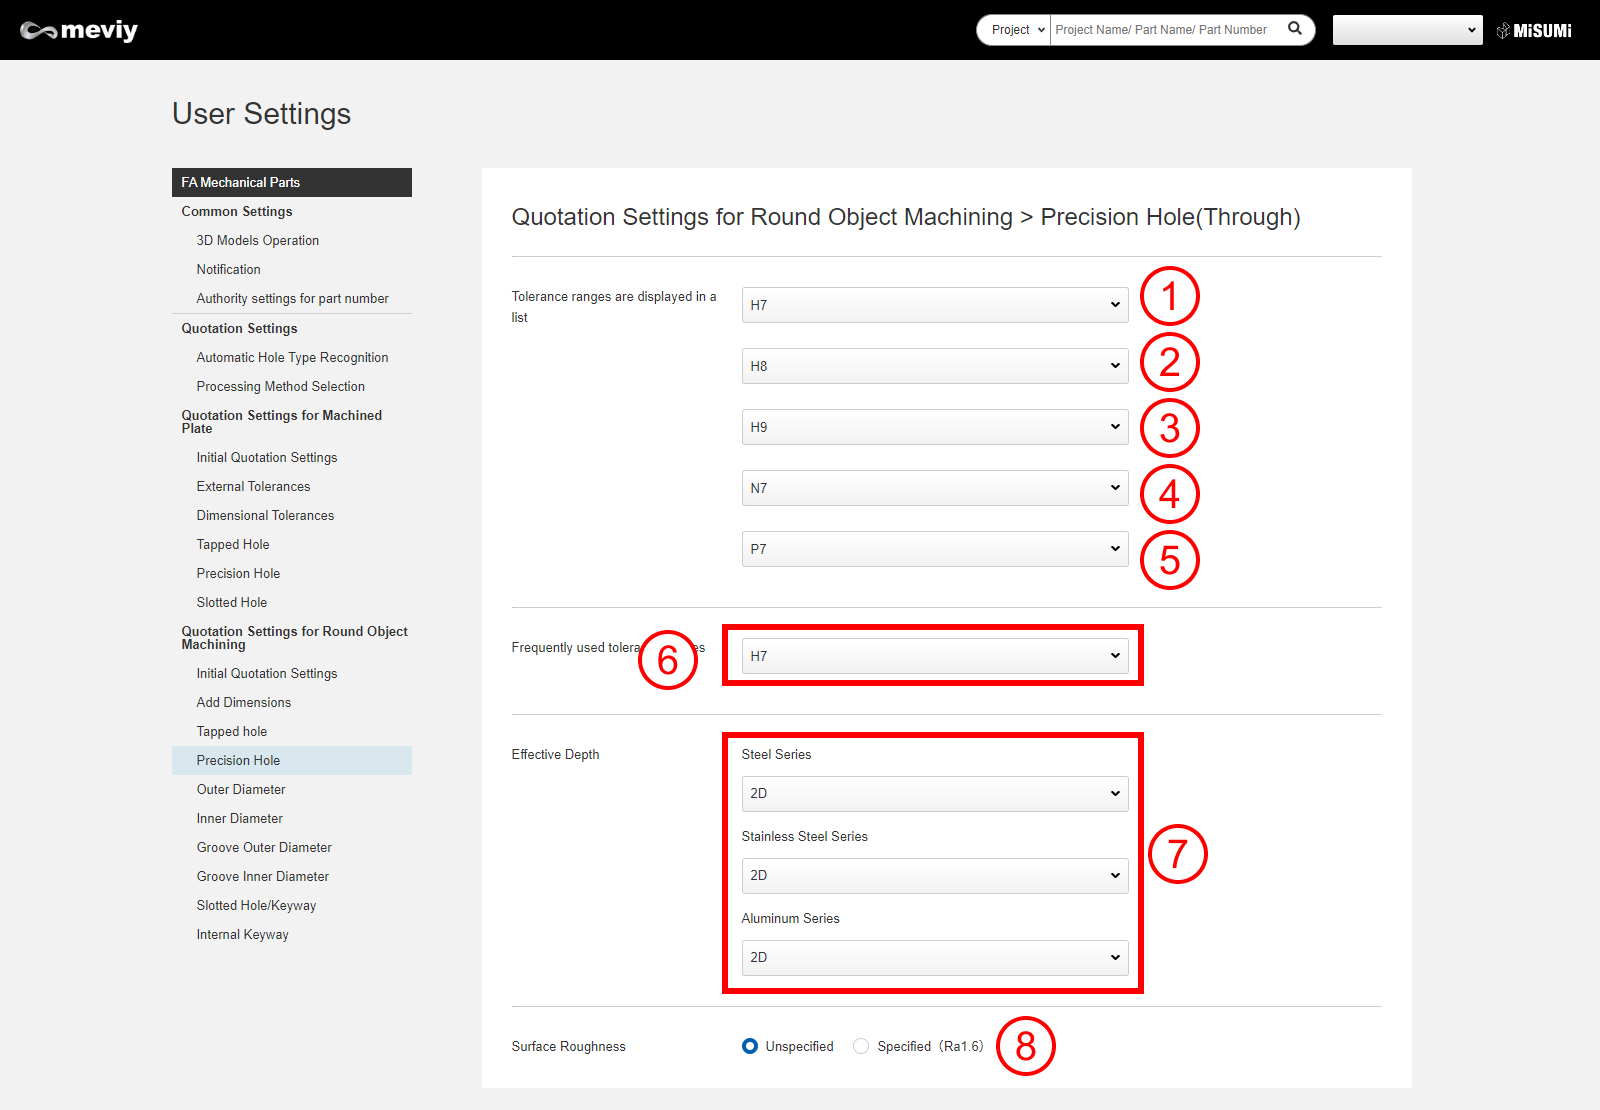
Precision Holes
You can change the tolerance range, frequently used tolerance ranges, effective depth, and surface roughness (none/present) displayed in the “Hole information instructions dialog” list.
User Settings Screen
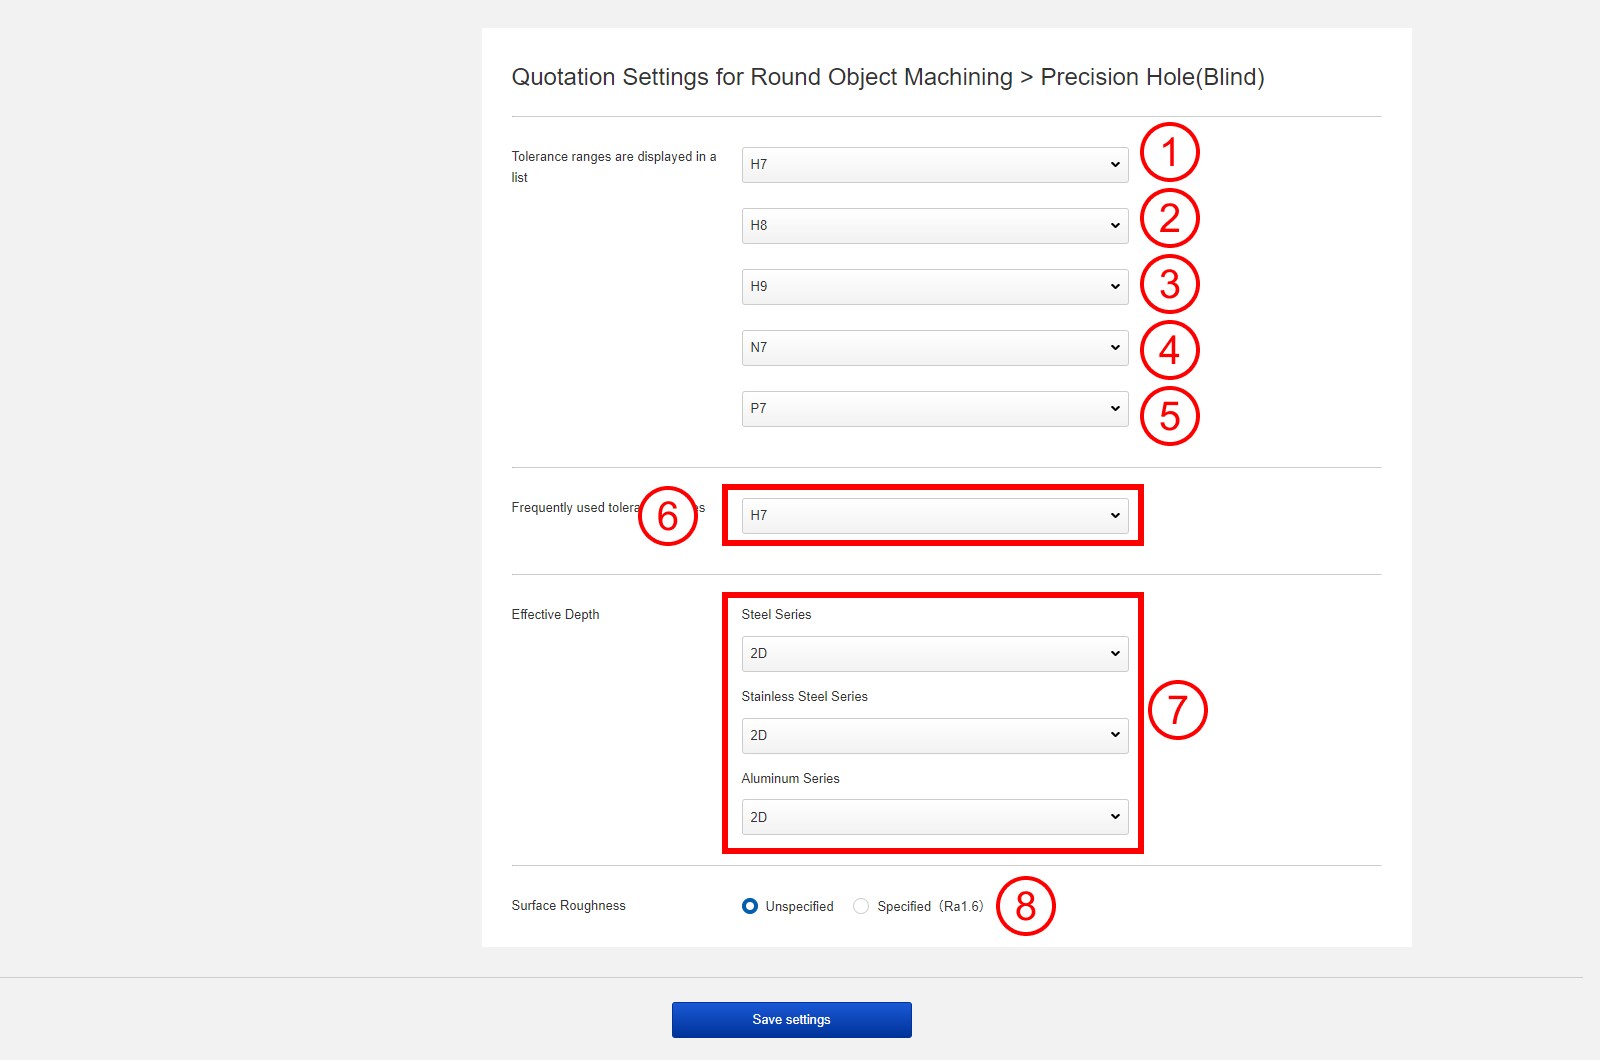
3D viewer dialog
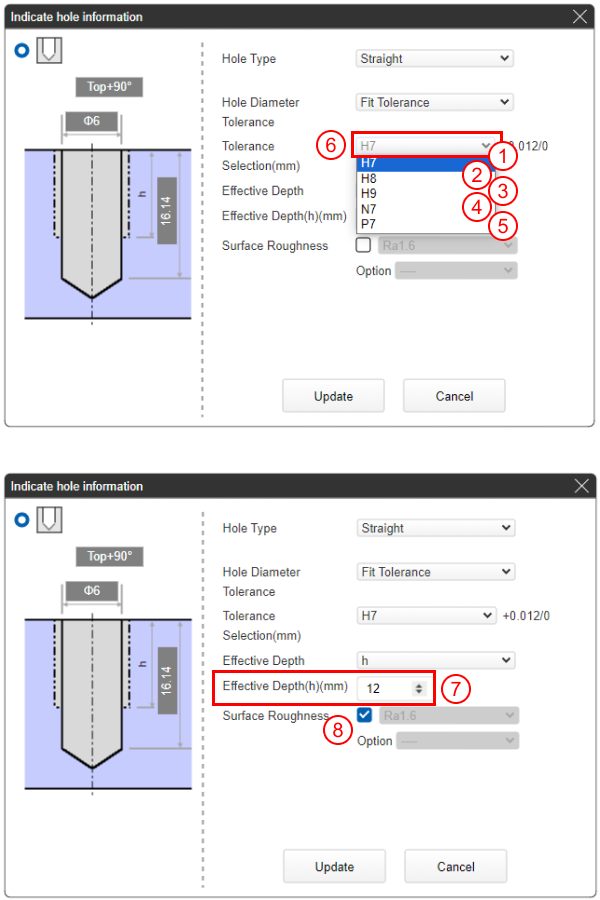
Tip
(6) “Effective Depth (h)” calculation method and display method| 1D | If diameter is ø6, initial value is 1 × 6, 6 mm |
| 1.5D | If diameter is ø6, initial value is 1.5 × 6, 9 mm |
| 2D | If diameter is ø6, initial value is 2 × 6, 12 mm |
| 2.5D | If diameter is ø6, initial value is 2.5 × 6, 15 mm |
| Full length | Model depth = 16.14 mm |
Outer Diameter
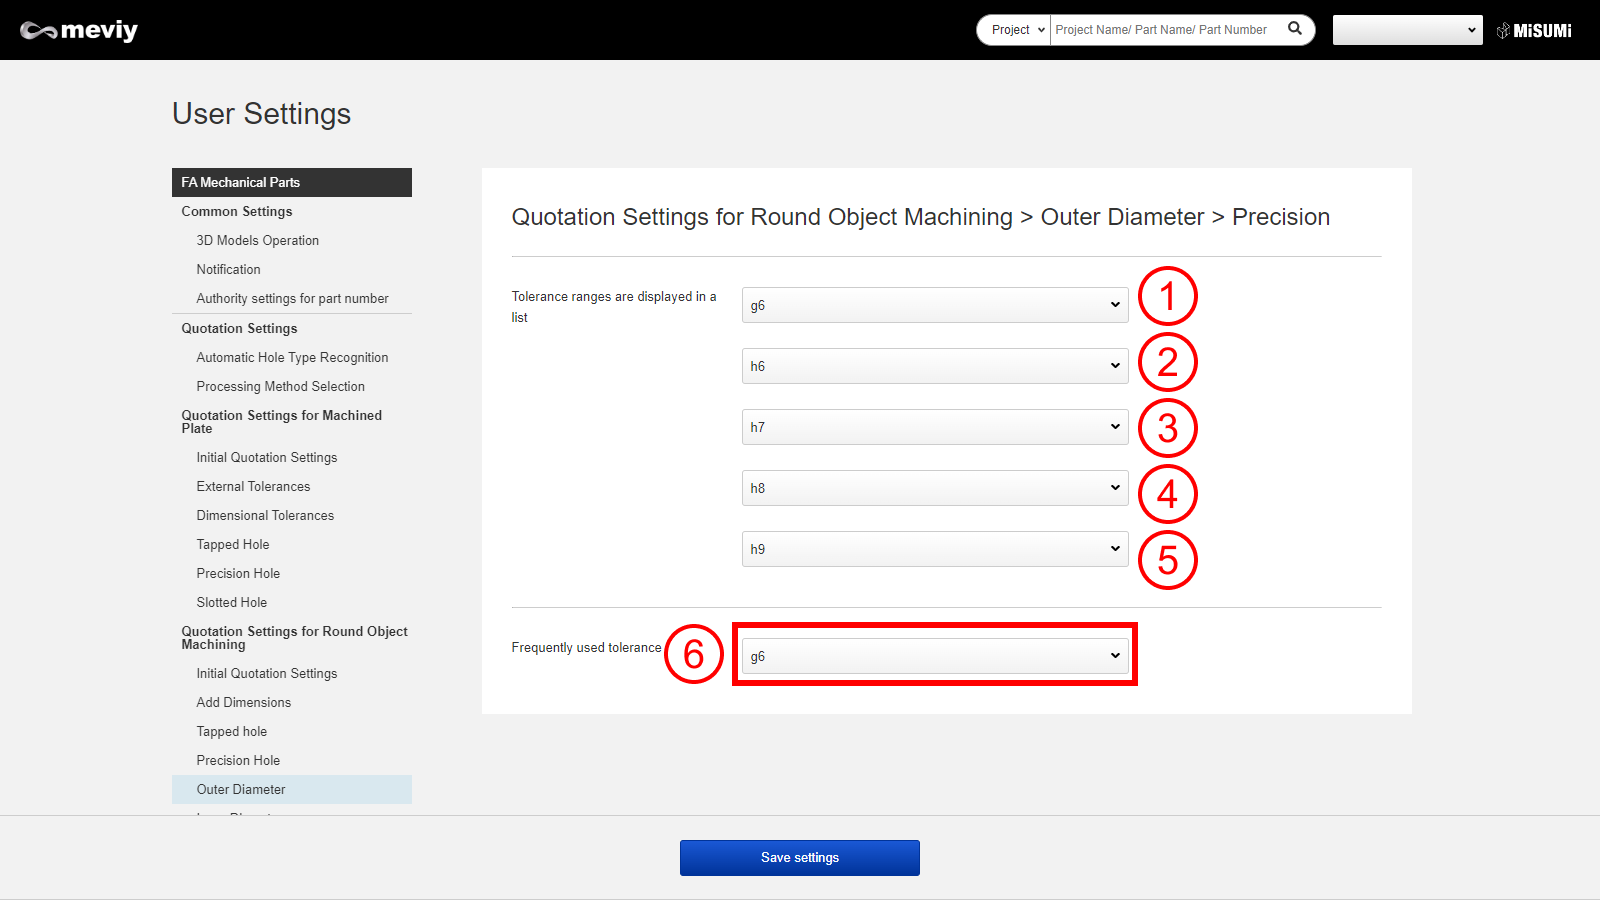
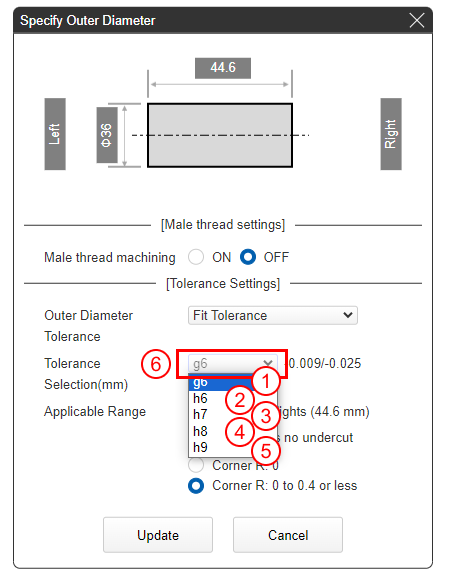
You can change the tolerance range and frequently used tolerance ranges displayed in the “Maximum diameter/outer diameter information instructions dialog” list.
User Settings Screen
3D viewer dialog
Inner Diameter
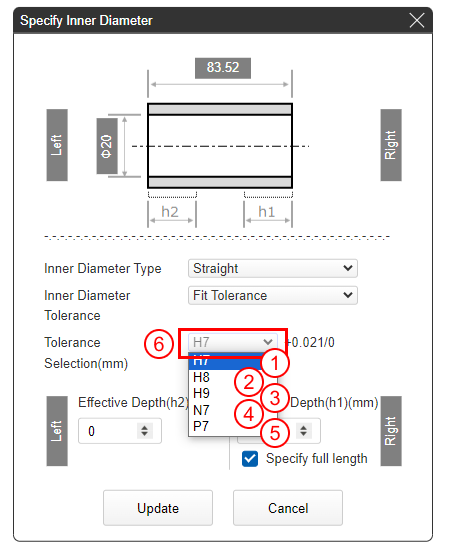
You can change the tolerance range and frequently used tolerance ranges displayed in the “Inner diameter information instructions dialog” list.
User Settings Screen
3D viewer dialog
Female thread
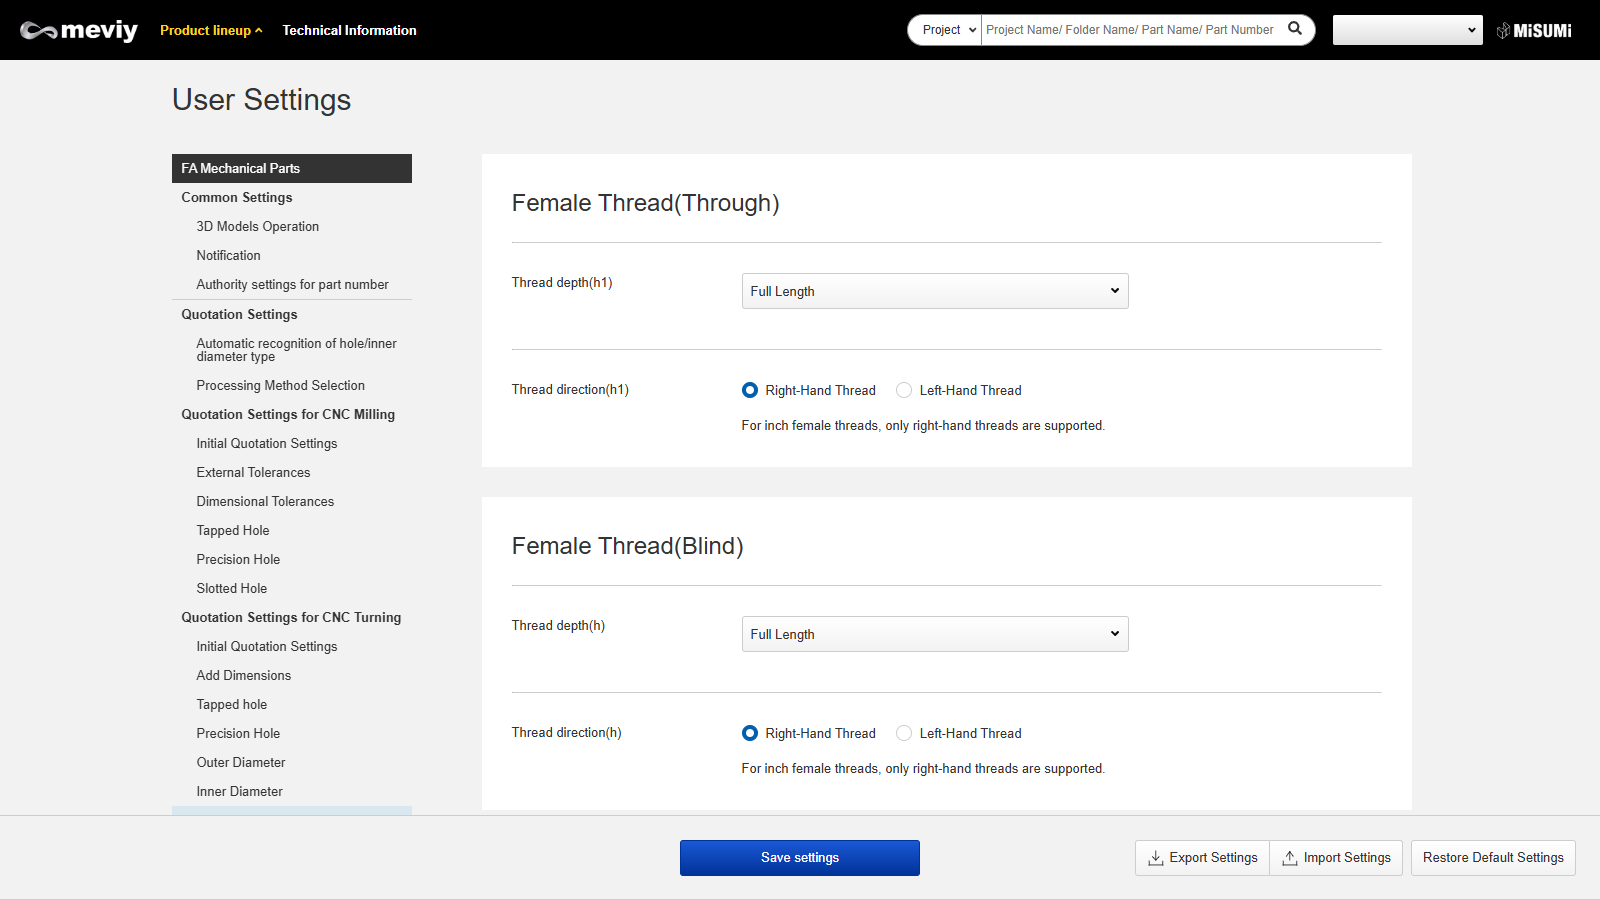
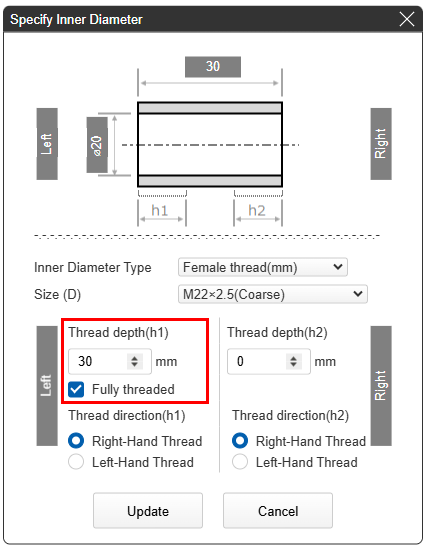
You can change Thread depth and Thread direction displayed in the “Inner diameter information instructions dialog” list.
User Settings Screen
3D viewer dialog
Tip
“Effective Depth (h)” Calculation Method and Display Method| 1D | If size (D) is M9, initial value is 1×9, 9 mm |
| 1.5D | If size (D) is M9, initial value is1.5×9, 13.5 mm |
| 2D | If size (D) is M9, initial value is 2 × 9, 18 mm |
| 2.5D | If size (D) is M9, initial value is 2.5×9, 22.5 mm |
| Full length | Model depth = 50 mm |
Groove Outer Diameter
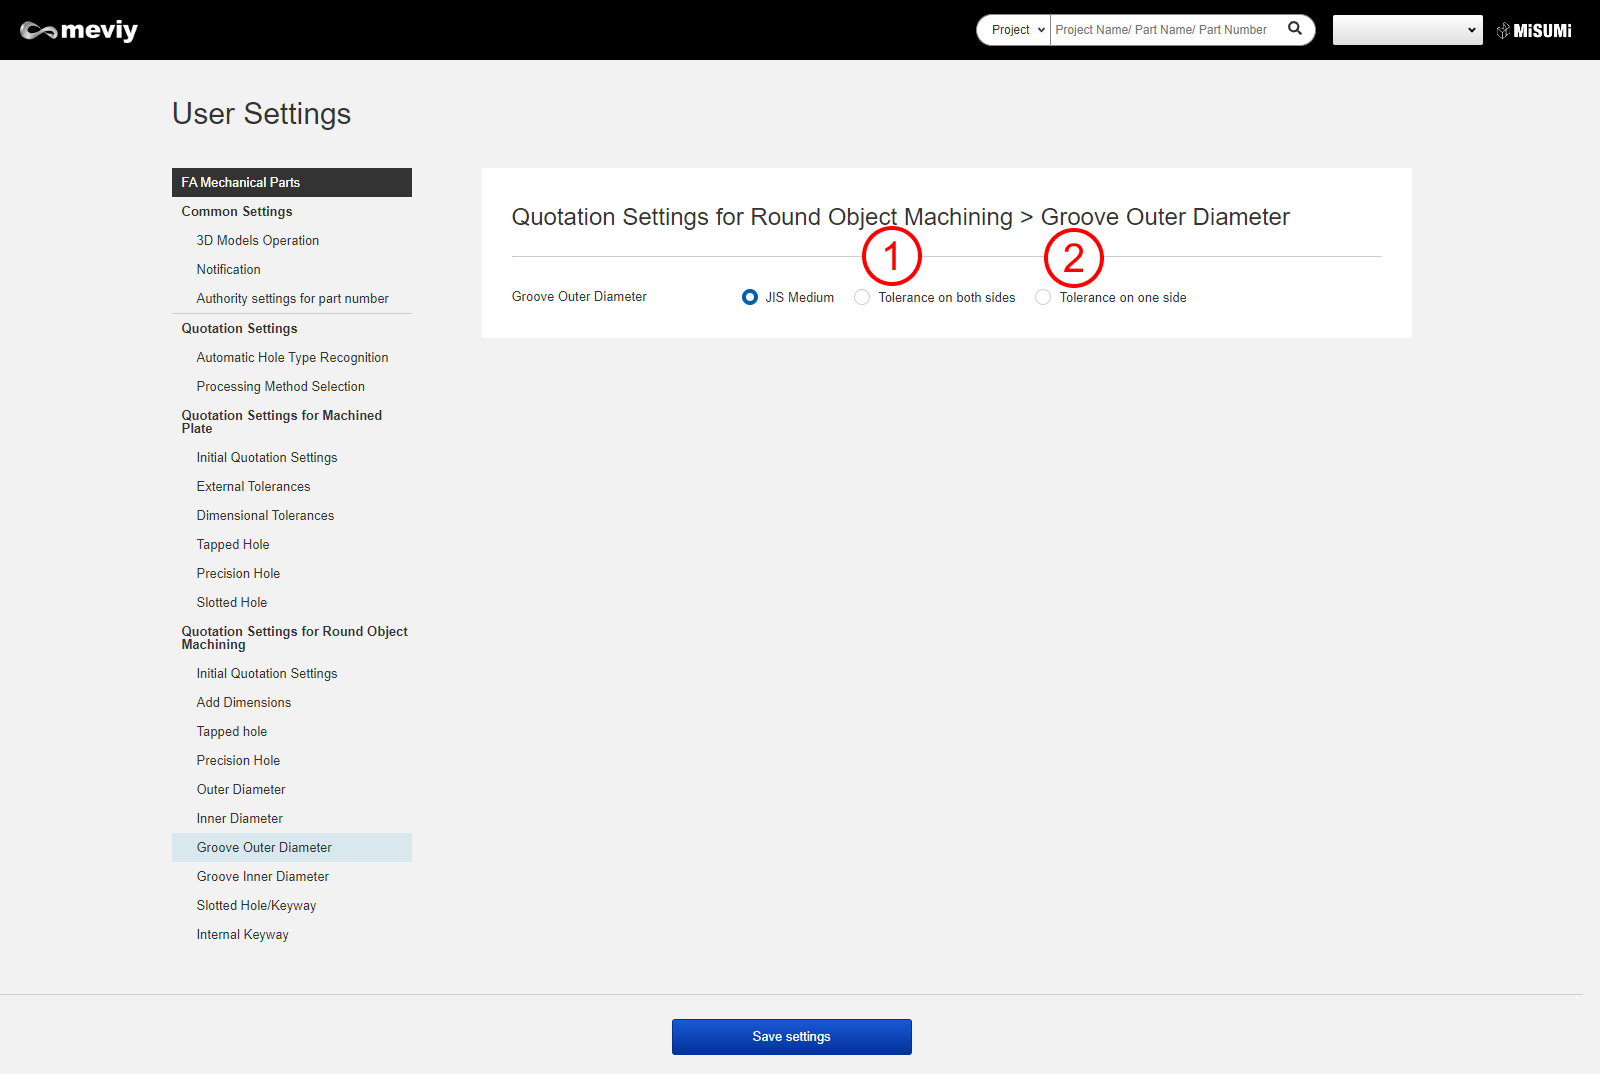
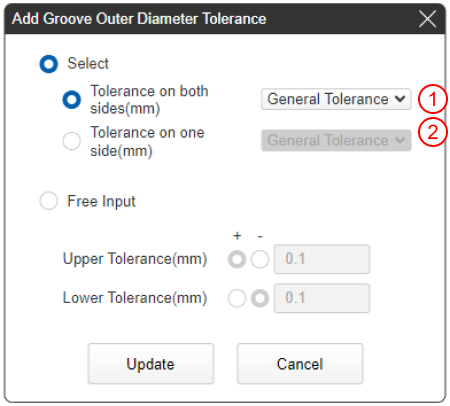
You can change the tolerance selected in the “Add groove outer diameter dimensions dialog.”
User Settings Screen

3D viewer dialog
Groove Inner Diameter
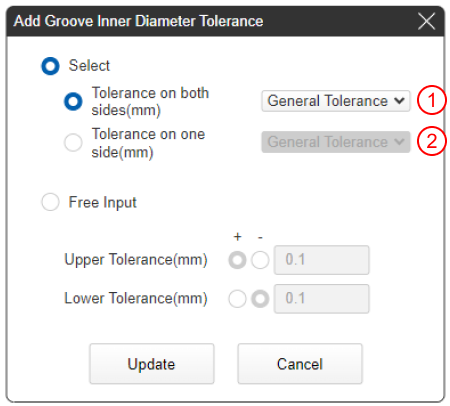
You can change the tolerance selected in the “Add groove inner diameter dimensions dialog.”
User Settings Screen
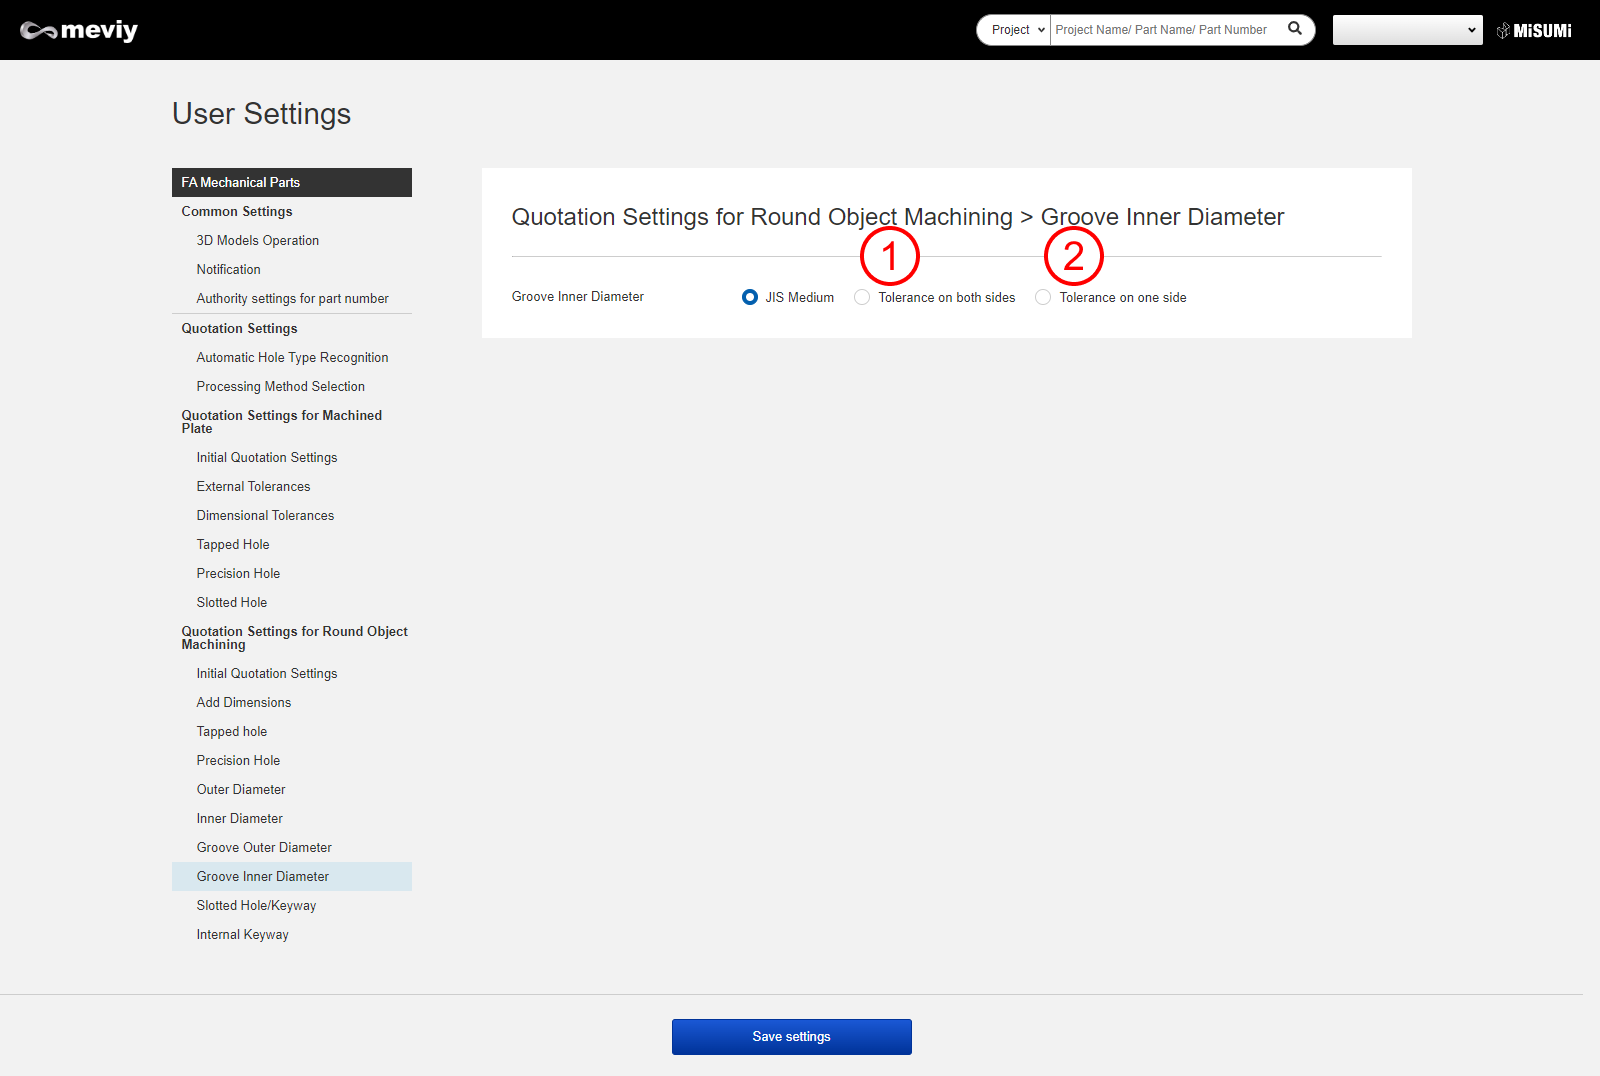
3D viewer dialog
Slotted Holes/Keyways
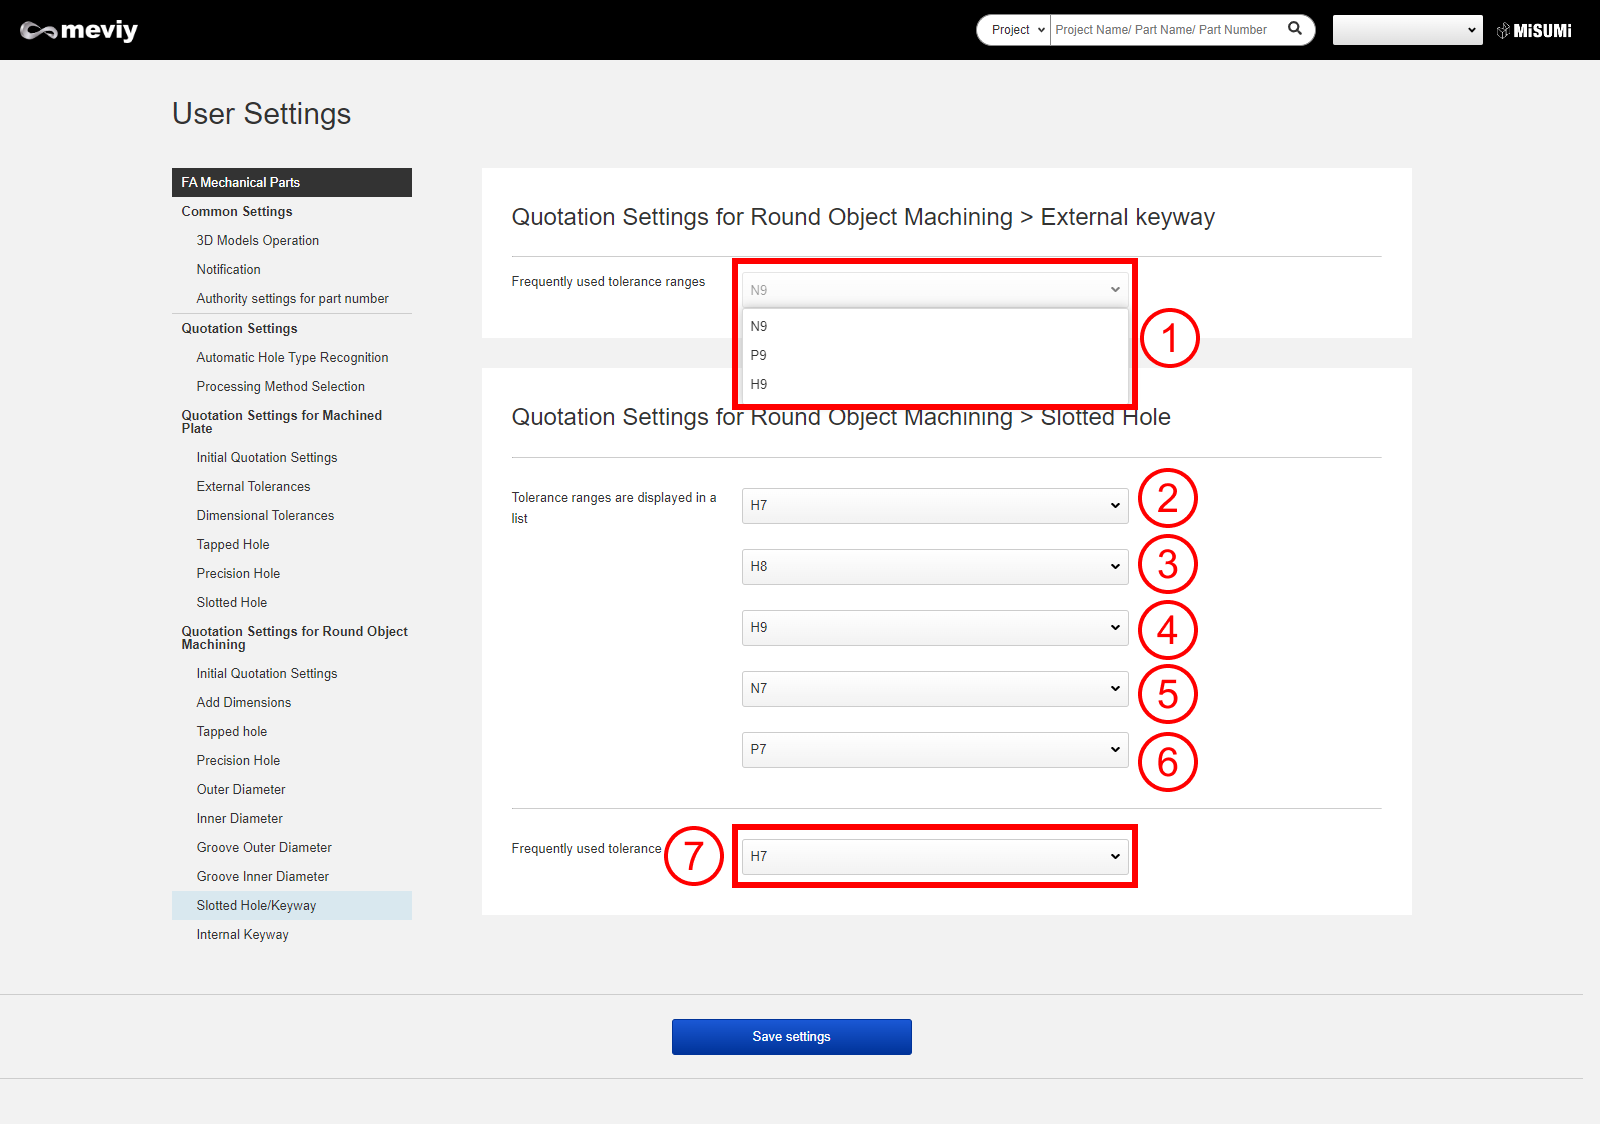
You can change the tolerance range and frequently used tolerance ranges displayed in the “Slotted hole/keyway information instructions dialog” list.
User Settings Screen
Tip
If the groove width matches JIS standards (B 1301:1996), this is recognized as a keyway.
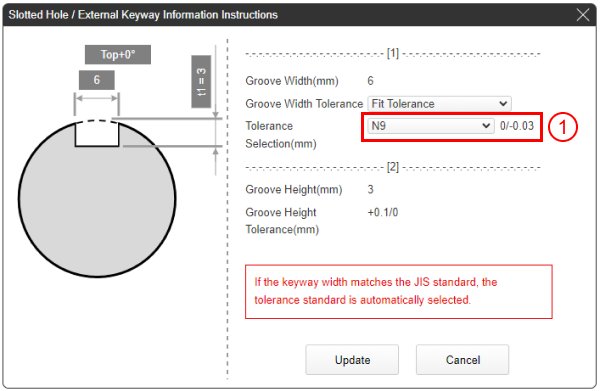
If the groove width does not match JIS standards (B 1301:1996), this is recognized as a slotted hole.
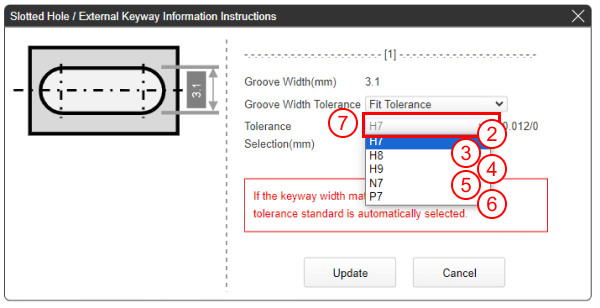
See here for the keyway standards table
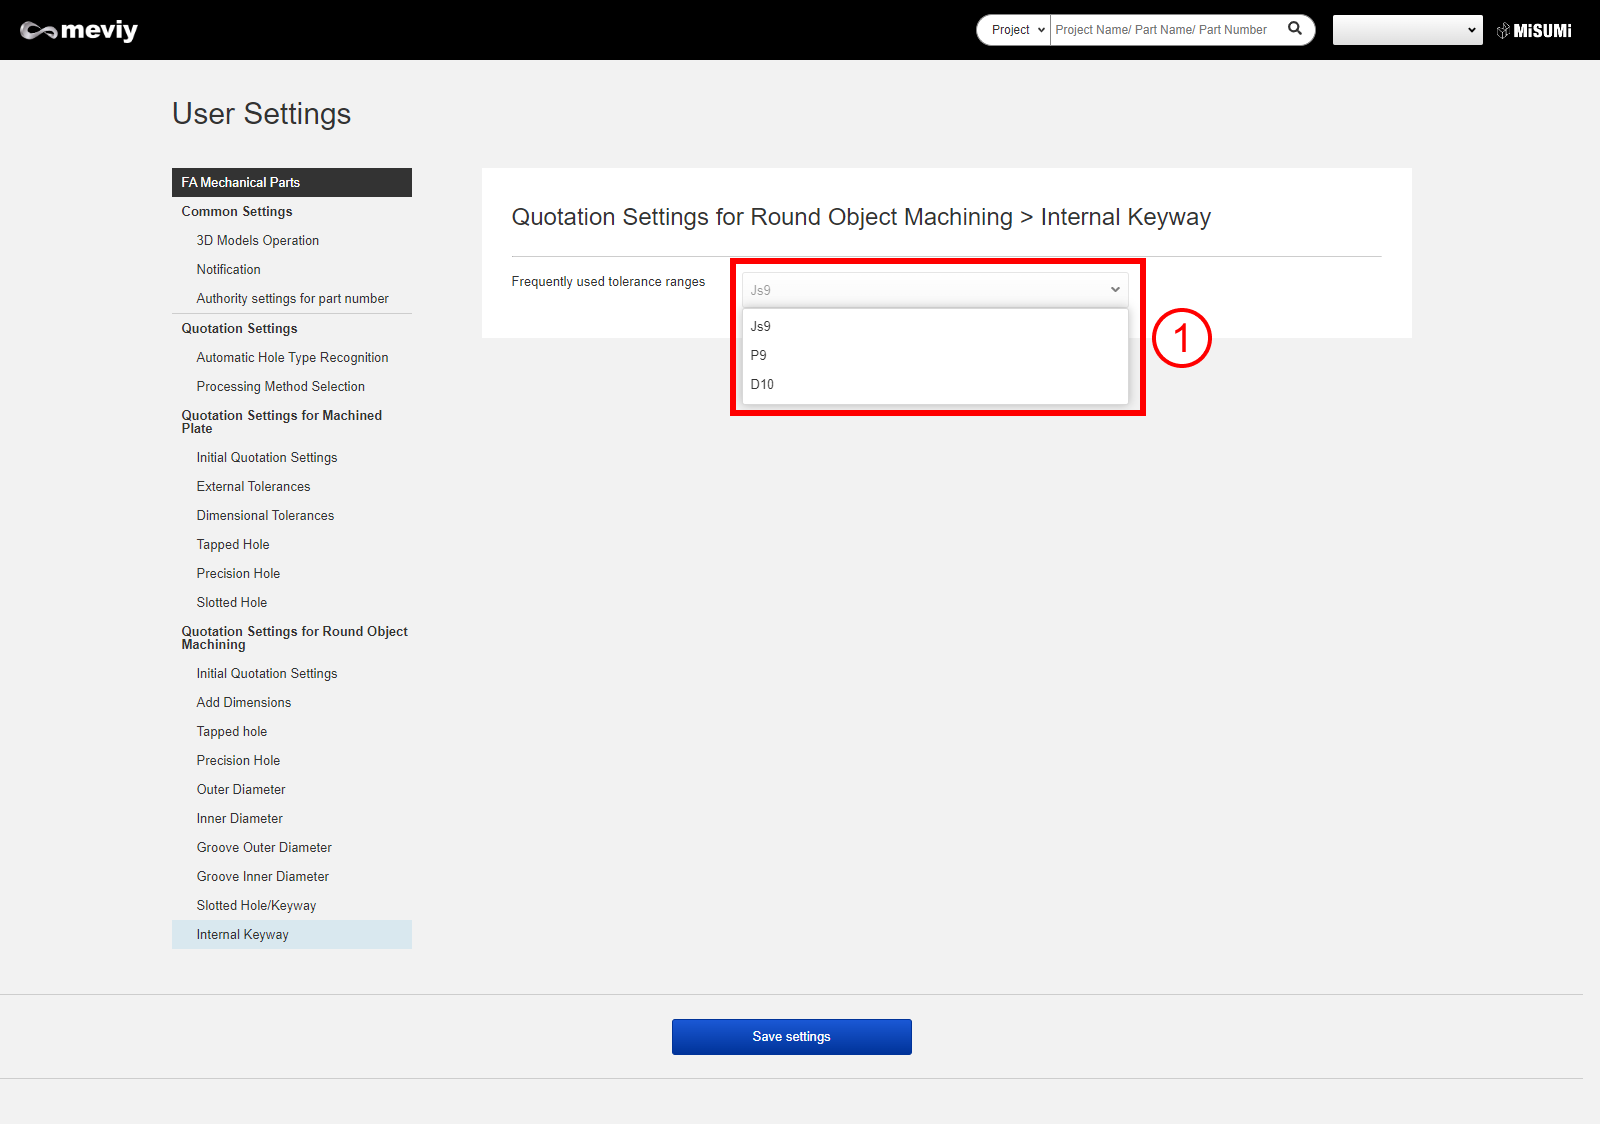
Internal Keyway
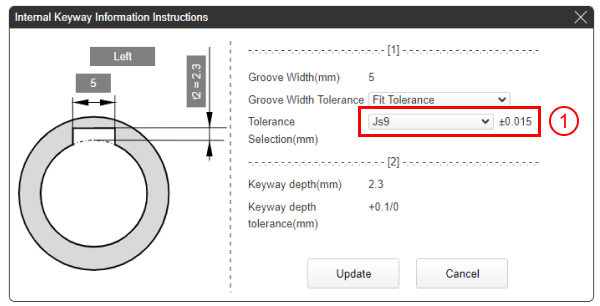
You can change the frequently used tolerance ranges displayed in the “Inner diameter keyway information instructions dialog” list.
User Settings Screen
Tip
If the groove width matches JIS standards (B 1301:1996), this is recognized as a keyway.
If the groove width does not match JIS standards (B 1301:1996), this is handled as “General tolerance” and tolerance cannot be selected.
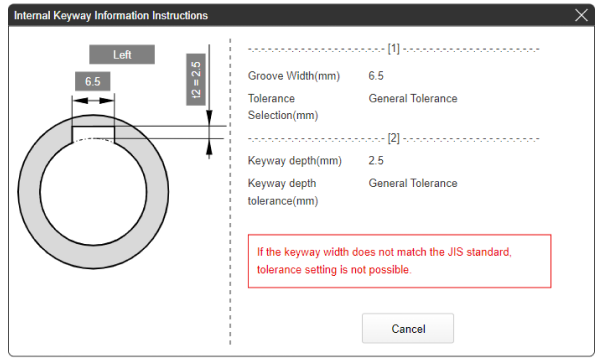
See here for the keyway standards table