Appearance Quality
Appearance quality assurance range
Turning surface ( Outer diameter )
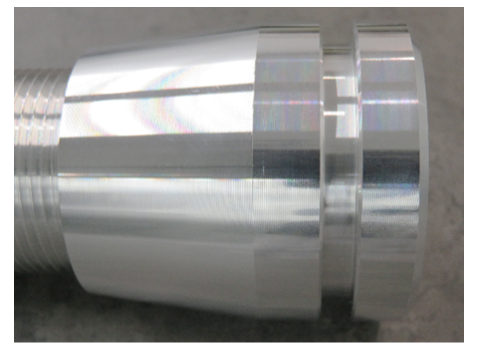
5056 Aluminum Alloy
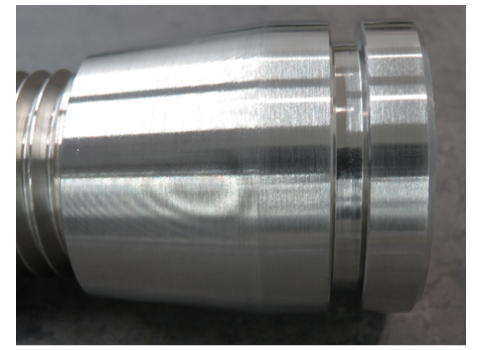
1045 Carbon Steel
Notes
- We guarantee that there will be no scratches of 0.7 mm or more on the dot gauge and that no nails will be scratched.
- Surface roughness: √Ra6.3 [√Rz25]
- Depending on the material and size, the product may be shipped with an untreated surface (polishing and rolling). Please see below for details.
→CNC Turning>Conditions of Use for Standard Materials (Polished bars and Cold finished material)
Turning surface ( Inner diameter )
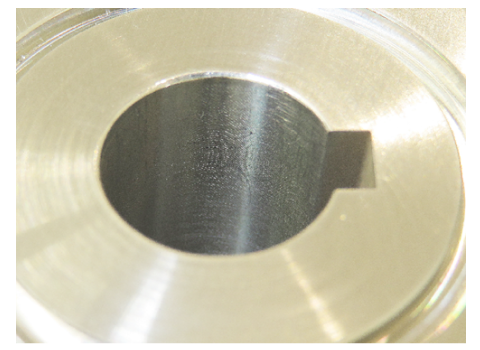
5056 Aluminum Alloy
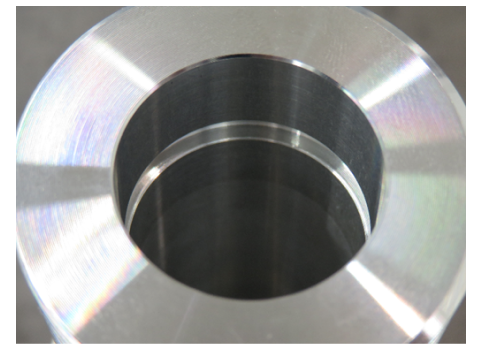
304 Stainless Steel
Milling face
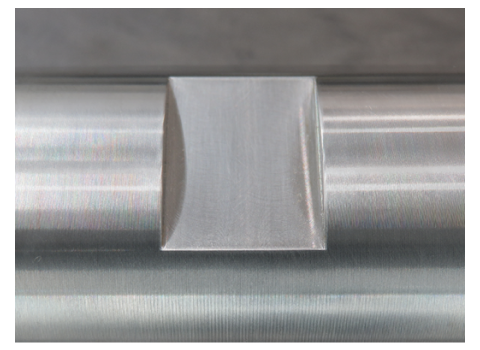
1045 Carbon Steel
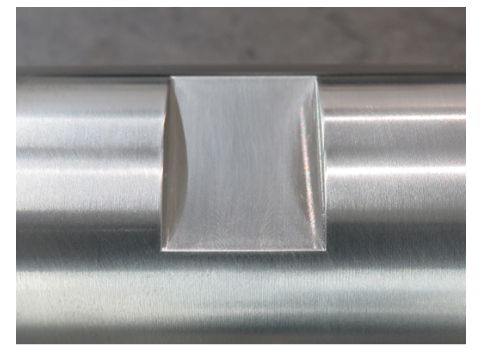
304 Stainless Steel
Caution
Although cutter marks may remain, specification in relation to the marks is not supported.Part Cut-off method
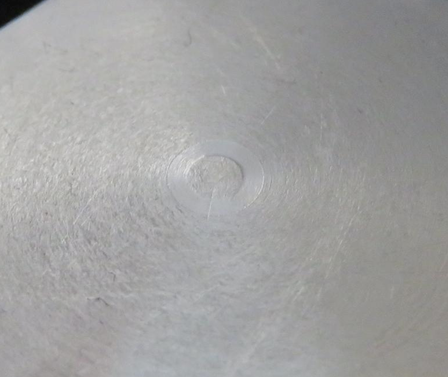
Turning
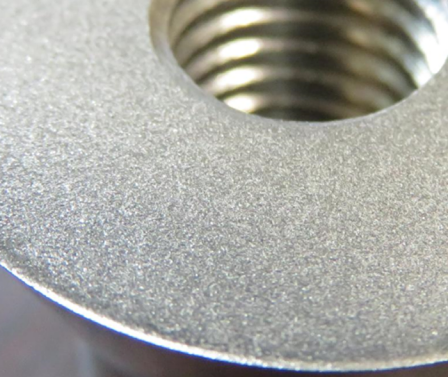
Wire Cutting
Caution
Processing method cannot be specified.Wire-Cut EDM Surfaces
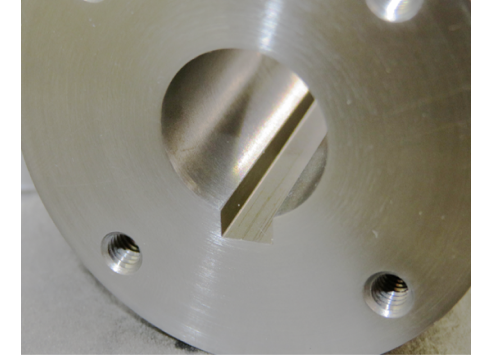
Wire-Cut EDM Surfaces
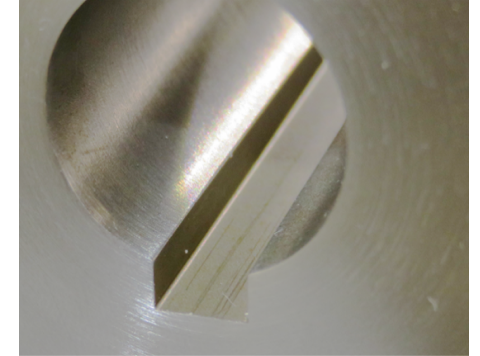
Enlarged view: Wire-cut EDM surface
Tip
Because this is a fusion process in which an electric discharge from an electrode melts the metal for cutting, it is not characterized by a shiny surface like cutting.
Surface Treatment Quality Standards
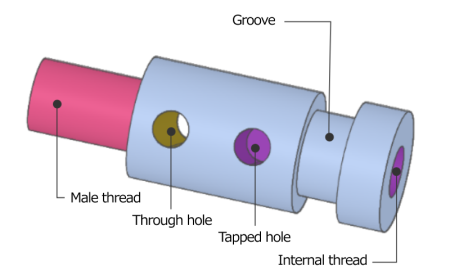
Caution
- Since film thickness management is difficult for small diameter precision holes, etc., additional machining may be carried out after processing, and as a result, the surface treatment may not remain on the cutting surface.
- The surface treatment may not remain on the inside of holes as holes may be masked.
- Surface treatment suspension and electrode contact marks may remain on the product.
- To ensure contact points for the following target surface treatments, at least one of the hanging shapes listed in (1) to (5) above is required.
- If there is no feature in the model for hanging the part, a through-hole will be made at any position for hanging.
| Surface Treatment | Hanging Holes |
|---|---|
| Electroless Nickel Plating | ー |
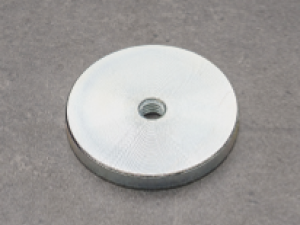
| Hard Chrome Plating | Target |
| Trivalent Chromate (clear) | Target |
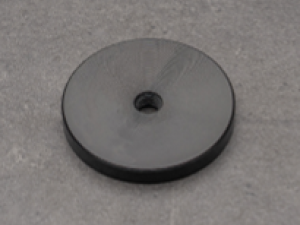
| Trivalent Chromate (black) | Target |
| Black Oxide | ー |
| Salt-Bath Nitrocarburizing | ー |
| Low Temperature Black Chrome | Target |
| Phosphate Coating | ー |
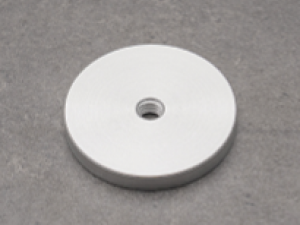
| Clear Anodize | Target |
| Black Anodize | Target |
| Black Anodize (matte) | Target |
| Hard Anodize (Clear) | Target |
| Passivation | Target |
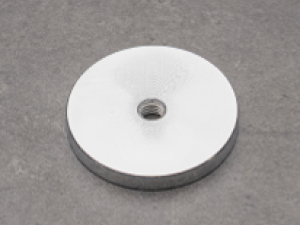 |
 |
 |
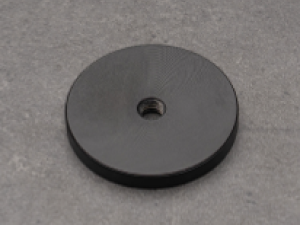 |
| Hard Chrome Plating | Trivalent Chromate (clear) | Trivalent Chromate (black) | Low Temperature Black Chrome |
 |
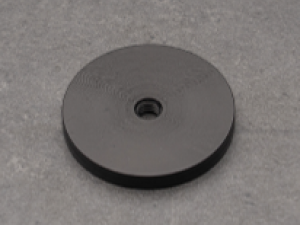 |
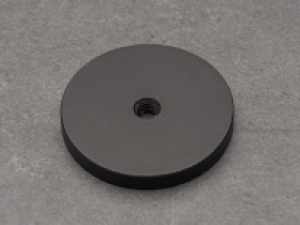 |
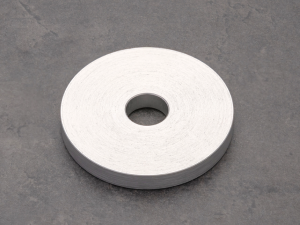 |
| Clear Anodize | Black Anodize | Black Anodize (matte) | Hard Anodize (Clear) |
 |
|||
| Passivation |
Quenching Quality Standards
About hardening quality assurance
The hardness value specified is guaranteed and will be measured and confirmed before shipping.
Appearance after quenching
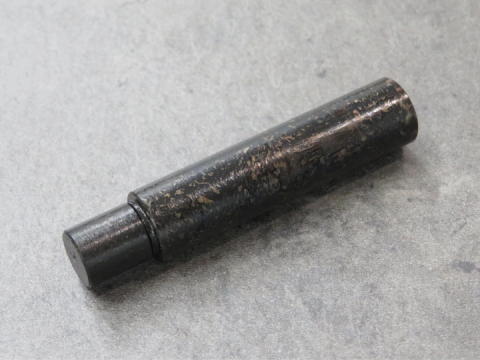
After quenching
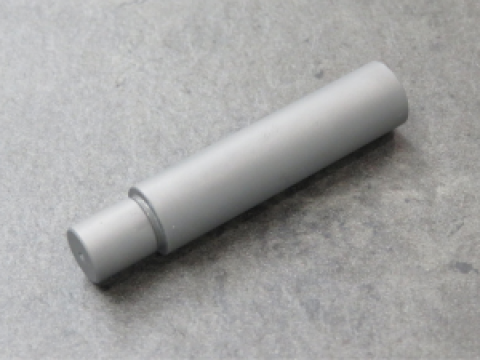
Blast finishing
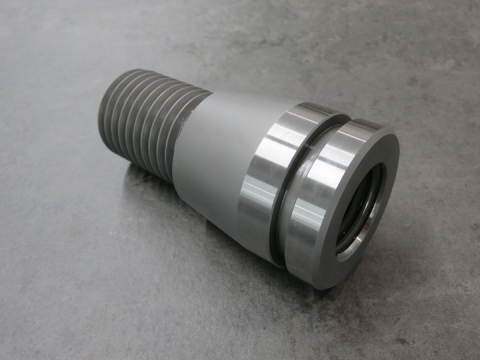
Grinding finishing (outer diameter)
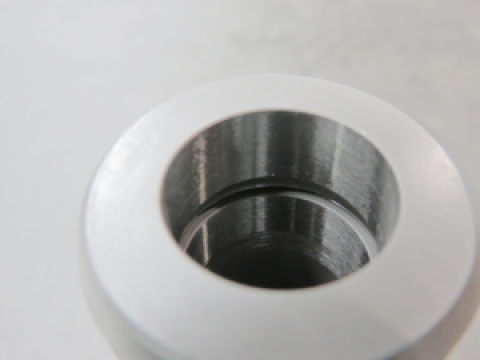
Grinding finishing (inner diameter)
Caution
- Media blasting may be performed to remove surface contamination after quenching. There will be no change in accuracy after the treatment.
- The photo shows sandblasting, but shot blasting is also available. Blast type cannot be specified.
- Grinding may be performed to guarantee accuracy for tolerances on the outer or inner diameter. The appearance of ground surfaces will be as shown in the above figure.
- Grinding cannot be specified. The factory will determine if grinding is necessary to guarantee dimensional accuracy.
- The threads will also be hardened. Depending on the application, the thread may be damaged. If you do not want the thread to be hardened, please specify Selective Hardening (Induction Hardening) to select an area that does not include the thread.
- Hardness measurement marks may remain in areas where surface roughness is not specified or near the center of the end face of the part. To confirm the inspection points in advance, please add information in the comments and request a manual quote
Induction Hardening
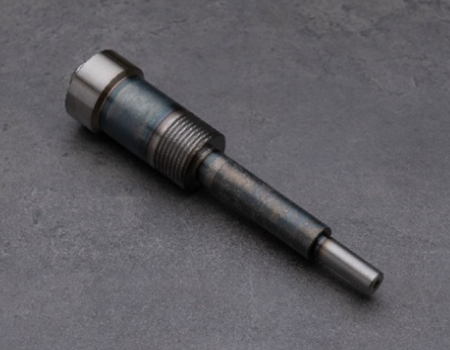
Caution
- Grinding may be performed to guarantee accuracy for tolerances on the outer or inner diameter. The appearance of ground surfaces will be as shown in the above figure.
- Grinding cannot be specified. The factory will determine if grinding is necessary to guarantee dimensional accuracy.
- A hardened depth of 1mm or more into the part surface is guaranteed. The hardened depth may be 1.5 mm or more.
- The hardened depth cannot be specified.
- The Induction Hardening process may also harden edges and surfaces adjacent to the surface specified for hardening.
Conditions of Use for Standard Materials (Polished bars and Cold finished material)
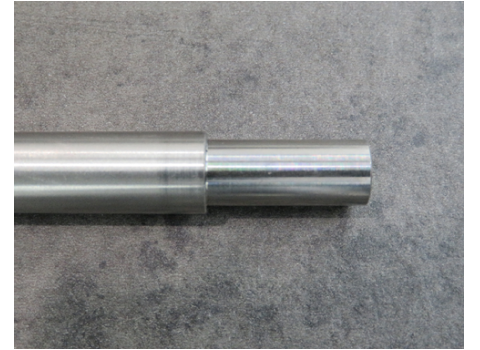
Machined
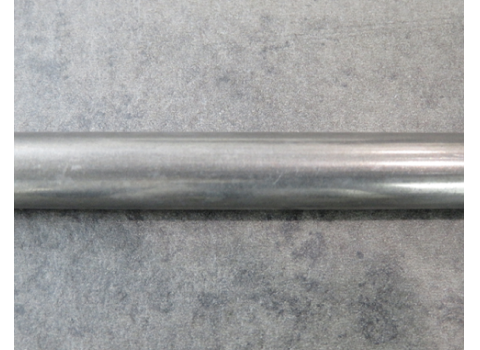
Cold finished material
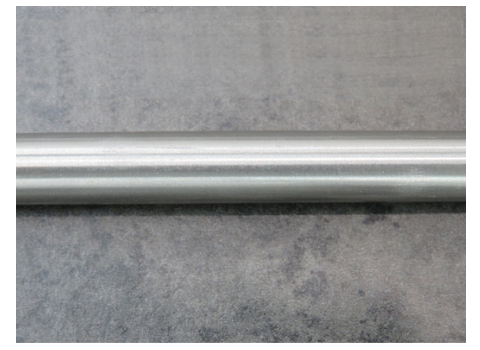
Polished bar
Selection criteria for standard materials
| Tolerance | |||||
|---|---|---|---|---|---|
| IT6 | g6 and h7 | h9 | Other (IT7 or above, general tolerance, etc.) | ||
| Surface roughness | Ra6.3 | Machined | Polished bar or Machined | Polished bar, Cold finished material, or Machined | Polished bar, Cold finished material, or Machined |
| Ra3.2 | Machined | Polished bar or Machined | Polished bar, Cold finished material, or Machined | Polished bar, Cold finished material, or Machined | |
| Ra1.6 | Machined | Polished bar or Machined | Machined | Polished bar or Machined | |
Corresponding table of standard materials
| Material | Machined | Cold finished material(h9) | Polished bar(g6 and h7) |
|---|
| 1045 Carbon Steel | 〇 | 〇 | 〇 |
|---|---|---|---|
| 1018 Carbon Steel | 〇 | 〇 | |
| 4135 Alloy Steel | 〇 | ||
| 4140 Alloy Steel | 〇 | ||
| O1 Tool Steel | 〇 | ||
| D2 tool Steel | 〇 | ||
| H13 tool Steel | 〇 | ||
| 52100 alloy Steel | 〇 | ||
| 2017 Aluminum Alloy | 〇 | ||
| 5052 Aluminum Alloy | 〇 | ||
| 5056 Aluminum Alloy | 〇 | ||
| 6061 Aluminum Alloy | 〇 | ||
| 7075 Aluminum Alloy | 〇 | ||
| 303 Stainless Steel | 〇 | 〇 | |
| 304 Stainless Steel | 〇 | 〇 | |
| 316 Stainless Steel | 〇 | 〇 | |
| 316L Stainless Steel | 〇 | ||
| 440C Stainless Steel | 〇 | ||
| Brass C3604-LCd | 〇 | ||
| Acetal(white,black) | 〇 | ||
| MC Nylon(blue,black ash) | 〇 | ||
| ABS(natural color,black) | 〇 | ||
| PEEK(gray-brown) | 〇 | ||
| PC(transparent, black) | 〇 | ||
| PP(standard, natural color) | 〇 | ||
| PPS(transparent, natural color) | 〇 | ||
| Acrylic(standard, transparent) | 〇 | ||
| UHMWPE(white) | 〇 | ||
| PVC(gray) | 〇 | ||
| Polyacetal (White, Black) | 〇 | ||
| MC nylon (Blue, Black-Gray) | 〇 | ||
| ABS (Natural colour, Black) | 〇 | ||
| PEEK (standard, gray-brown) | 〇 | ||
| PC (Transparent, Black) | 〇 | ||
| PP (Natural colour) | 〇 |
Round bar specification table
| Material | Maximum Diameter (h9) |
|---|
| 1018 Carbon Steel | ø3 to ø30 (1 mm increments) |
|---|---|
| ø32 | |
| ø34 | |
| ø35 | |
| ø36 | |
| ø38 | |
| ø40 | |
| ø42 | |
| ø44 | |
| ø45 | |
| ø46 | |
| ø48 | |
| ø50 | |
| ø52 | |
| ø55 | |
| ø56 | |
| ø58 | |
| ø60 | |
| ø65 | |
| ø70 | |
| ø75 | |
| ø80 | |
| ø85 | |
| ø90 | |
| ø95 | |
| ø100 | |
| ø105 | |
| ø110 | |
| ø115 | |
| ø120 | |
| ø125 | |
| ø130 | |
| ø140 | |
| ø150 |
| Material | Maximum Diameter (g6 and h7 and h9) |
|---|
| 1045 Carbon Steel | ø3 to ø30 (1 mm increments) |
|---|---|
| ø32 | |
| ø34 | |
| ø35 | |
| ø36 | |
| ø38 | |
| ø40 | |
| ø42 | |
| ø44 | |
| ø45 | |
| ø46 | |
| ø48 | |
| ø50 |
| Material | Maximum Diameter (h9) |
|---|
| 1045 Carbon Steel | ø52 |
|---|---|
| ø55 | |
| ø60 | |
| ø65 | |
| ø70 | |
| ø75 | |
| ø80 | |
| ø85 | |
| ø90 | |
| ø95 | |
| ø100 | |
| ø110 | |
| ø120 | |
| ø130 | |
| ø140 | |
| ø150 |
| Material | Maximum Diameter (g6 and h7) |
|---|
| 303 Stainless Steel 304 Stainless Steel 316 Stainless Steel | ø3~ø18(1 mm increments) |
|---|---|
| ø20~ø26(1 mm increments) | |
| ø28 | |
| ø30 | |
| ø32 | |
| ø35 | |
| ø36 | |
| ø38 | |
| ø40 | |
| ø42 | |
| ø45 | |
| ø50 |
| Material | Maximum Diameter (h9) |
|---|
| 303 Stainless Steel 304 Stainless Steel 316 Stainless Steel | ø55 |
|---|---|
| ø60 | |
| ø65 | |
| ø70 | |
| ø75 | |
| ø80 | |
| ø85 | |
| ø90 | |
| ø95 | |
| ø100 |
| Material | Maximum Diameter (h9) |
|---|---|
| 4135 Alloy Steel | ø4~ø12(1 mm increments) |
| ø12.7 | |
| ø13~ø21(1 mm increments) | |
| ø22 | |
| ø24 | |
| ø25 | |
| ø26 | |
| ø28 | |
| ø30 | |
| ø32 | |
| ø35 | |
| ø40 | |
| ø45 | |
| ø50 |
Caution
- If it is not included in the standard table, it will be shaved.
- Shaving will be used for non-standard materials
Tip

What is maximum diameter?
- The maximum diameter on the cylindrical surface of the product. (highlighted in light blue)
- Even if the groove is divided by a groove as shown in Figure 3, it is recognized as one element as long as it has the same diameter.

Figure 1


Figure 3
Applicable conditions for Hexagonal bar
If the distance across the flats of the hexagon matches a standard size, it is processed with hexagonal bar stock and shipped.
Hexagonal surfaces may be scratched because they are stock, unmachined surfaces.
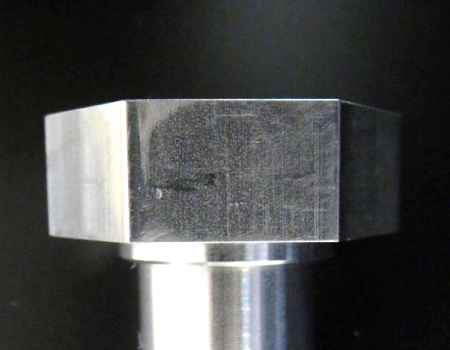
Example (1)
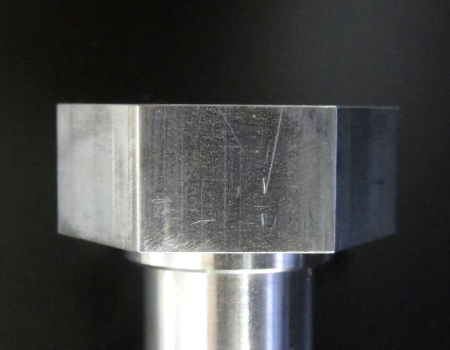
Example (2)
What is the distance across the flats?
The distance between two opposite sides of a hexagon.
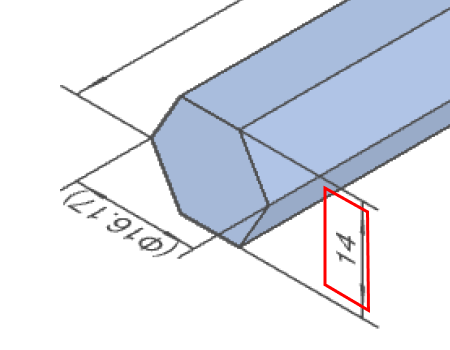
Hexagonal rod standards and specifications table
| Material | ||||||||||
|---|---|---|---|---|---|---|---|---|---|---|
| Tolerance(h12) | Tolerance | |||||||||
| 1045 Carbon Steel | 1018 Carbon Steel | 4135 Alloy Steel | 303 Stainless Steel | 304 Stainless Steel | 316 Stainless Steel | Brass C3604-LCd | ||||
| Distance across the flats | 6 | 〇 | 〇 | × | 〇 | 〇 | × | 0 -0.15 | 〇 | ±0.06 |
|---|---|---|---|---|---|---|---|---|---|---|
| 7 | 〇 | 〇 | × | 〇 | 〇 | 〇 | 〇 | ±0.08 | ||
| 8 | 〇 | 〇 | 〇 | 〇 | 〇 | 〇 | × | |||
| 9 | 〇 | 〇 | × | × | × | × | × | |||
| 10 | 〇 | 〇 | 〇 | 〇 | 〇 | 〇 | 0 -0.18 | 〇 | ||
| 12 | 〇 | 〇 | 〇 | 〇 | 〇 | 〇 | 〇 | ±0.11 | ||
| 13 | 〇 | 〇 | 〇 | 〇 | 〇 | 〇 | × | |||
| 14 | 〇 | 〇 | 〇 | 〇 | 〇 | 〇 | 〇 | |||
| 17 | 〇 | 〇 | 〇 | 〇 | 〇 | 〇 | 〇 | |||
| 19 | 〇 | 〇 | 〇 | 〇 | 〇 | 〇 | 0 -0.21 | 〇 | ||
| 21 | 〇 | 〇 | 〇 | 〇 | 〇 | 〇 | × | ±0.18 | ||
| 22 | 〇 | 〇 | 〇 | 〇 | 〇 | 〇 | 〇 | |||
| 23 | 〇 | 〇 | 〇 | 〇 | 〇 | 〇 | × | |||
| 24 | 〇 | 〇 | 〇 | 〇 | 〇 | 〇 | 〇 | |||
| 26 | 〇 | 〇 | 〇 | 〇 | 〇 | 〇 | 〇 | |||
| 27 | 〇 | 〇 | 〇 | 〇 | 〇 | 〇 | 〇 | |||
| 29 | 〇 | 〇 | × | 〇 | 〇 | 〇 | × | |||
| 30 | 〇 | 〇 | × | 〇 | 〇 | 〇 | 0 -0.25 | 〇 | ||
| 32 | 〇 | 〇 | × | 〇 | 〇 | 〇 | 〇 | |||
| 35 | 〇 | 〇 | × | 〇 | 〇 | 〇 | 〇 | |||
| 36 | 〇 | 〇 | × | 〇 | 〇 | 〇 | × |