- HELP
- How to use
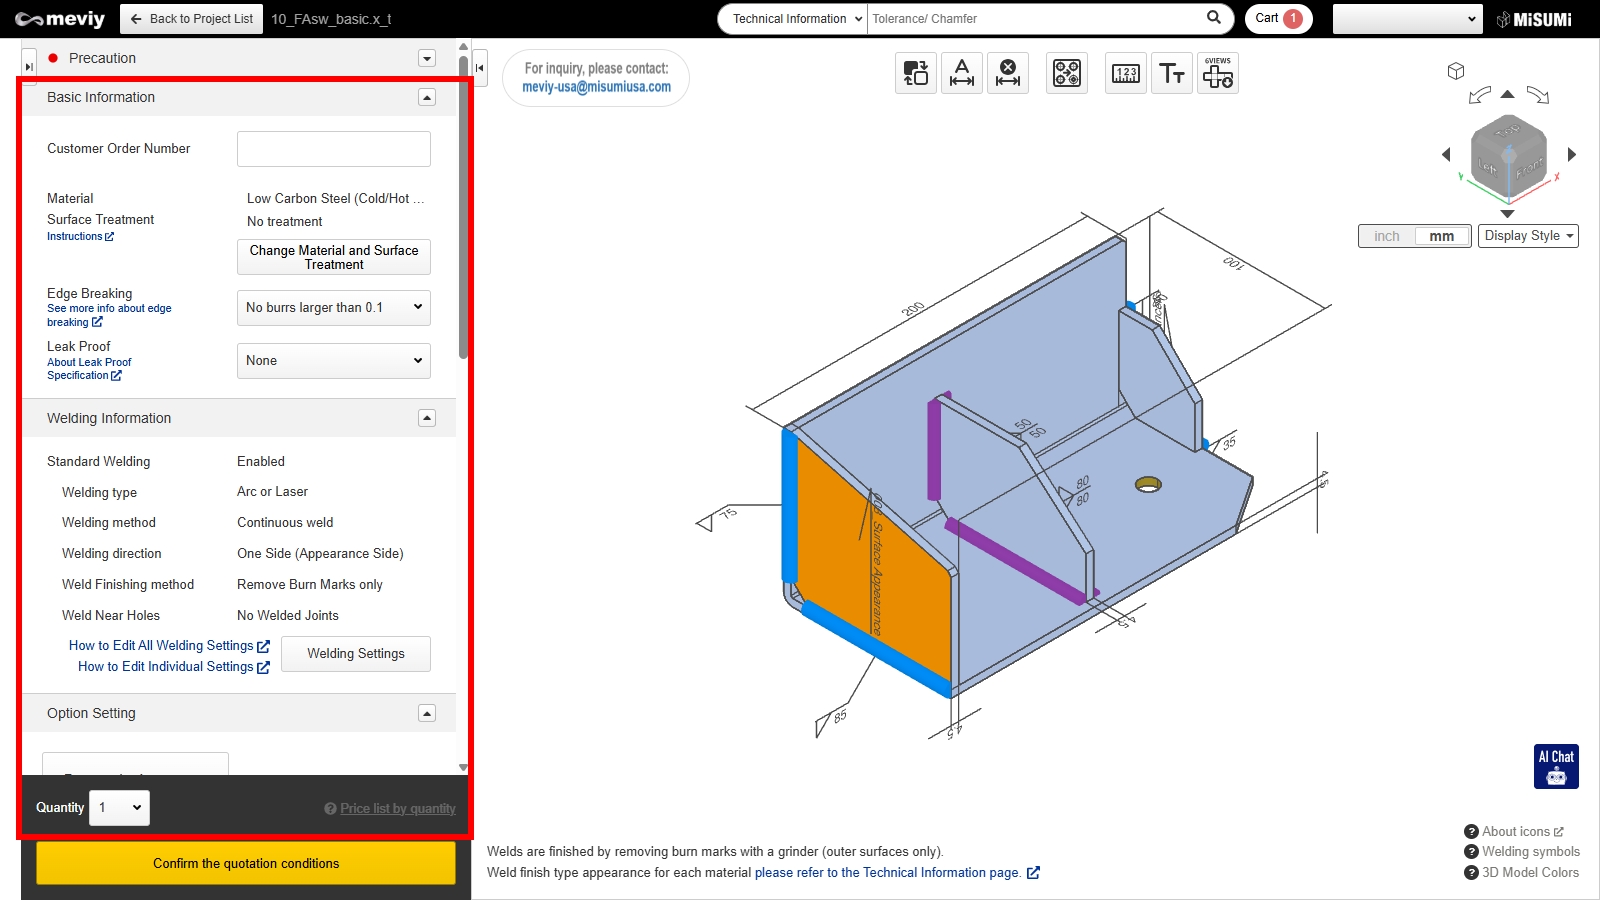
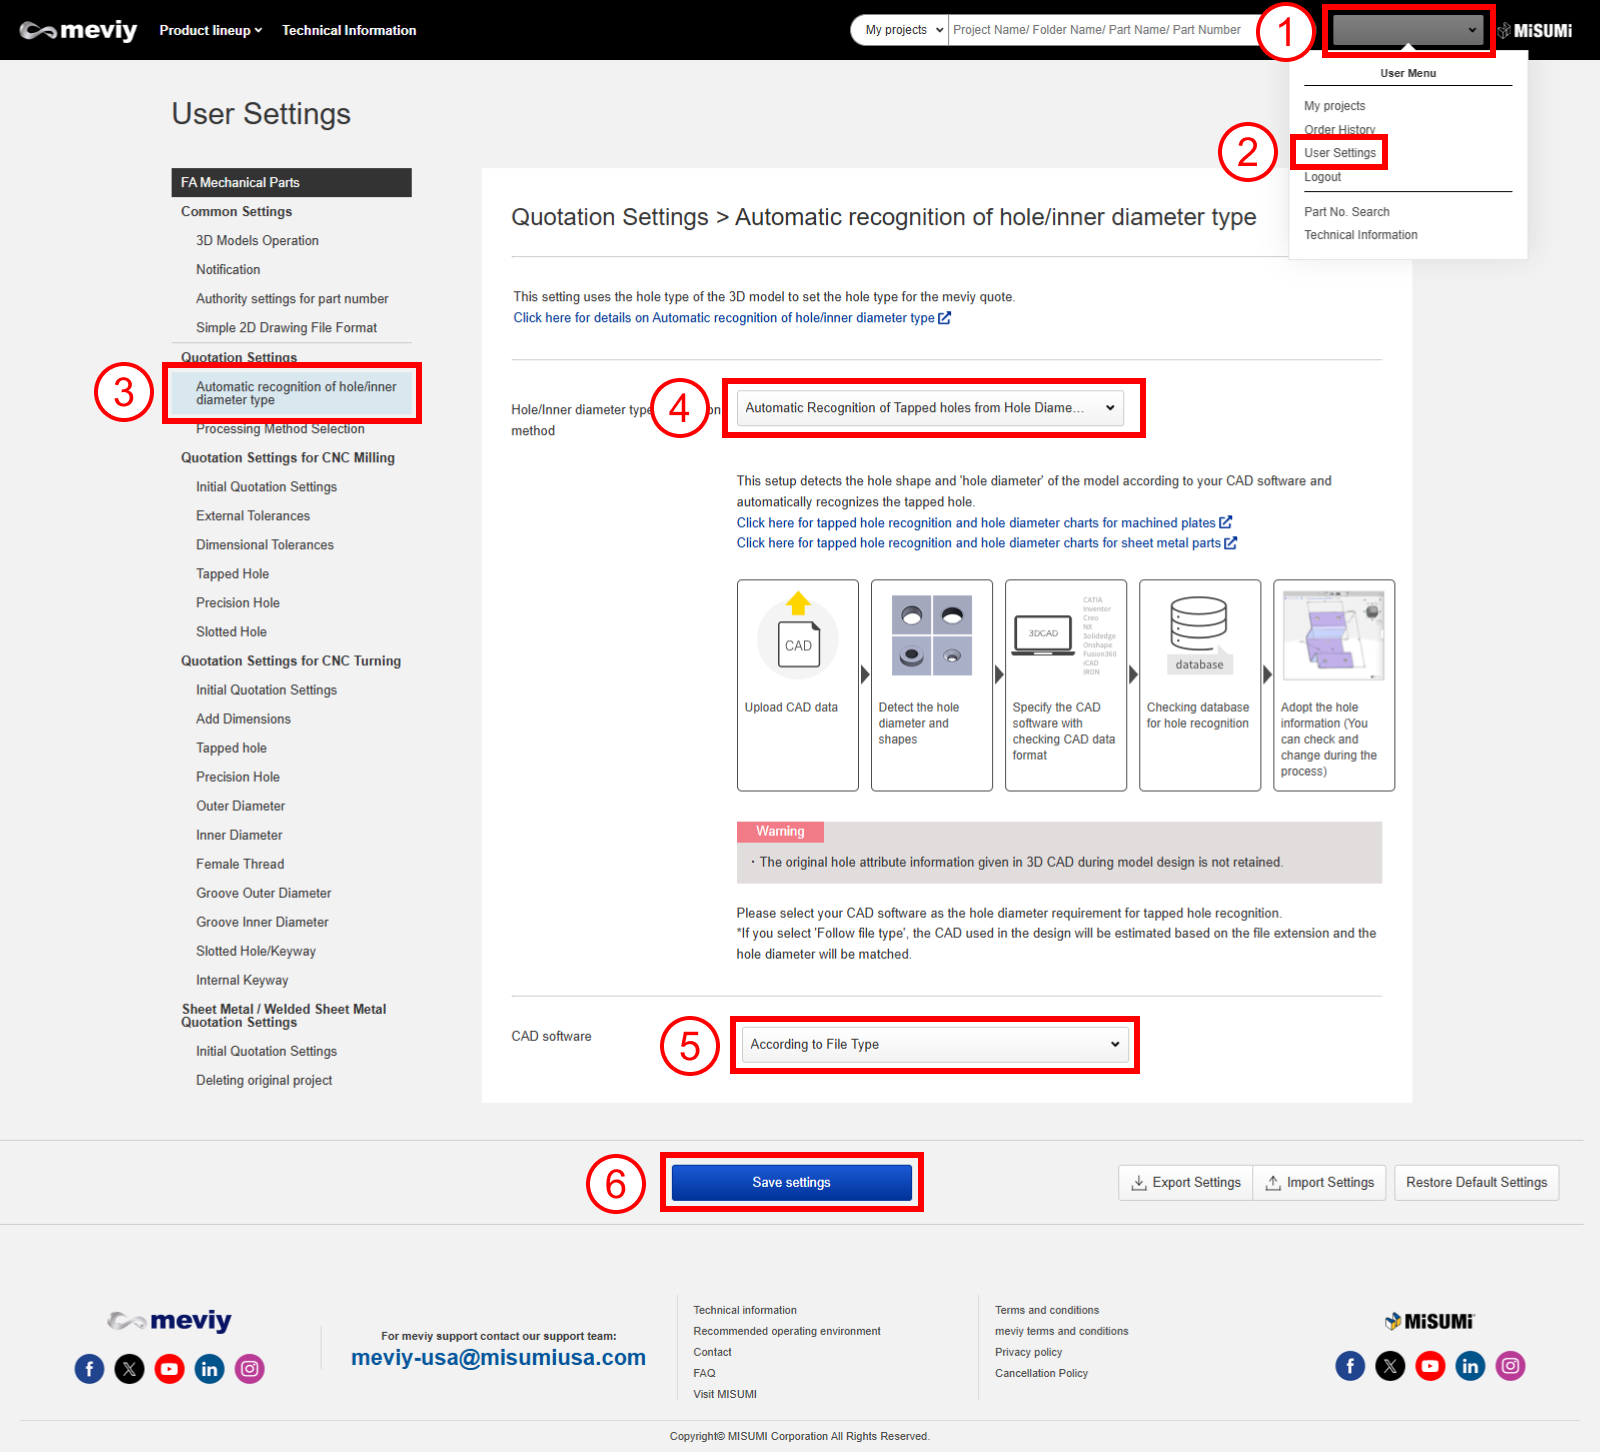
- Quotation conditions settings
- [Welded Sheet Metal] Quotation Settings
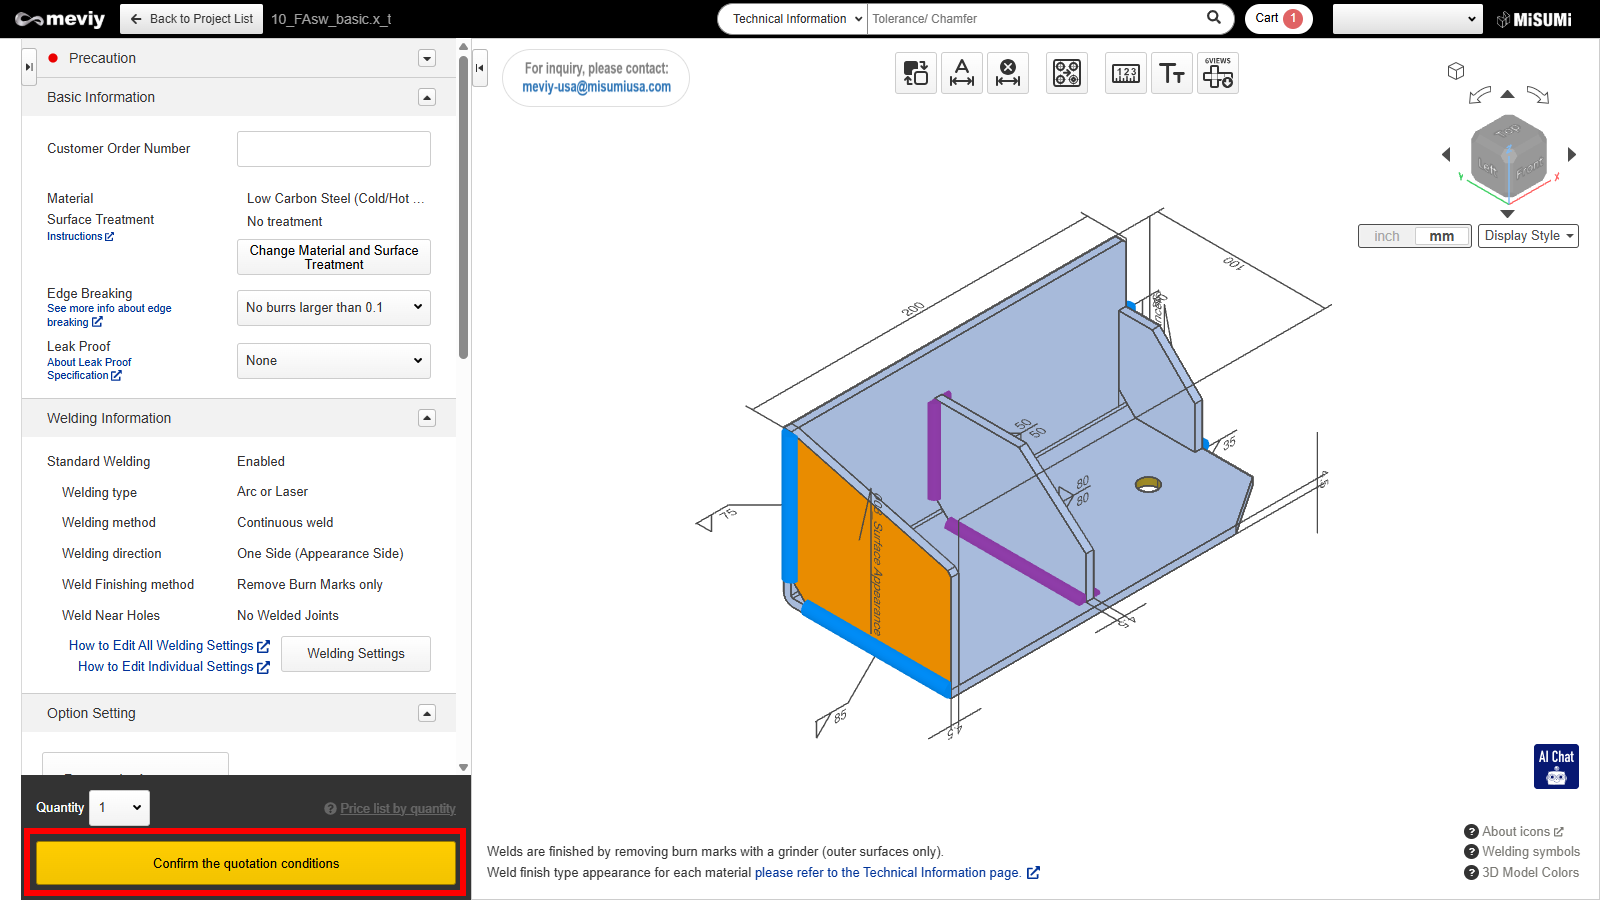
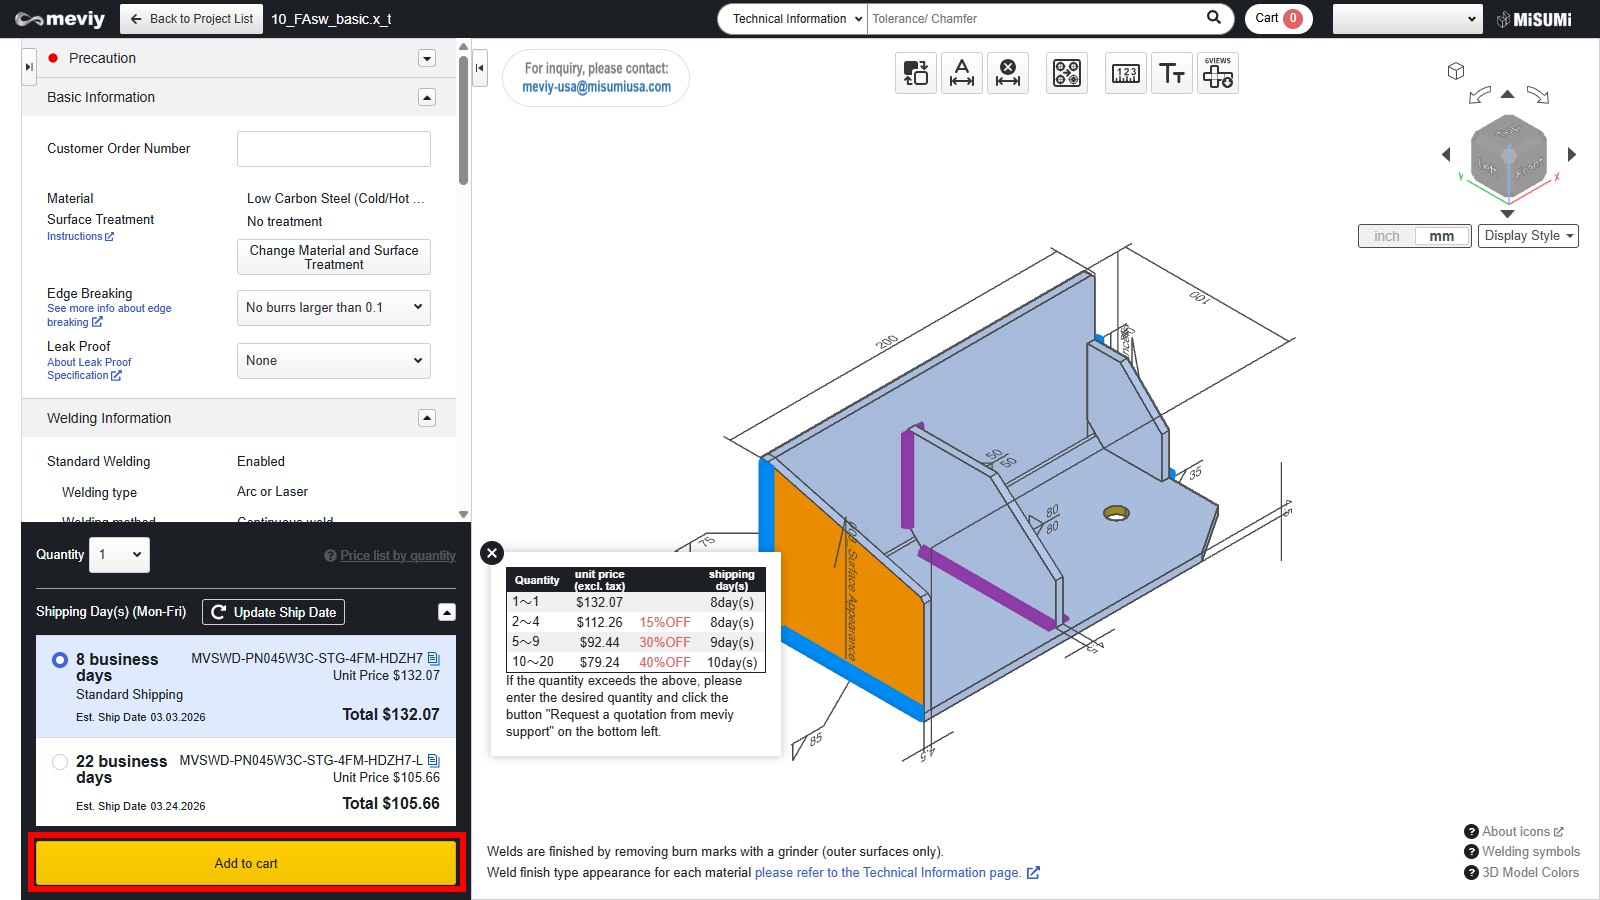
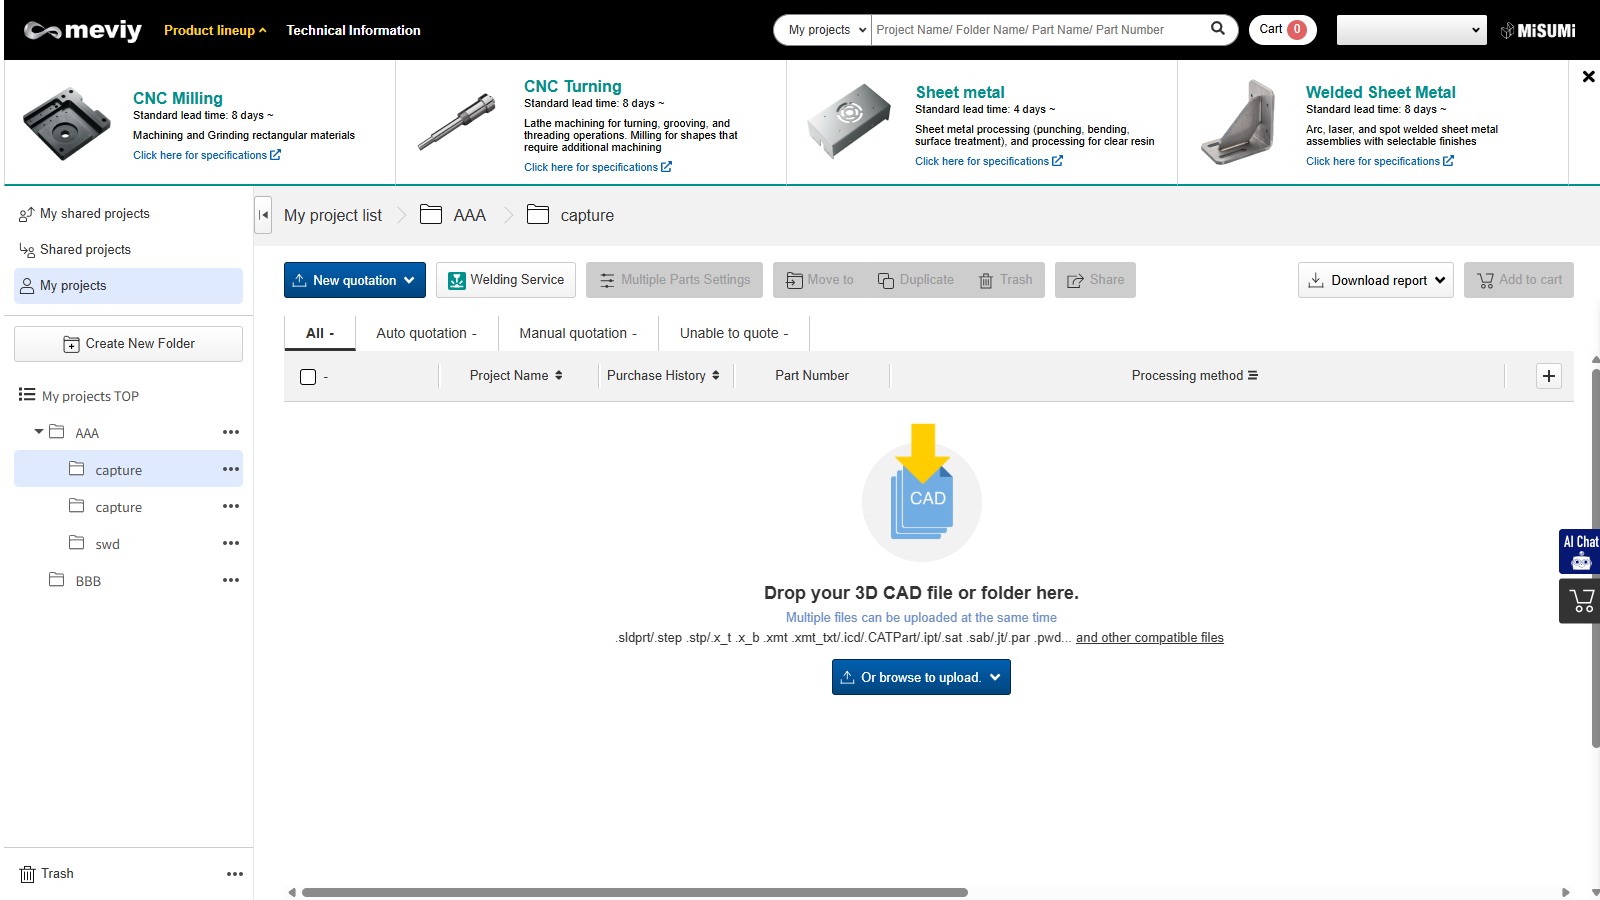
- Quotation Procedure
Quotation Procedure
Tip
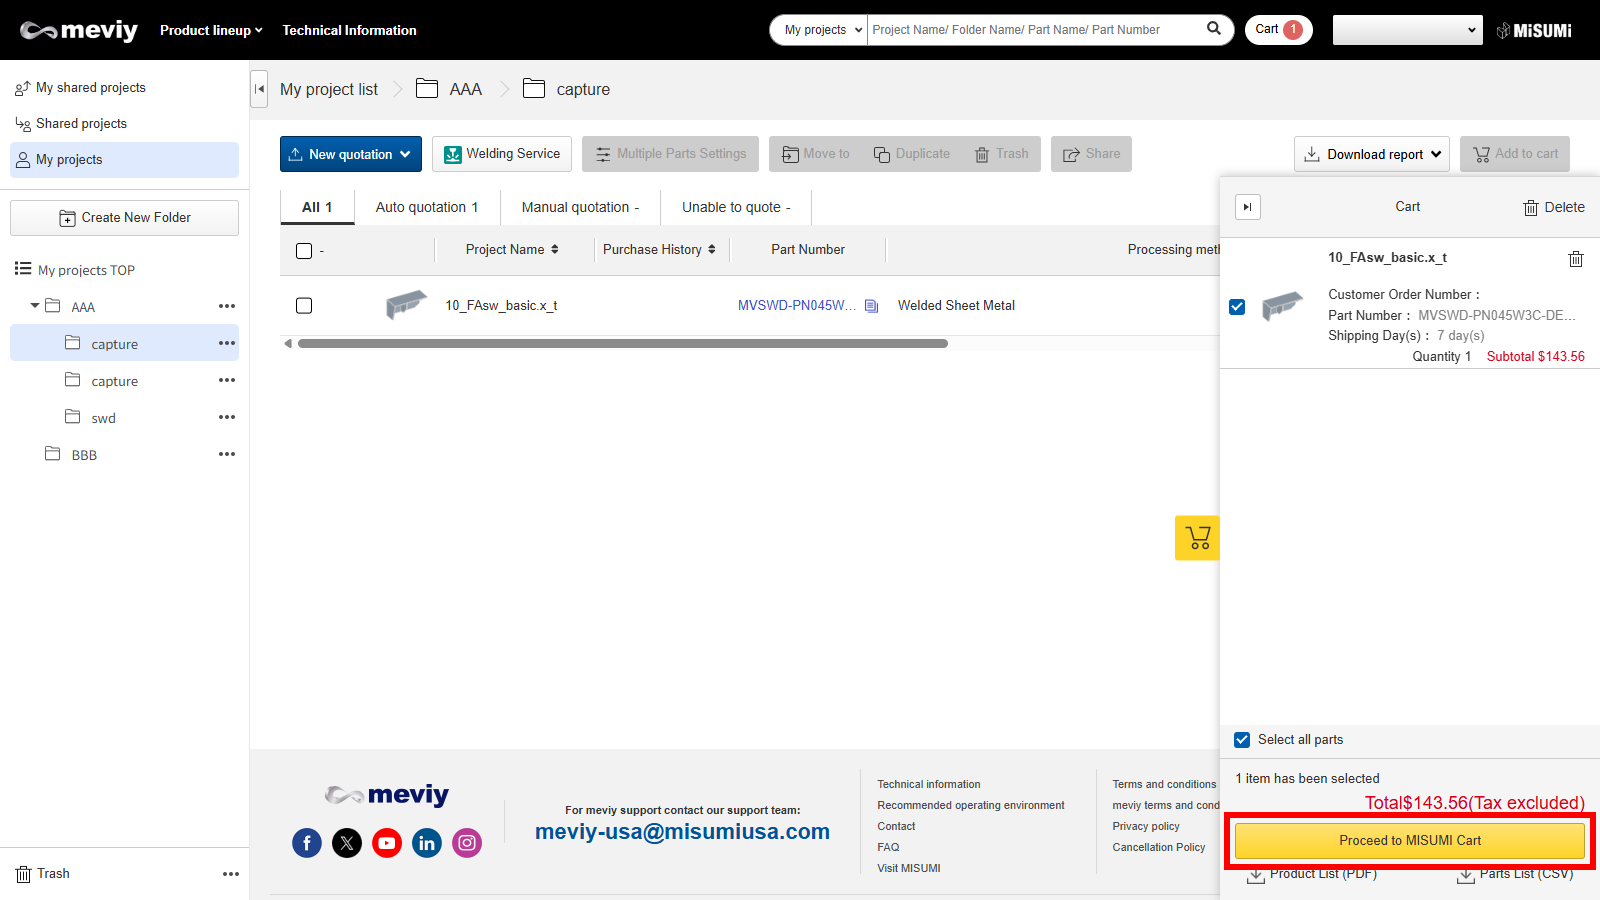
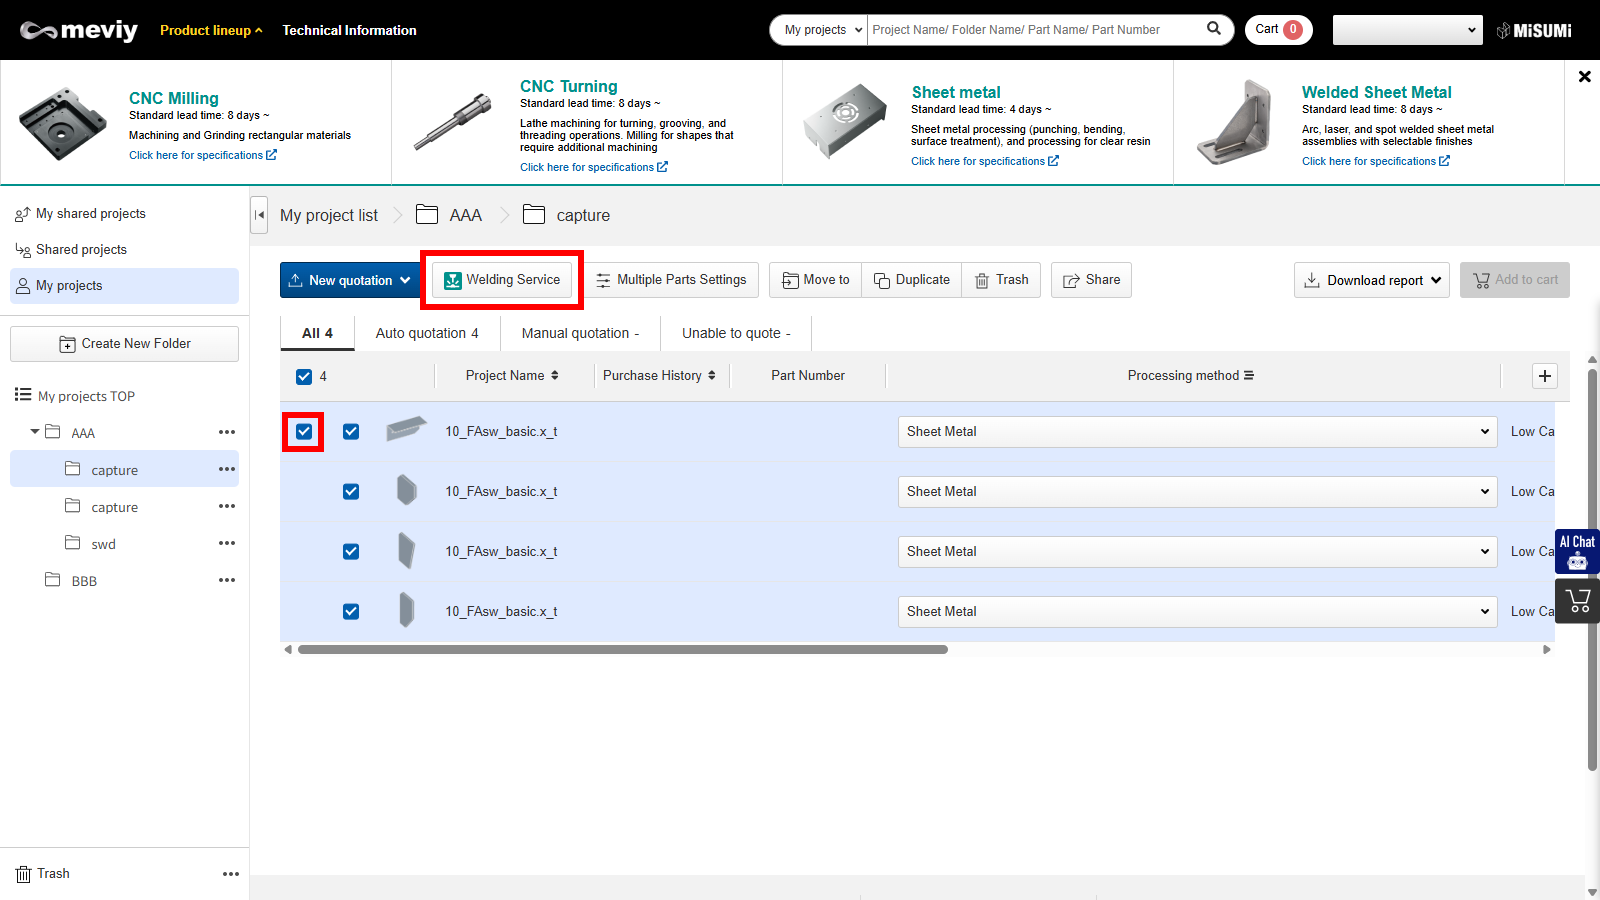
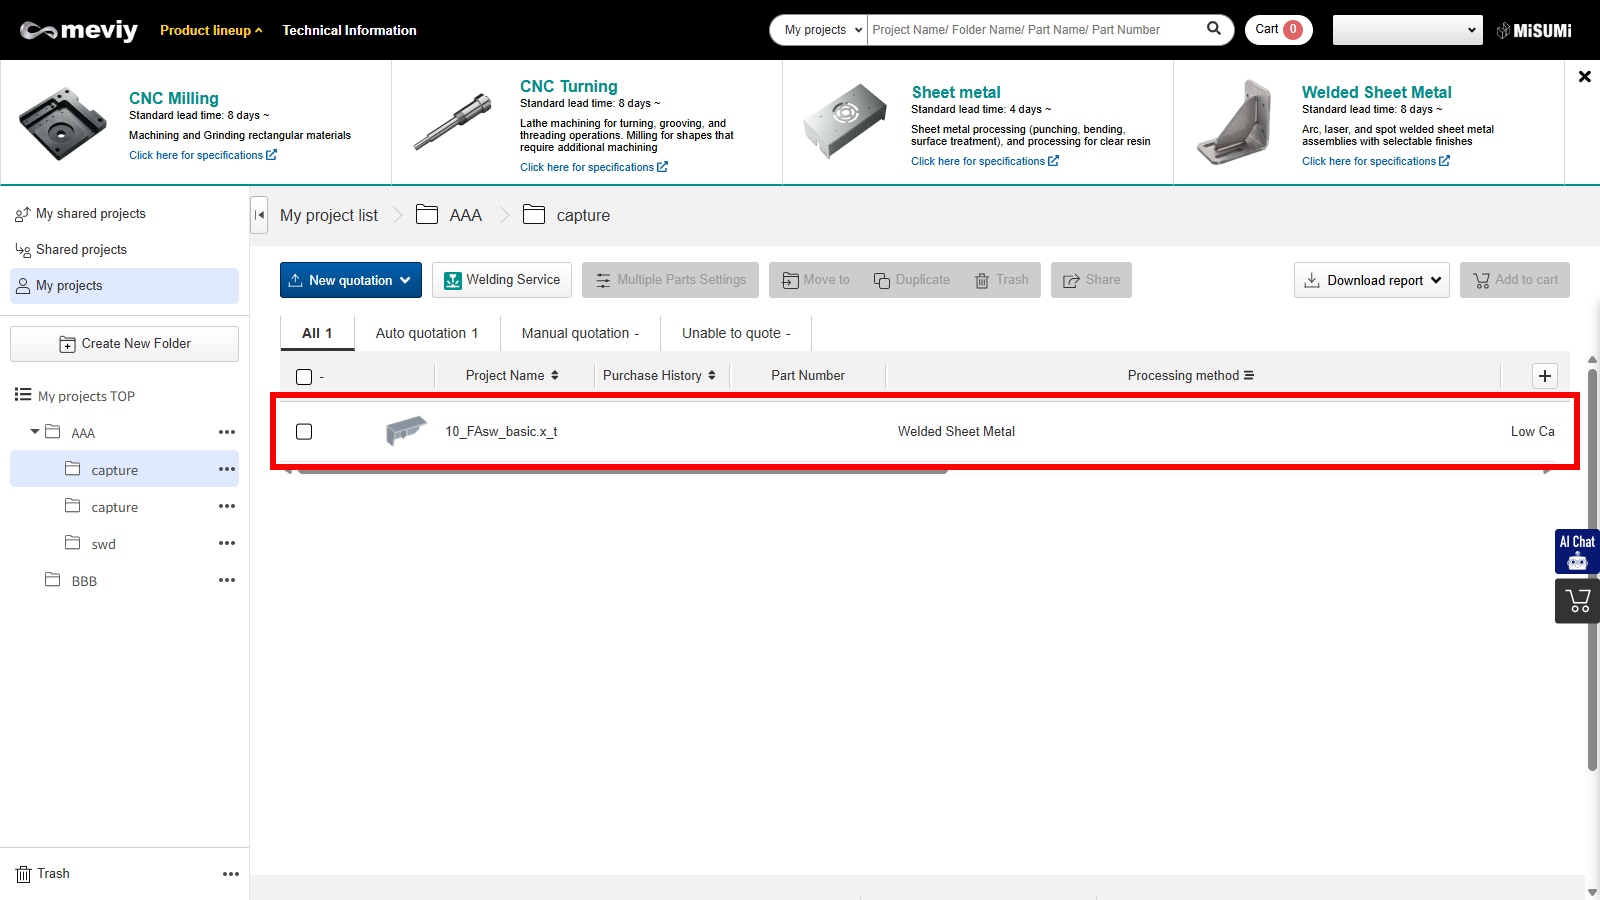
- [Make Welded Structure] You can
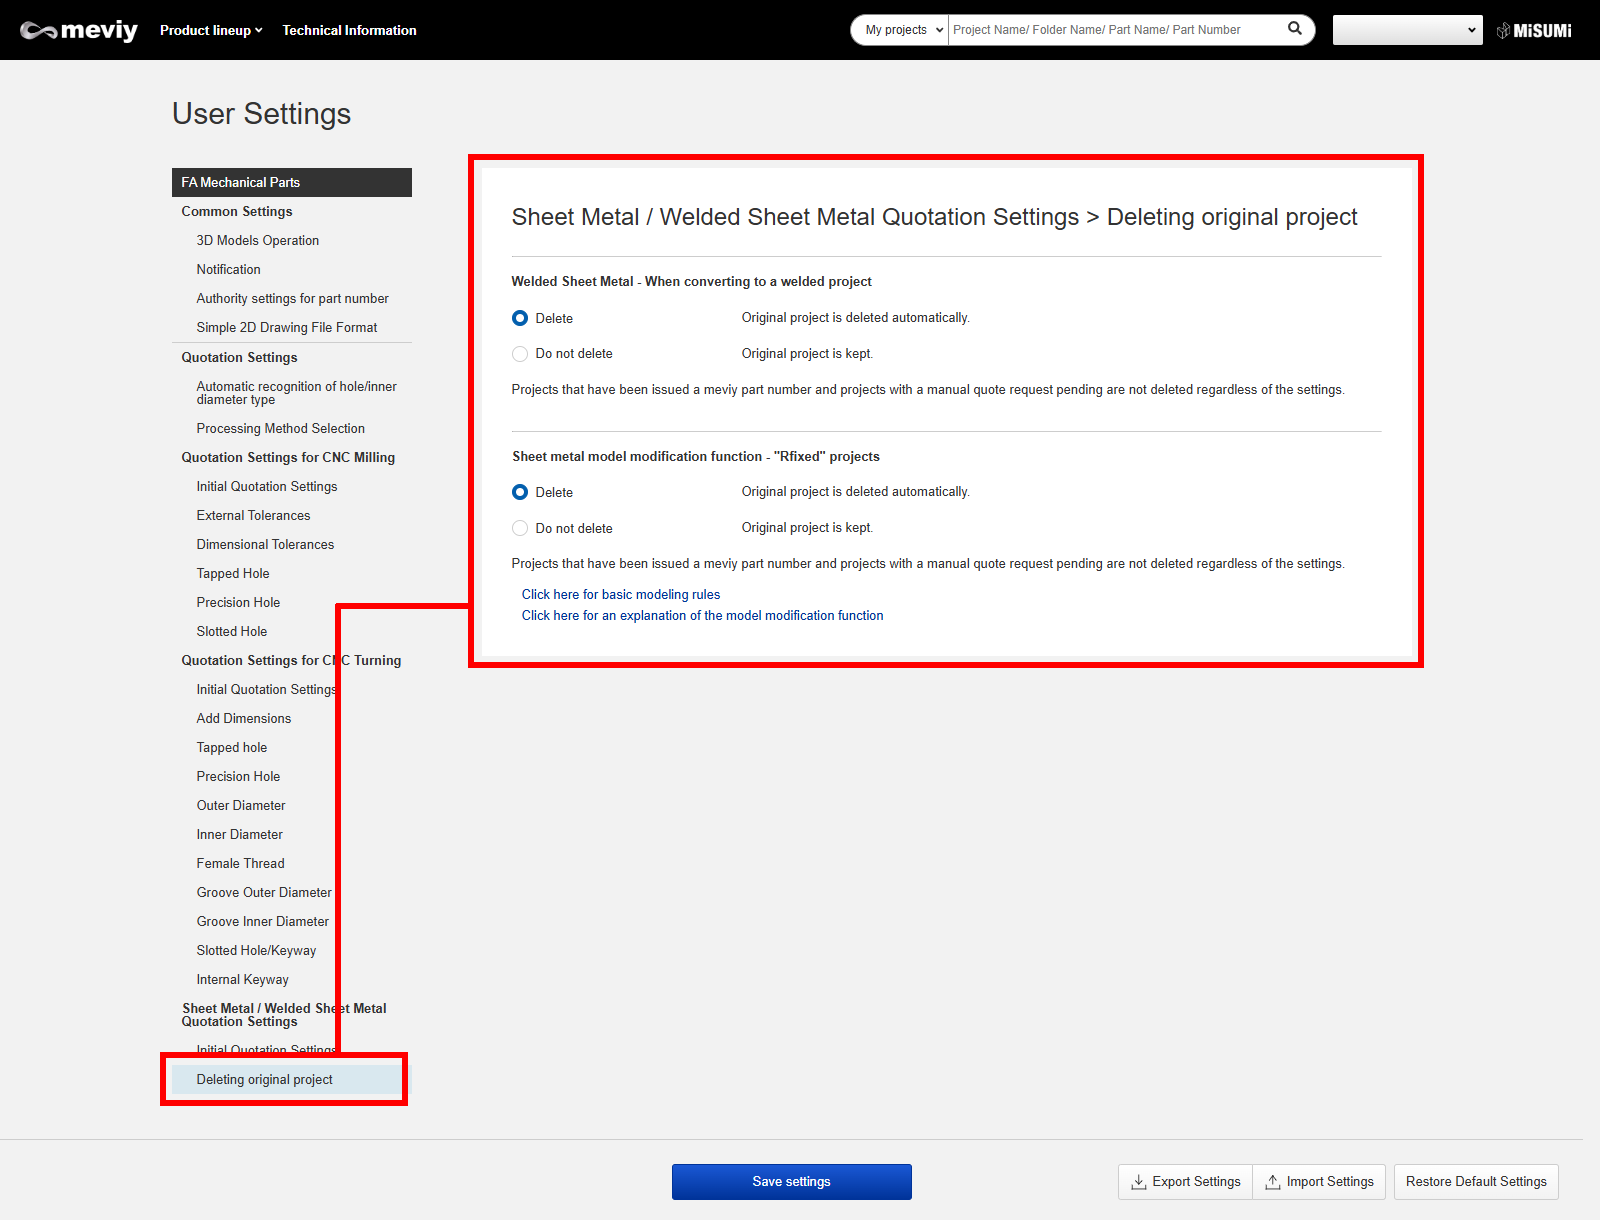
also choose to keep the original project checked before execution. - In that case, go to User Settings > [Delete Plate Welding Estimates] > [Delete Original Project] in User Settings and change it to “Do Not Delete”.*The default setting is “Delete,” so the original project will be automatically deleted.
- [Make Welded Structure] You can