- HELP
- How to use
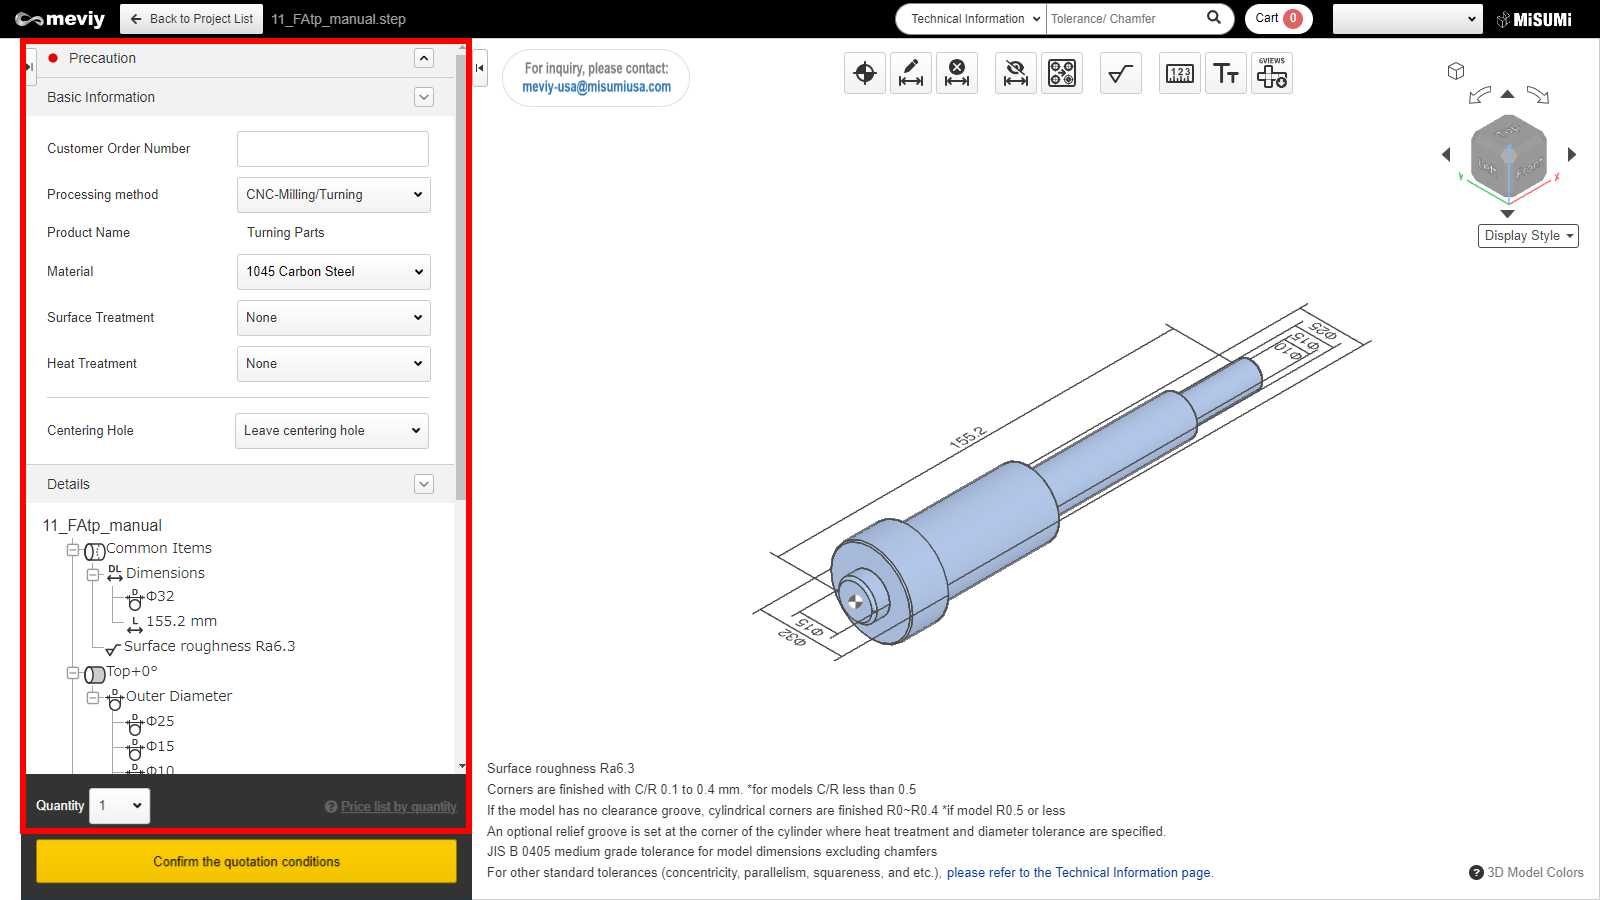
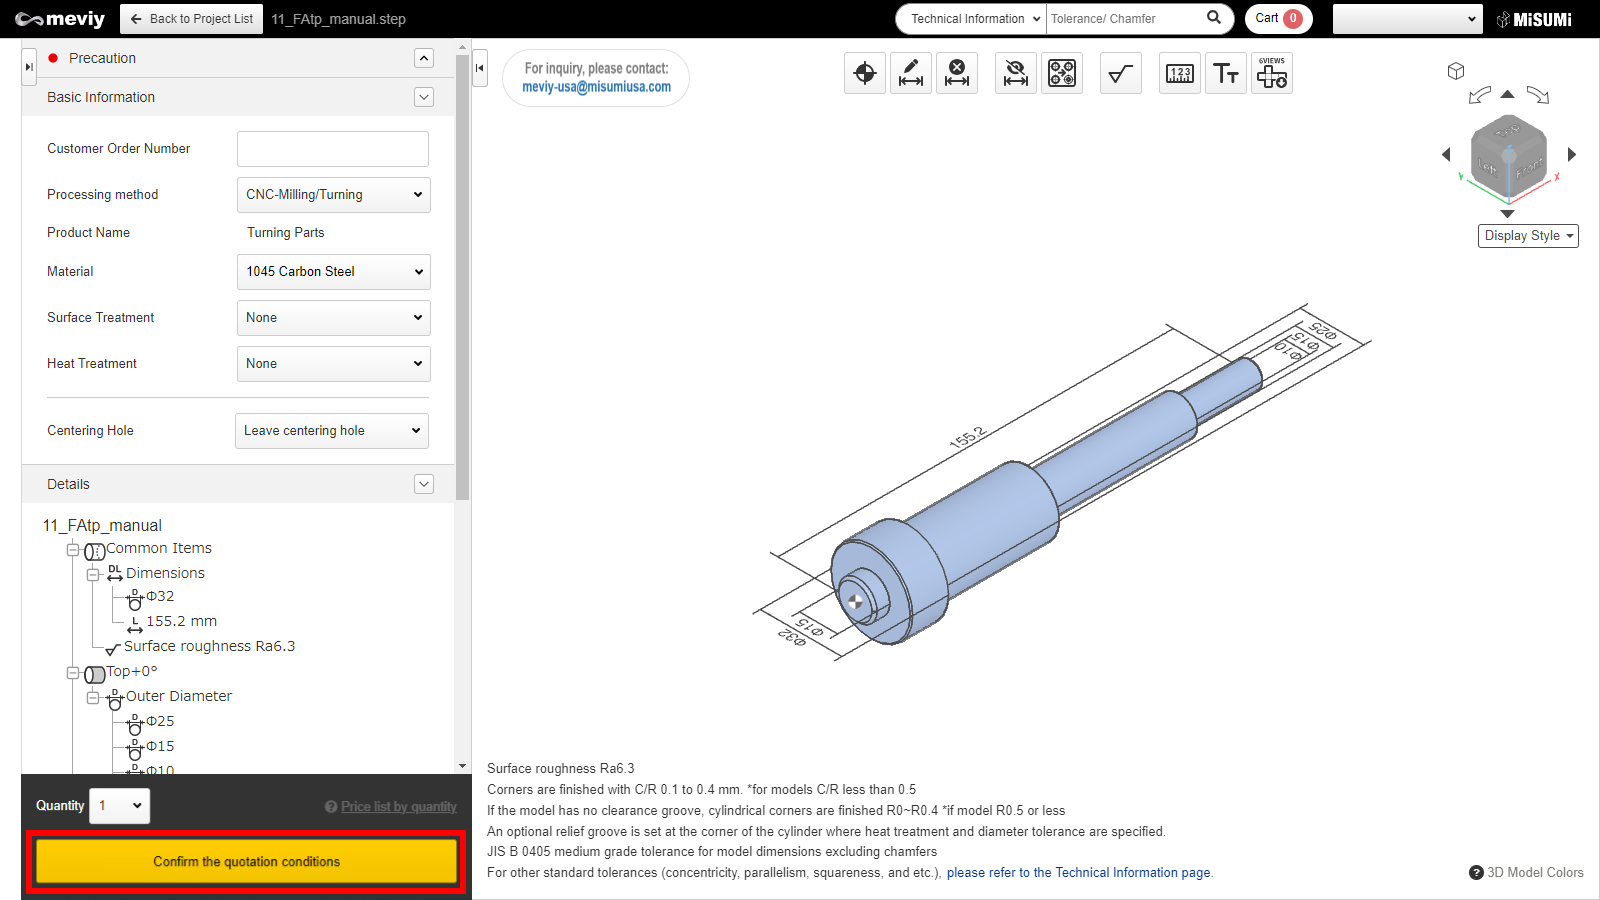
- Quotation conditions settings
- [CNC Turning ] Quotation Settings
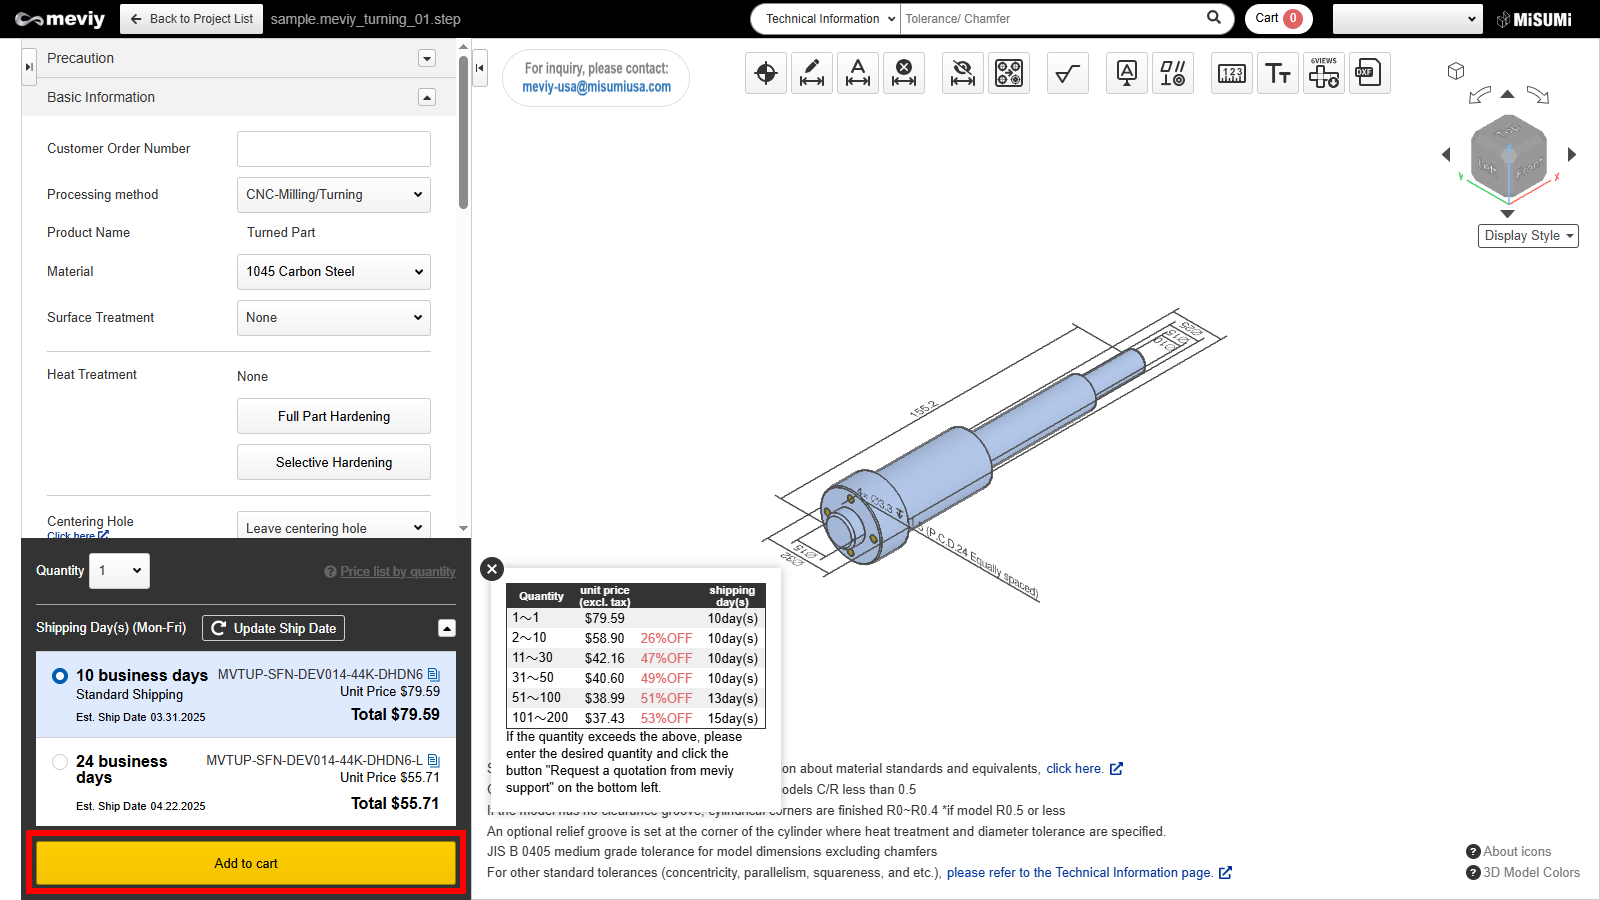
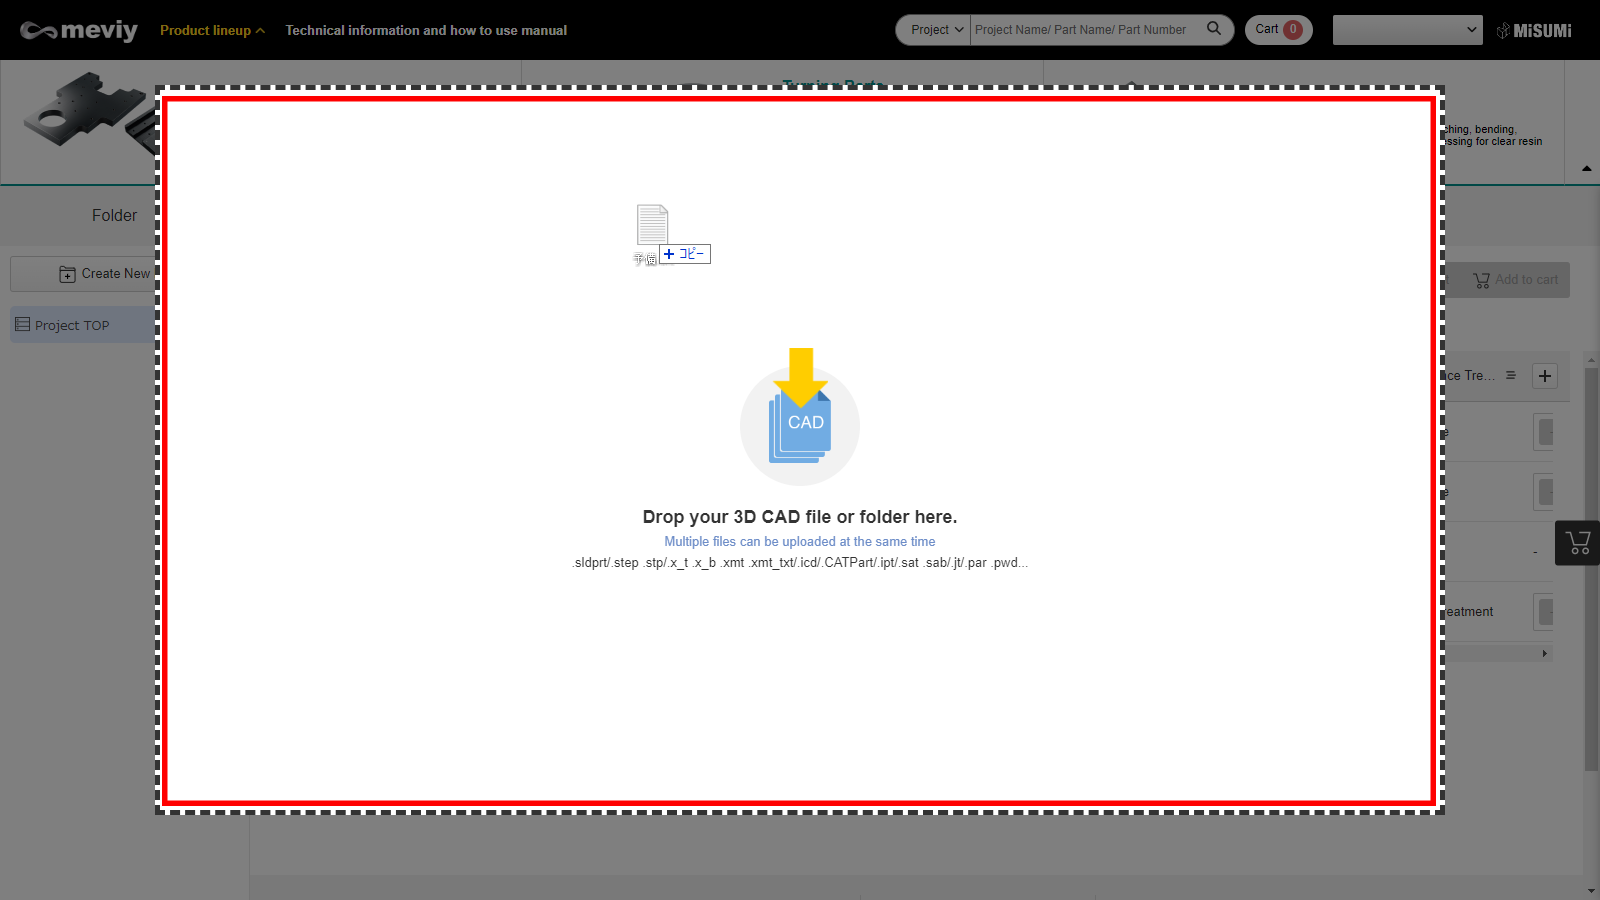
- Quotation Procedure
Quotation Procedure
Step 1: Upload the 3D CAD data
1. You can drag and drop to upload an individual file or a folder. Alternatively, you can select to upload with the "New quotation" button.
Notes
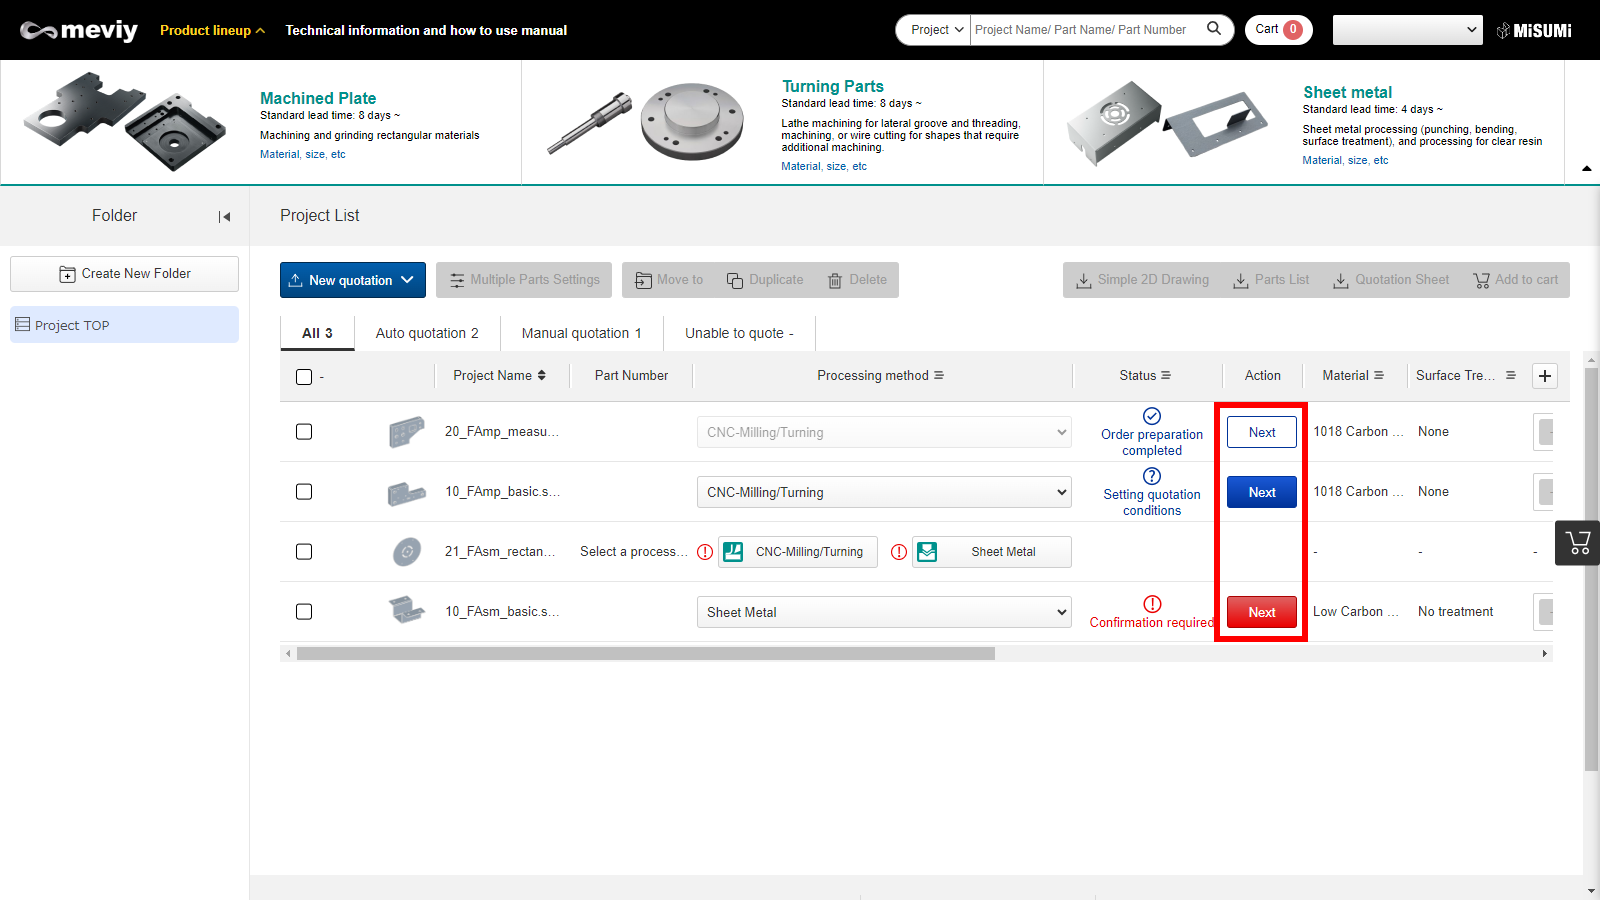
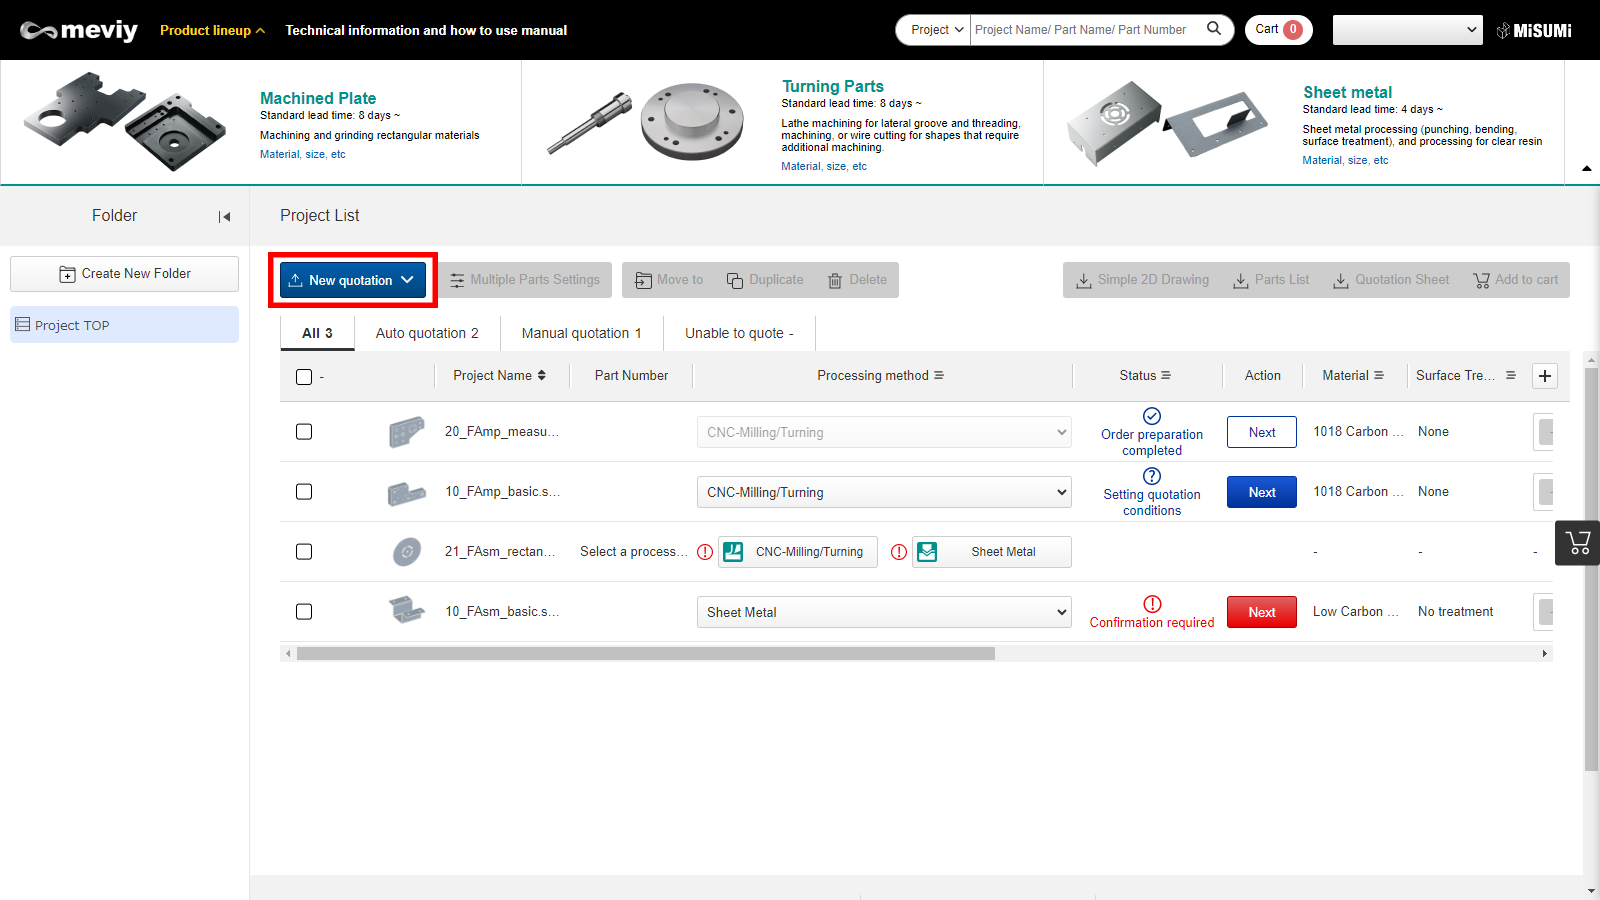
- Project List display
- Processing method automatically selected
- (1) Waiting for “Quotation Conditions” to be set in the 3D viewer.
- (2) The part number has been issued and can be ordered.
- Choosing a processing method
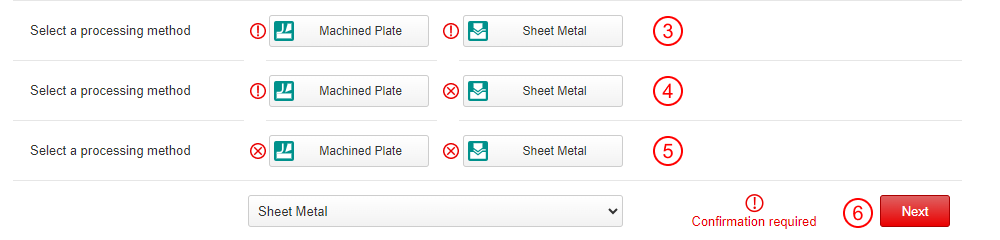
- (3) Both “CNC Milled parts” and “Sheet metal parts” can be selected in the 3D viewer.
- (4) “CNC Milled parts” can be selected, but “Sheet metal parts” cannot.
- (5) Neither “CNC Milled parts” nor “Sheet metal parts” can be selected.
- (6) Confirmation of processing method is required after selection.
- *
If a processing method with (3) or (4) is selected, proceed to (6).
2. Click "Next".
Step 2: Configure/update quotation conditions
- The following settings are available for CNC Turned parts.
- Material
- Surface Treatment
- Heat Treatment
- Quantity
- Centering hole possibility
- Additionally, settings such as “threaded,” “tolerance,” and “surface roughness” can be set in the 3D viewer.
Step 3: Finalize quotes (obtaining part numbers)/confirm
- Click “Confirm the quotation conditions” and create the part number.
Step 4: Add to cart.
After issuing the part number, select the shipping date and click the [Add to Cart] button.
Step 5: Check the product list, and place your order.
- Returns you to the Project List screen, and opens the cart.
- Select the parts to order, click “Proceed to order”, and order from MISUMI (General Web Catalog)