- HELP
- How to use
- Quotation conditions settings
- [CNC Turning ] Quotation Settings
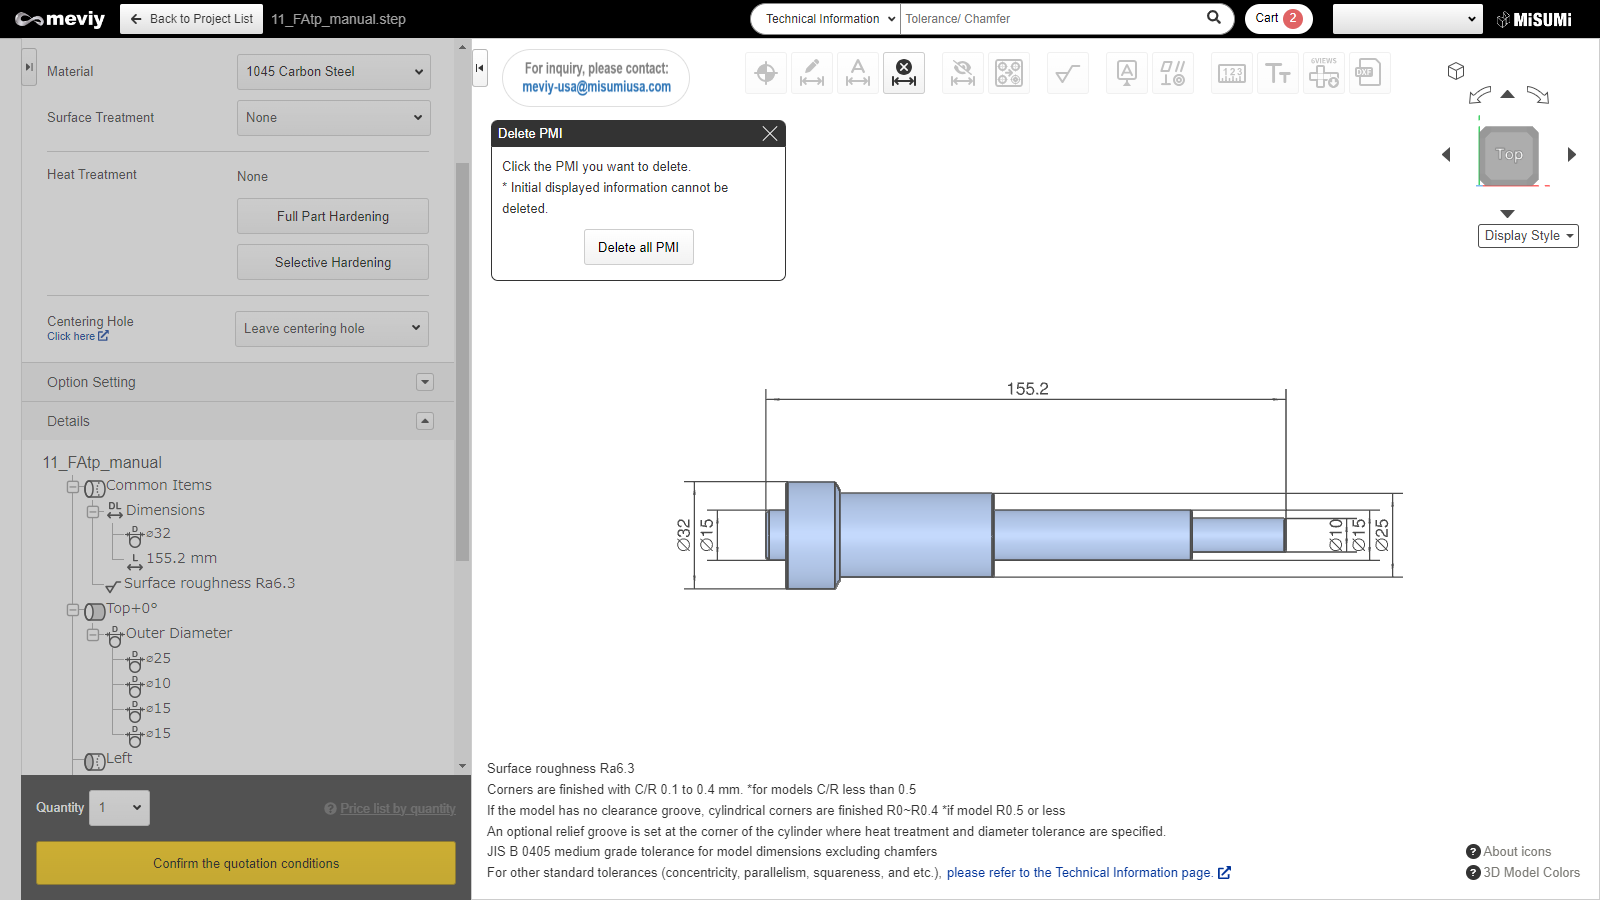
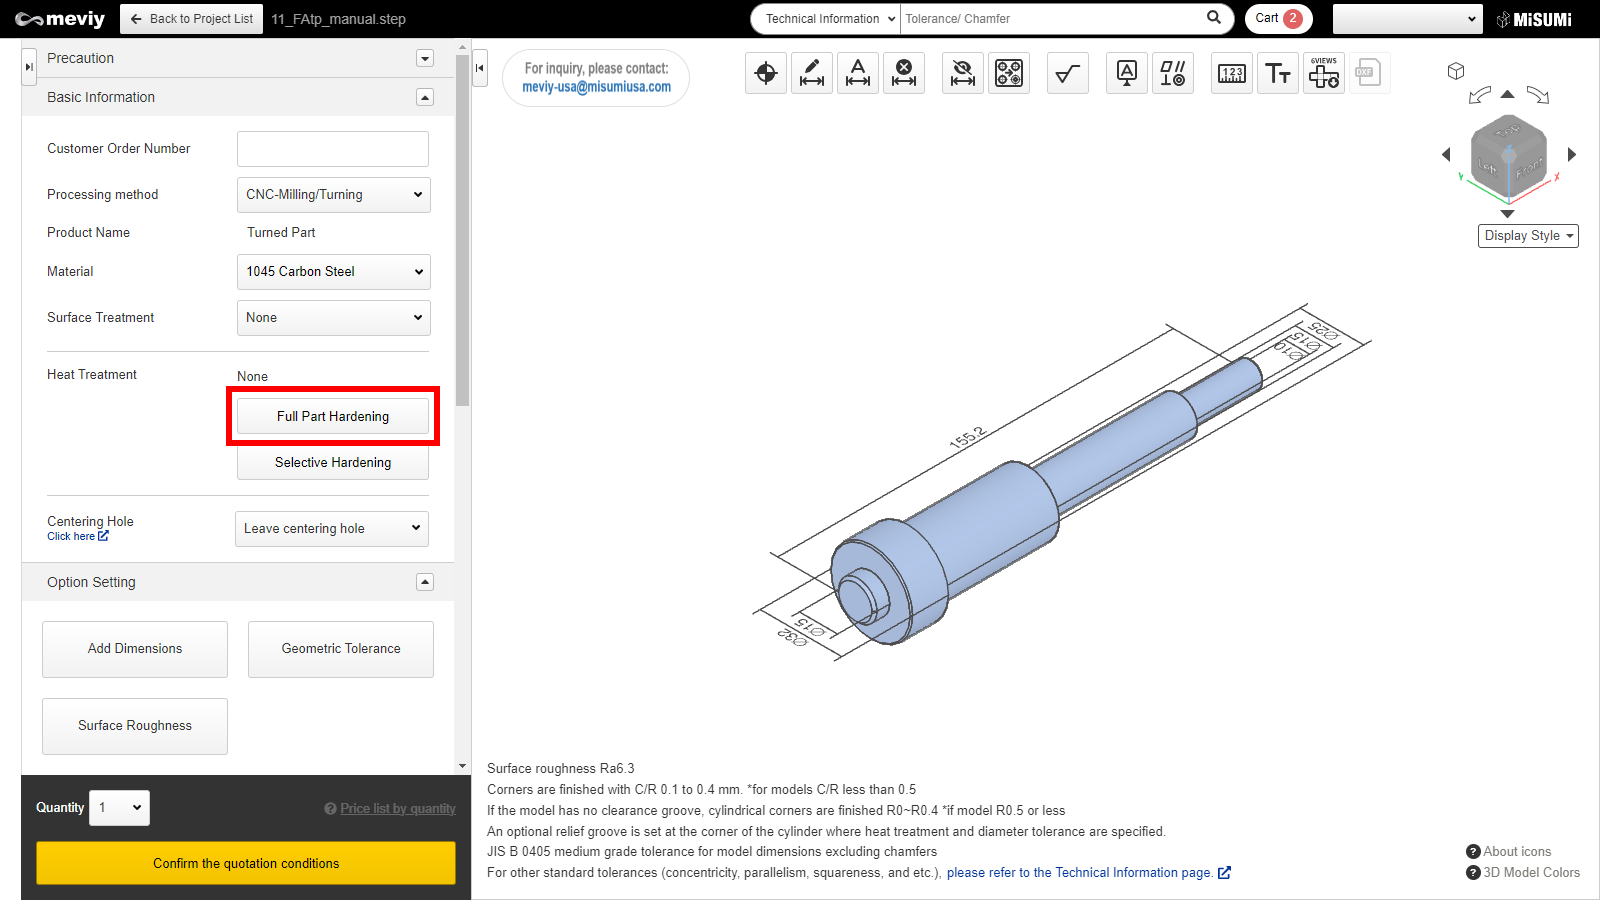
- Hardness Selection (Full Part Hardening or Selective Hardening)
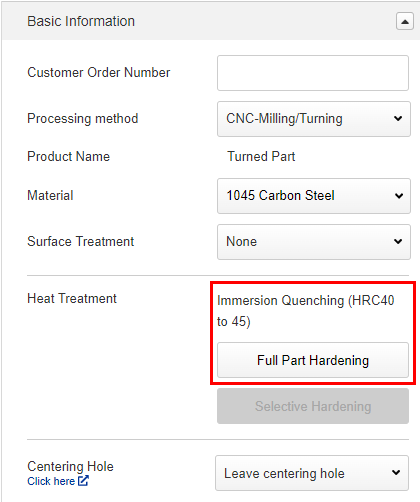
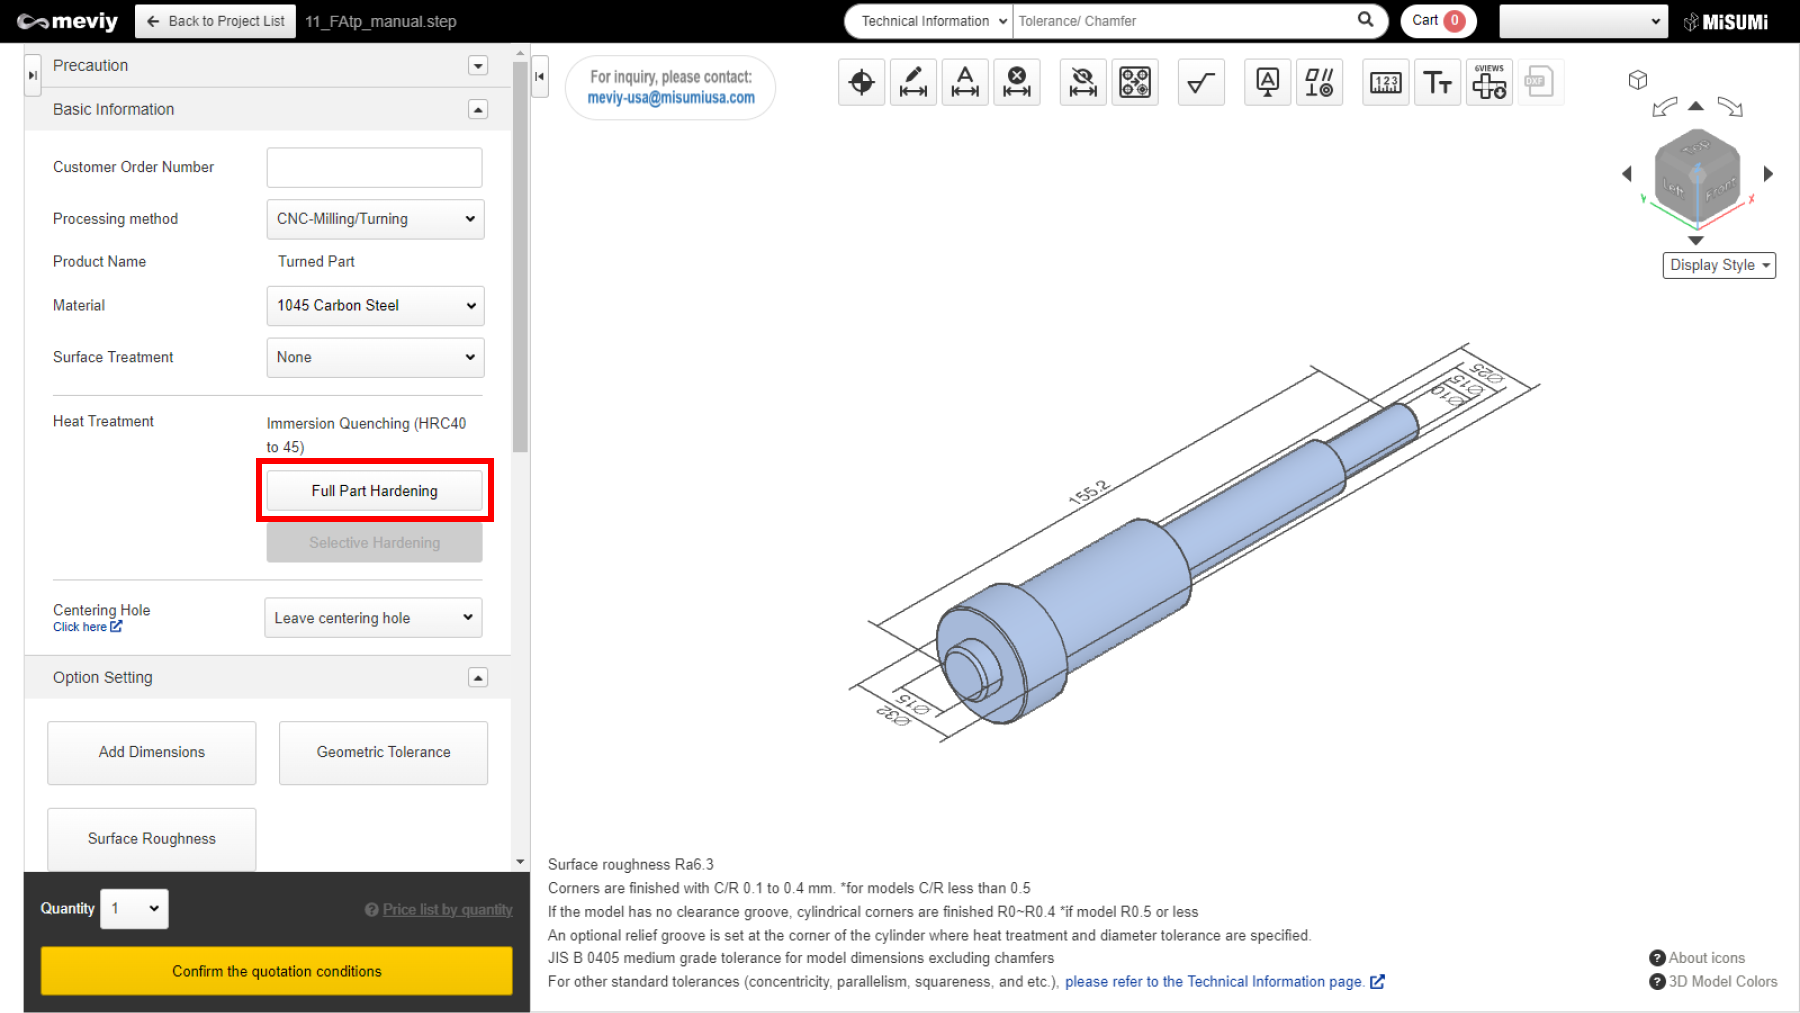
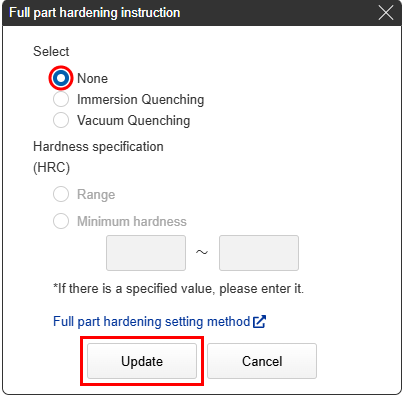
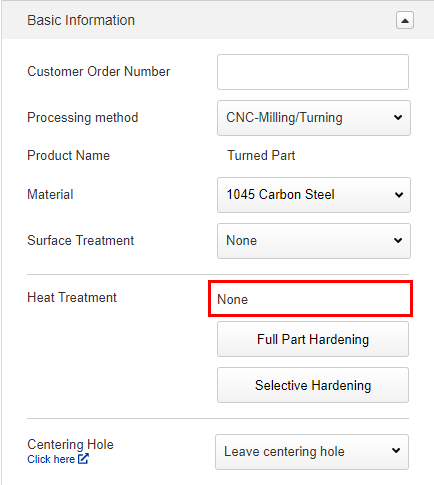
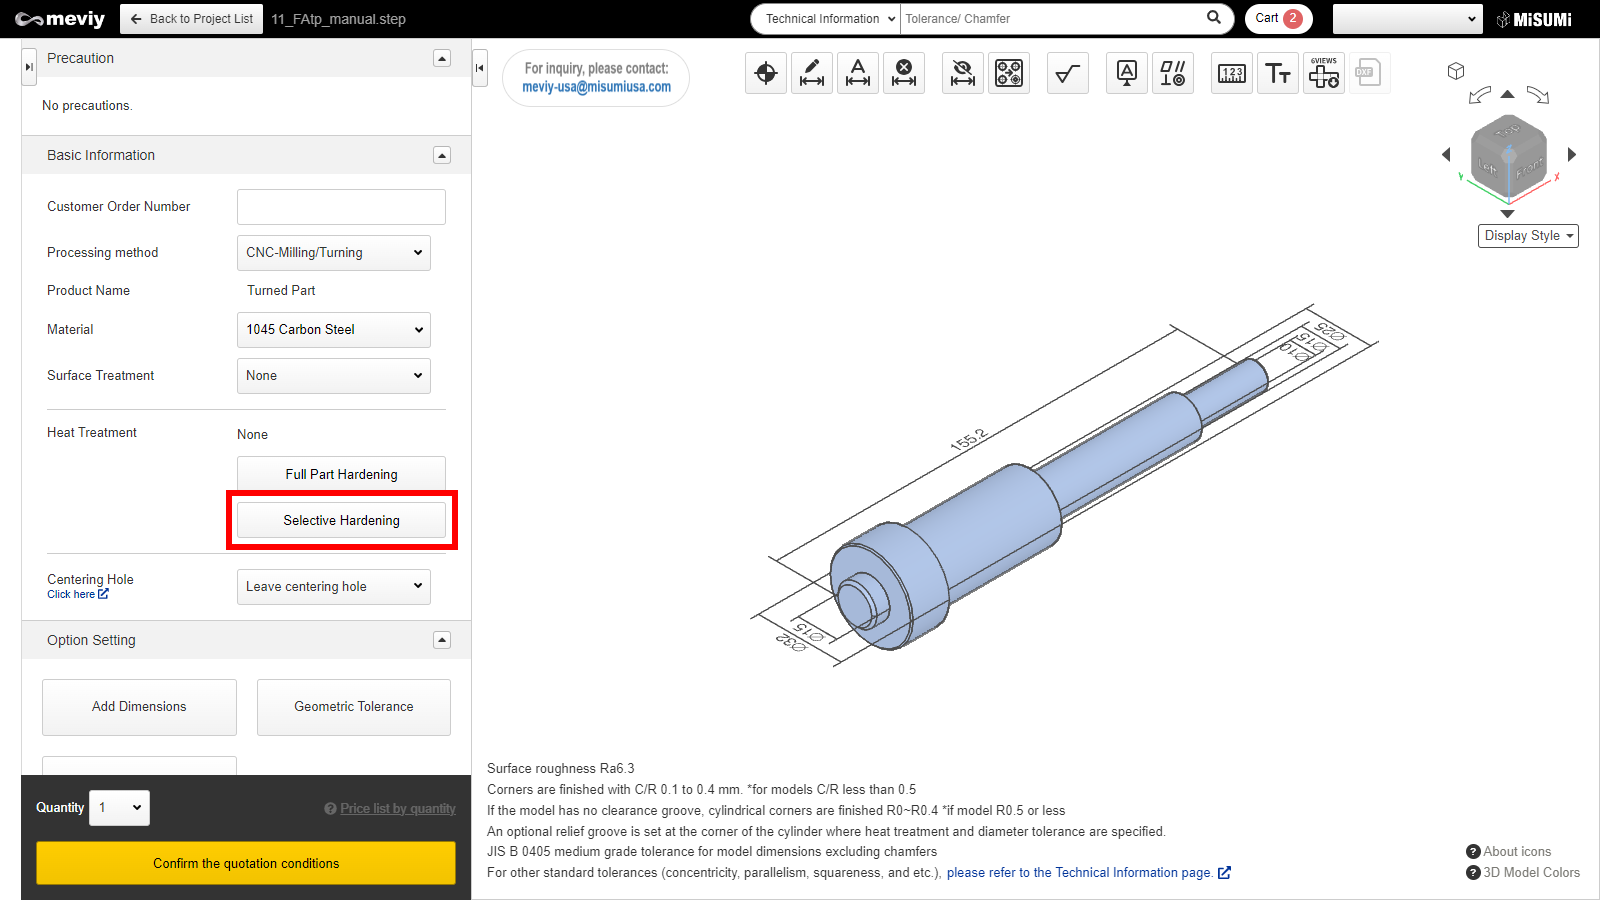
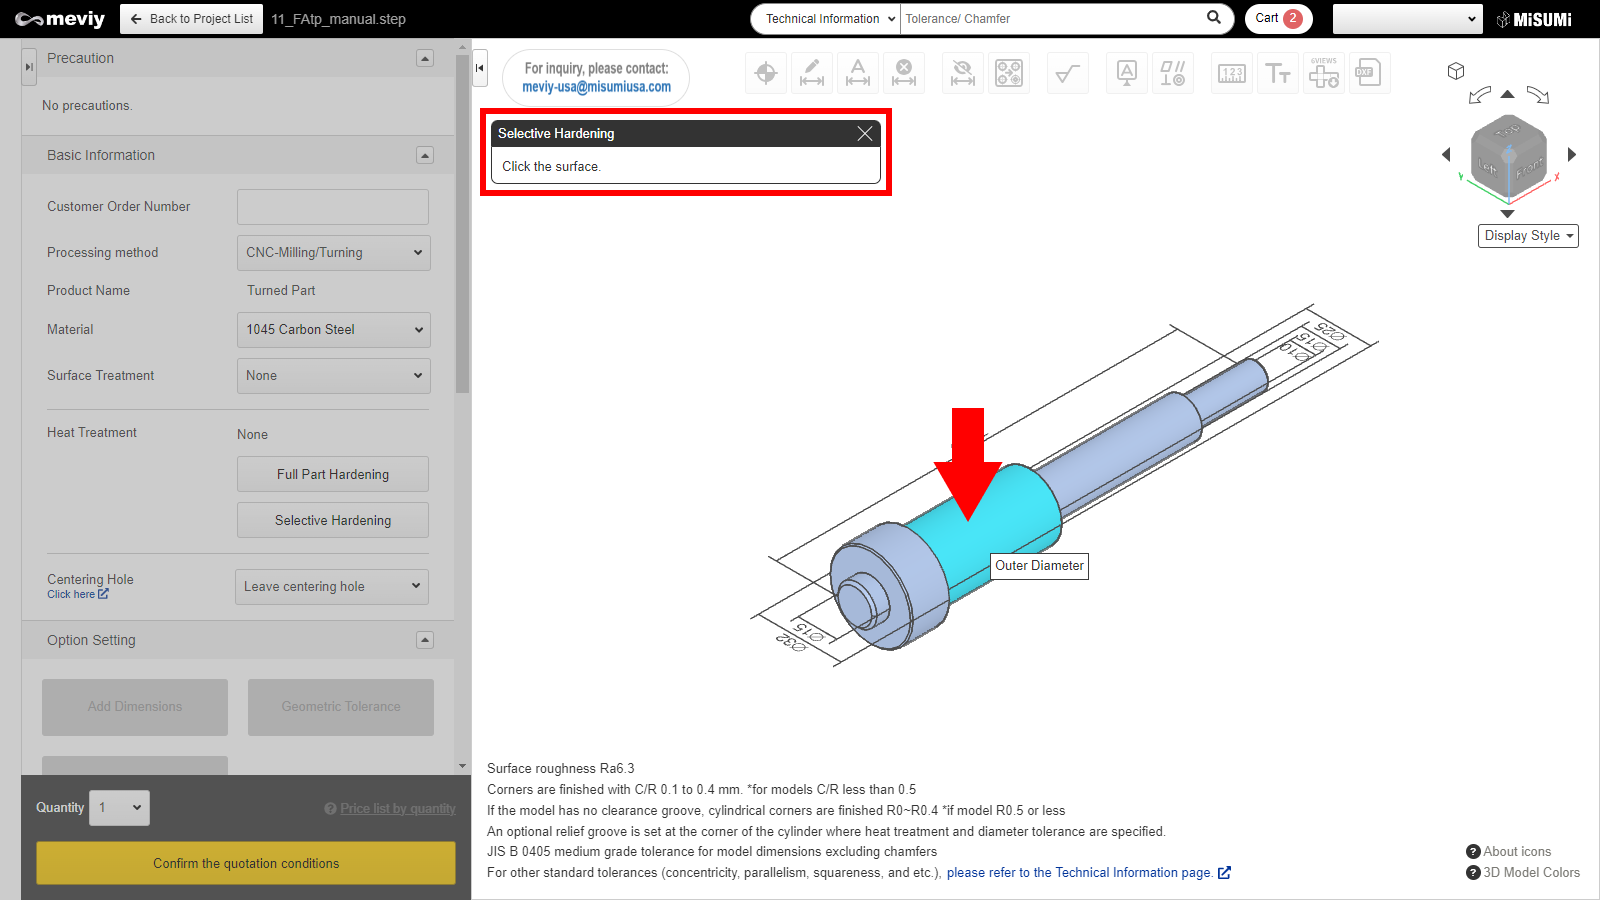
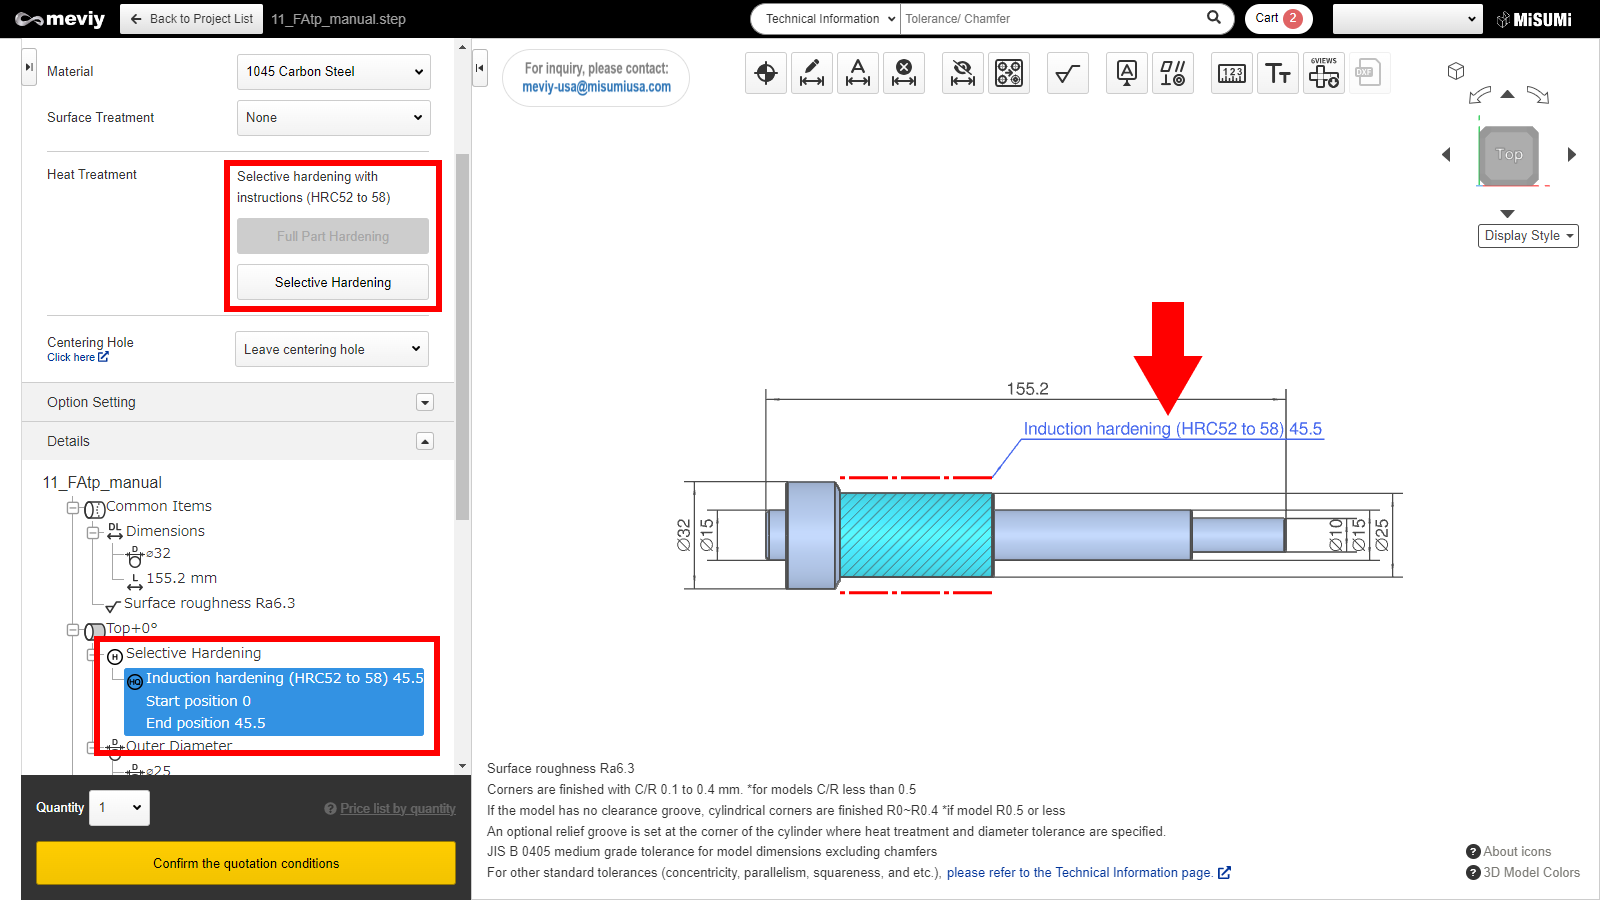
Hardness Selection (Full Part Hardening or Selective Hardening)
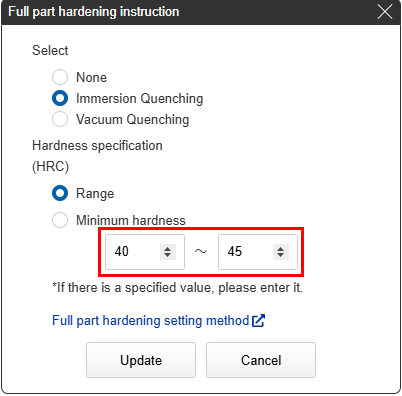
Tip
The minimum hardness specification is selected by entering only the minimum value for the desired hardness (HRC).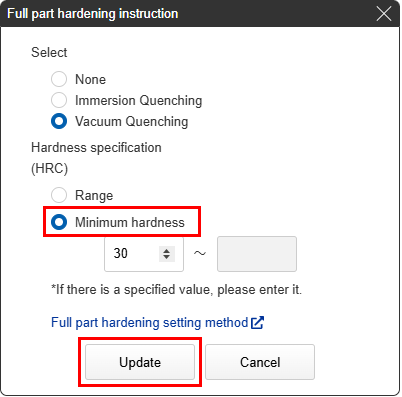
Caution
If the surface is not selectable, the “Not Selectable” icon will be displayed when the mouse hovers over it.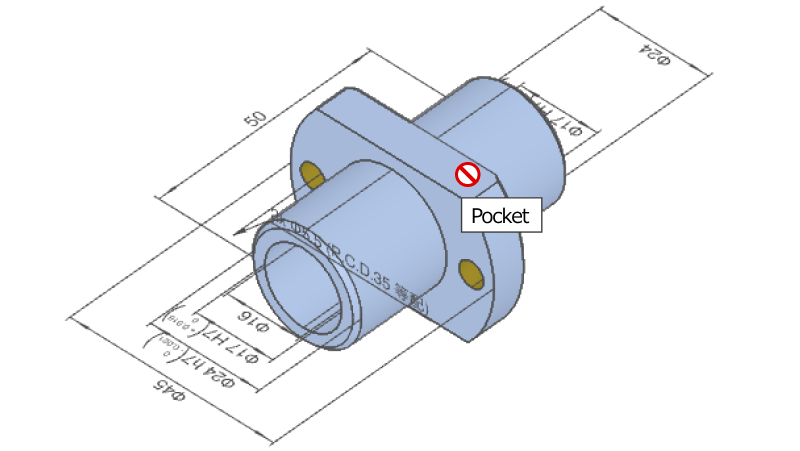
Notes
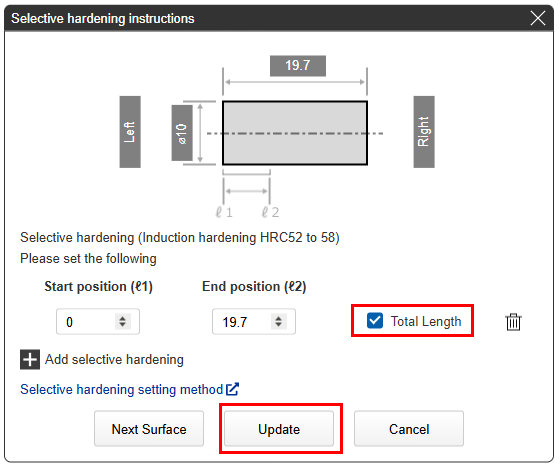
You can also specify the start and end position for hardening.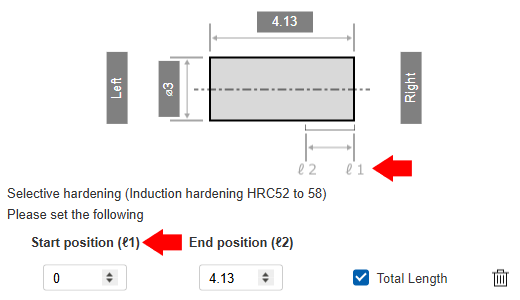 |
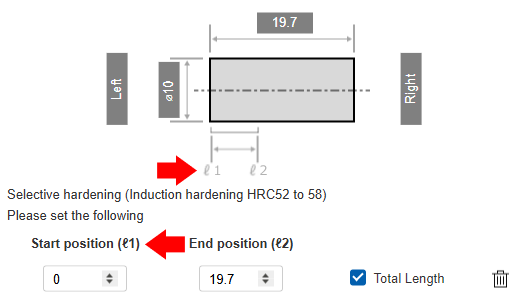 |
| Right side start position | Left side start position |
|---|
Notes
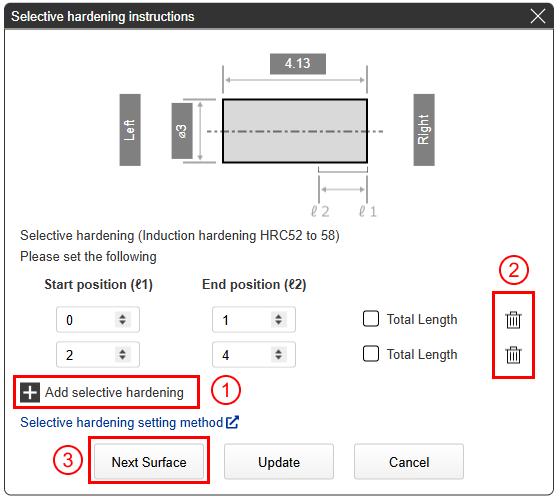 |
①Multiple ranges can be specified at multiple locations within the same surface.
|
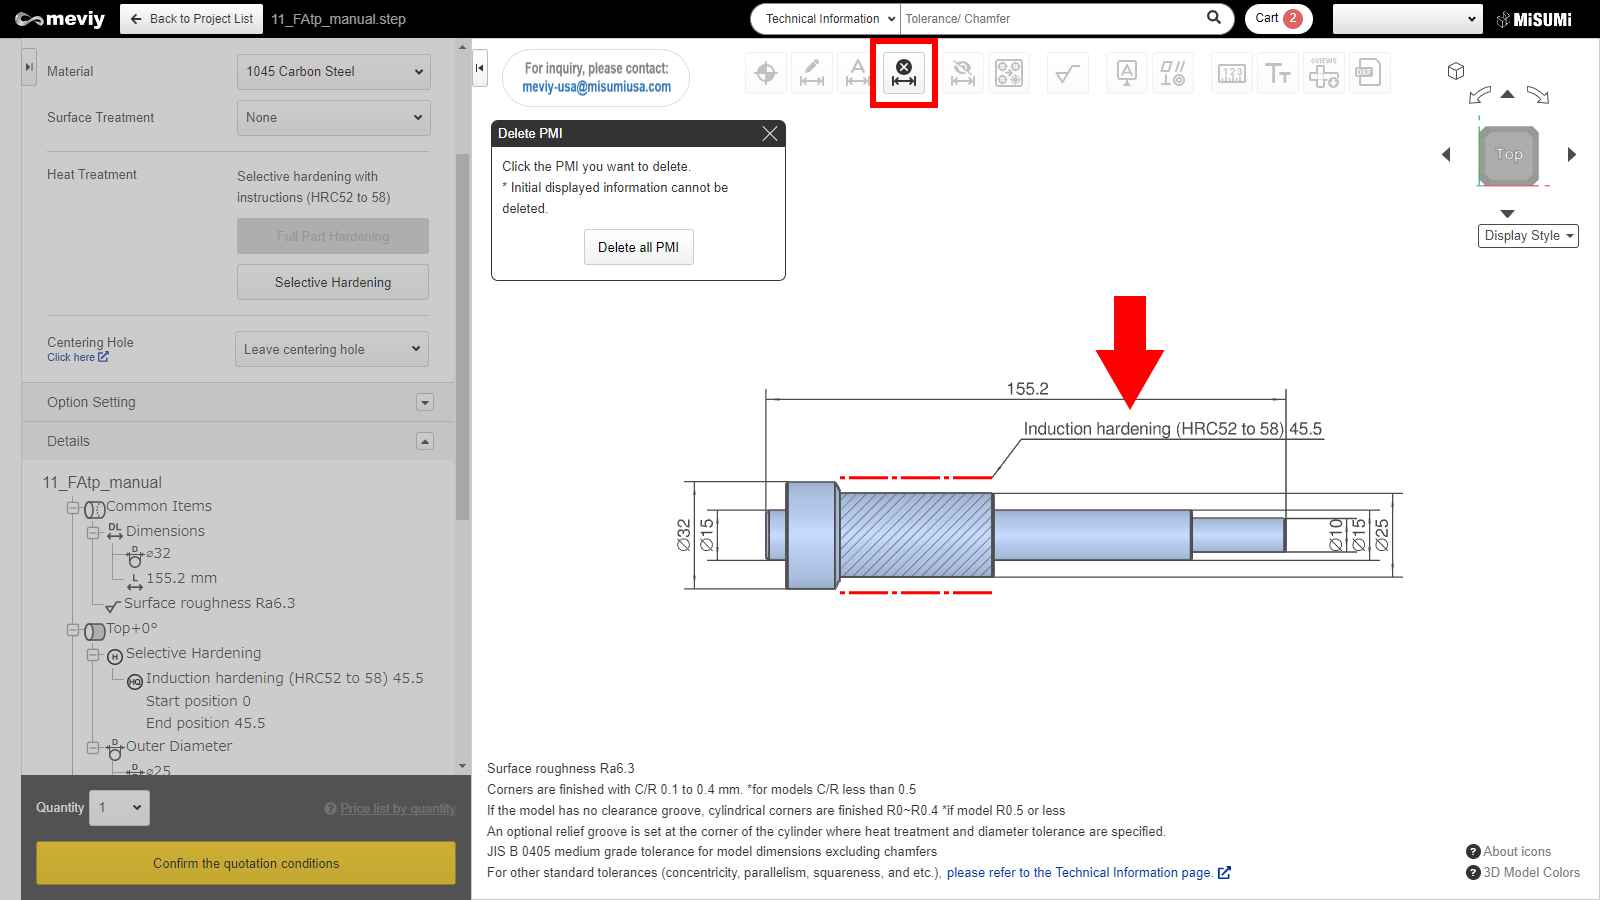
- Select
 from the icons at the top of the screen.
 - The shortcut key (D) can also be used.